


See the result first
You drop a floor plan into the agent and say "make this floor plan into a renovation designer webpage." After a while, an HTML file appears beside it, and double-clicking opens it in your browser:
- Your floor plan is already built: walls, doors and windows, rooms, furniture, and plumbing/electrical are all there.
- You can move furniture and edit walls in the 2D plan, and switch to the 3D bird's-eye view and first-person walkthrough to look around.
- You don't need to learn modeling software first, or hand-draw construction drawings line by line.
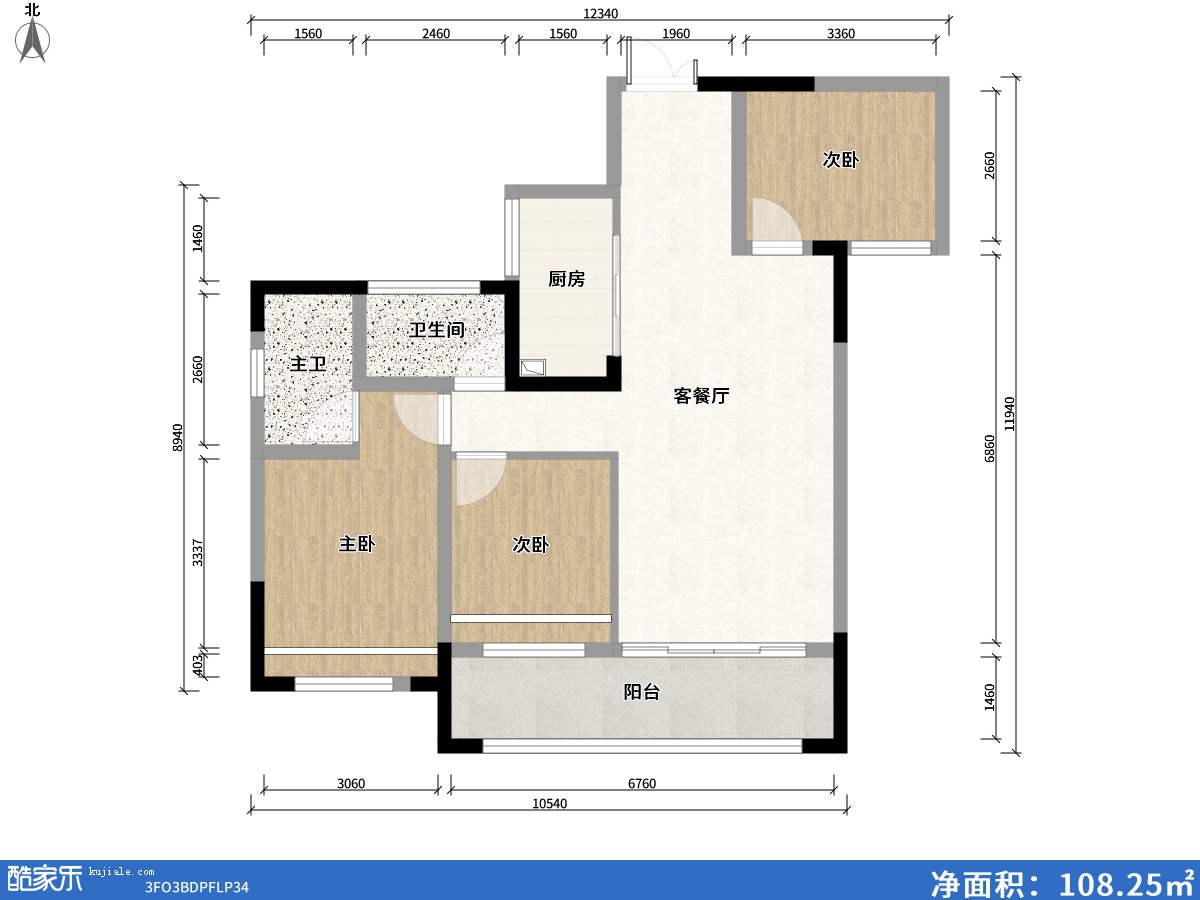
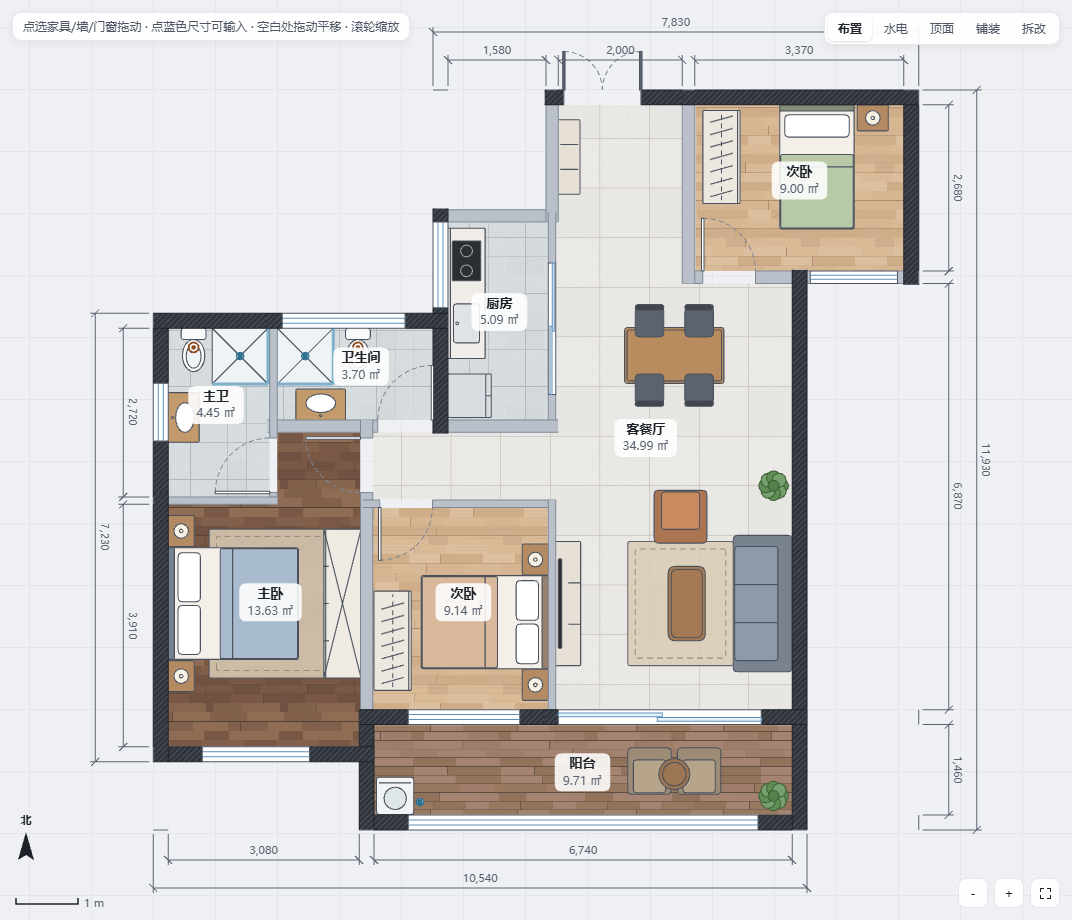
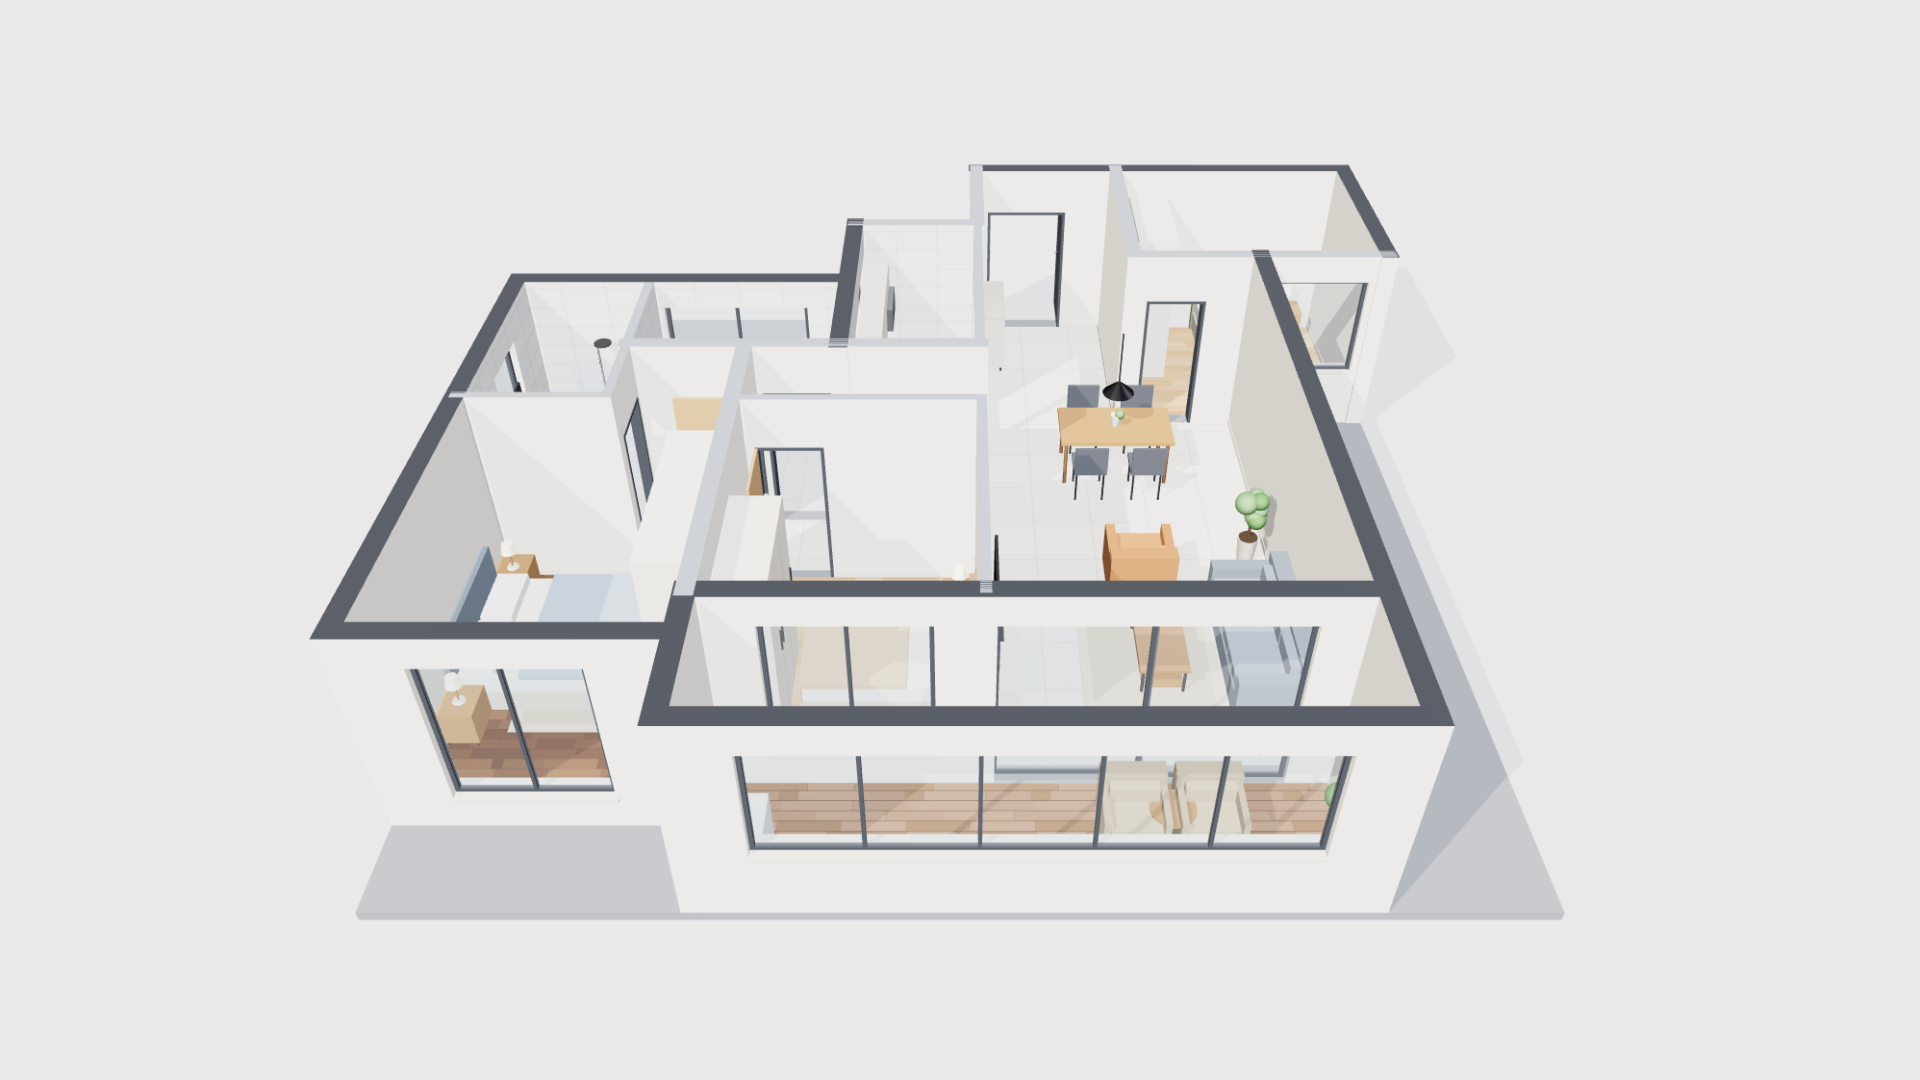
Images come from the example in the project repository. We did not install and run it ourselves.
How this case was built
It is an open-source Skill (by author ZWD11, MIT license), which we have packaged as a ready-to-use Skill: Floor plan to renovation designer. It is written for agents that support Skills, such as Claude Code. After reading its workflow instructions, the agent works through these four steps:
- Measure walls. Clean CAD vector drawings are read directly from coordinates; for images, OpenCV finds the walls, then converts pixels to millimeters using the dimension annotations on the drawing.
- Understand the drawing. The agent compares against the original, fills in walls interrupted by windows and very thin partition walls, distinguishes door and window types and swing directions, identifies each room, and writes it up as a "floor plan description."
- Self-check. After generating the webpage, it is opened in a headless browser to check whether rooms are closed, whether there are dangling walls, and whether doors or windows are missing. The generated result is also overlaid semi-transparently onto the original drawing to verify dimensions. If something is off, it gets fixed until the walls coincide with the original.
- Auto-place. Furniture and appliances are arranged according to room function, and then the whole set of plumbing and electrical (outlets, lighting, network cable, hot and cold water, drainage) is laid out in one click.
The key to the whole process is step 3: have the agent reconcile before delivering, rather than stopping once drawing is done.
What you get
According to the project's own description, the generated designer can do the following (we have not tried each item individually):
- 2D layout, 3D bird's-eye view, first-person walkthrough; doors, windows, curtains, and lights can be clicked to switch on and off.
- A furniture library of over three hundred items, with one-click full-set style changes; cabinet and custom closet dimensions are adjustable.
- Ceilings, light strips, and plumbing/electrical pipelines can be viewed in layers, and pipelines can be exported by category.
- Automatic quantity takeoff and cost estimates; export of construction drawing PDFs and national-standard CAD drawings (DXF).
- Reads multiple input types: color floor plans, black-background CAD screenshots, vector PDFs, DXF, and also supports whole buildings and office floors.
How to run it yourself
- First install the Skill: open Floor plan to renovation designer, give its contents to your agent, or follow its installation section.
- Tell the agent:
make this floor plan into a renovation designer webpage, and attach the floor plan (image, screenshot, PDF, or DXF all work). - You can add requirements along the way, for example:
Sign in to unlock this key section
New accounts get 10 free credits, plus 1 more for each daily check-in. Spend 1 credit to unlock and it stays open for you.
- After you get the HTML, review the "recognition notes" the agent attaches: which dimensions come from annotations, which were measured from the drawing, and where the drawing contradicts itself are all listed.
Common pitfalls
- The drawing should ideally have dimension annotations. Without them, the agent will ask you for a known dimension or estimate from typical sizes. You must check estimated results yourself.
- Pure line drawings, scans, and skewed photos produce poorer recognition; the first draft relies on the agent's inference, so you need to check more carefully.
- Load-bearing walls are only inferred. The basis is color and thickness; go by the property's structural drawings, and do not use this as a basis for removing walls before renovating.
- A weaker model reduces results. The author notes in the documentation that to get full results, using models like Doubao is not recommended.
- Designs are stored in the browser. When switching computers or sharing with others, use "Export → Share file" in the designer.
- It can read DXF but not DWG directly; save as DXF or export as PDF first.
Where it usually breaks
- 01If the drawing has no dimension annotations, scale can only be estimated. First add a known dimension, or ask the agent to state its basis for the estimate.
- 02Pure line drawings, scans, or skewed photos recognize poorly. Switch to a vector PDF or DXF exported from CAD, or retake a clear, straight-on photo.
- 03Load-bearing walls are inferred from color and thickness. Before renovating, rely on the property's structural drawings, and do not remove walls based on this.
- 04If the model's capability is insufficient, recognition and cross-checking will suffer. Rerun with a stronger model.
Comments (0)
No comments yet. Start the conversation.