

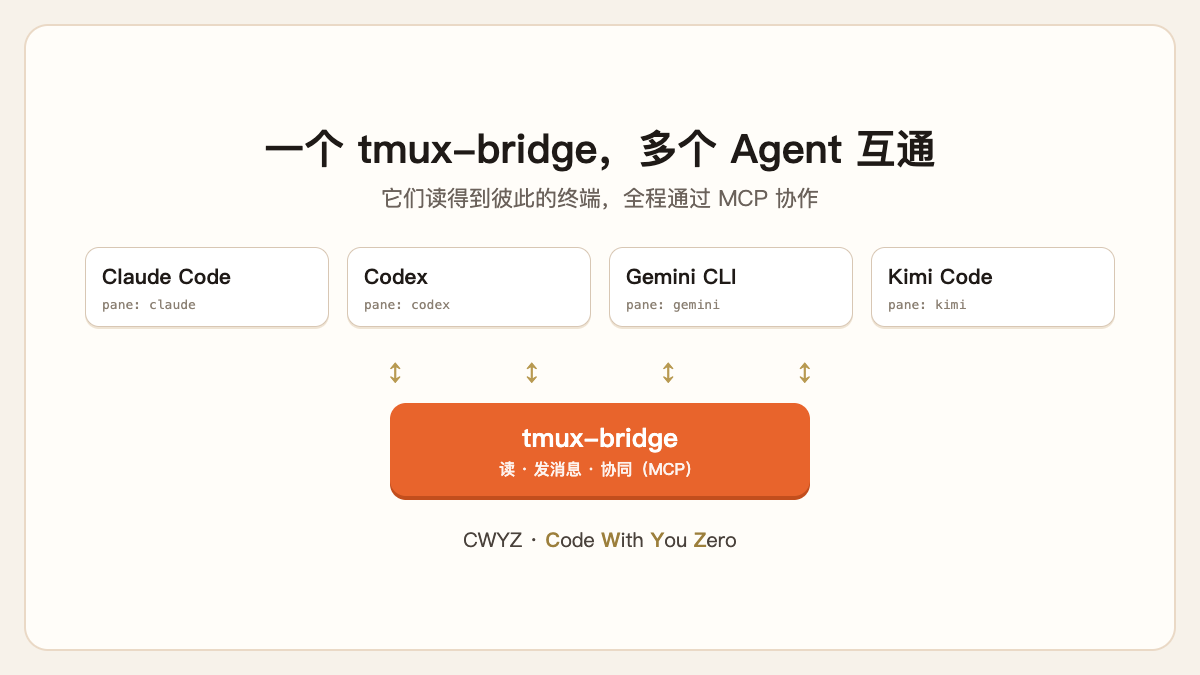
What You Get
No more juggling several terminals and copying messages between AI agents by hand. Once tmux-bridge is installed, agents such as Claude Code, Codex, Gemini CLI, and Kimi Code can read each other's terminals and send each other tasks, all through MCP. For example, Gemini can look up material, Claude can write the code, and Codex can review it, passing the work along on their own.
This guide is for people already using command-line agents and takes about fifteen minutes.
First, a Term: tmux
tmux is a "terminal split" tool: it divides one terminal window into several blocks (called panes), each running its own program without interfering with the others. You could run Claude Code in one pane, Codex in another, and a log viewer in a third, all visible at once.
The catch is that by default these panes cannot see each other. tmux-bridge is what connects them, letting each agent read from and send messages to the other panes.
Step 1: Install tmux
# macOS
brew install tmux
# Ubuntu / Debian
sudo apt install tmux
Once installed, typing tmux should open a session. Press Ctrl-b then d to detach.
Step 2: Set Up the Bridge with One Command
npx tmux-bridge-mcp setup
This adds the tmux-bridge MCP server to the agents installed on your computer (Claude Code, Codex, Gemini, Kimi, and others). When it finishes, follow the prompts and restart any agents you plan to use so they pick up the new configuration.
Step 3: Split the Screen and Name Each Pane
Start a tmux session, split it into several panes, run one agent in each, and name them by role so they are easy to address:
tmux new -s team       # create a session named team
# Inside it: Ctrl-b % splits left/right, Ctrl-b " splits top/bottom
# In each pane, start an agent: claude / codex / gemini / kimi
To make the agents easy to refer to, give each pane a name (have the agent call tmux_name in its pane, or set it yourself), for example claude, codex, gemini, or kimi.
Step 4: Get Them Working Together
From there, you direct them in plain language. Inside one agent, you can say:
- "Read what the codex pane is doing right now." (It will read the last few lines of the Codex terminal.)
- "Hand this file to claude for a review." (It will send the task to the Claude pane.)
- "Once gemini finishes its research, bring the results back and keep writing."
You don't need to learn new commands. These are standard MCP tool calls (tmux_read to read, tmux_message plus tmux_keys to send, tmux_name to name). Any agent that supports MCP will use them automatically.
A Few Good Habits
Sign in to unlock this key section
New accounts get 10 free credits, plus 1 more for each daily check-in. Spend 1 credit to unlock and it stays open for you.
Common Questions
- Nothing happens after setup: Agents must restart to load the new MCP configuration. Quit and reopen them.
- Can't address a pane by name: Confirm the pane has been named and that the name matches what you typed.
- Reads show old content:
tmux_readreads the current terminal screen. If the output is slow to update, ask it to read again.
Further Reading
- New to MCP? Start with the MCP handbook, which explains how agents use tools.
- To understand how multiple agents collaborate, see the Agent handbook.
- Project homepage: https://github.com/howardpen9/tmux-bridge
Comments (0)
No comments yet. Start the conversation.