


What you'll get
Once the arch-diagram Skill is installed, give a GitHub repo or a technical article link to Claude Code or Codex, and it will read the structure and draw a living architecture diagram: boxes are modules, light dots flow along the connecting lines, and at the bottom, lines of "who handed what to whom" scroll by. No drawing skills or frontend knowledge needed. The article includes 2 prompts you can copy directly.
This diagram helps you understand a project, but it doesn't guarantee every detail is right: it draws what the source actually states, and inferred parts are drawn as dashed lines. Check it yourself before explaining it to anyone.

A few terms first
- Skill: a set of operating instructions written for an AI. Once installed in Claude Code or Codex, it automatically follows them when a related request comes up. To understand it first, see the Skill handbook.
- Architecture diagram: uses boxes and arrows to show which parts make up a piece of software and how data flows between them.
- spec: the "working draft" of the diagram, a JSON file recording which boxes exist and how they connect. Future edits are made by changing it.
Step 1: Prepare three things on your computer
- Claude Code or Codex, at least one. Claude Code requires a Claude Pro or higher subscription; see the Claude handbook. For Codex, see the Codex handbook.
- Node.js 18 or newer. Type
node -vin the terminal; if you see a numberv18or above, you're set. If not, download the installer from the Node.js website. - Chrome, Edge, or a Chromium browser. The Skill uses it in the background to check whether the diagram has misaligned elements. Most computers already have one.
If you only want web pages and images, this is enough. To export video or GIF, you also need ffmpeg (a video processing tool): on a Mac with Homebrew, run brew install ffmpeg.
Step 2: Install the Skill with one command
Run this in the terminal:
npx @rokoai/arch-diagram install
It installs the Skill to your user directory, usable by both Claude Code and Codex (if Codex is on your computer, a copy is installed for it too). After installing, restart Claude Code or Codex so the new Skill is loaded.
When the author releases a new version, running npx @rokoai/arch-diagram install again updates it. The rules the Skill gives your agent (read only, never run; dashed lines for guesses; no delivery before the self-check passes) are on the arch-diagram Skill page.
Step 3: Draw your first diagram
Open Claude Code (or Codex) and say what you want to draw. The simplest request is "Draw https://github.com/xxx/yyy as an architecture diagram." For more reliable, easier-to-explain results, use this prompt:
Sign in to unlock this key section
New accounts get 10 free credits, plus 1 more for each daily check-in. Spend 1 credit to unlock and it stays open for you.
Item 1 prevents it from running unfamiliar code on your computer; item 2 determines whether the diagram can be understood at a glance, since too many nodes becomes a dense tangle; item 3 tells you where you need to verify things yourself.
It will clone the repo, read files, write the spec, generate the web page, then self-check in the browser, fixing overlaps or text overflow itself, usually over two or three rounds. When finished, it opens an HTML file that looks roughly like this:
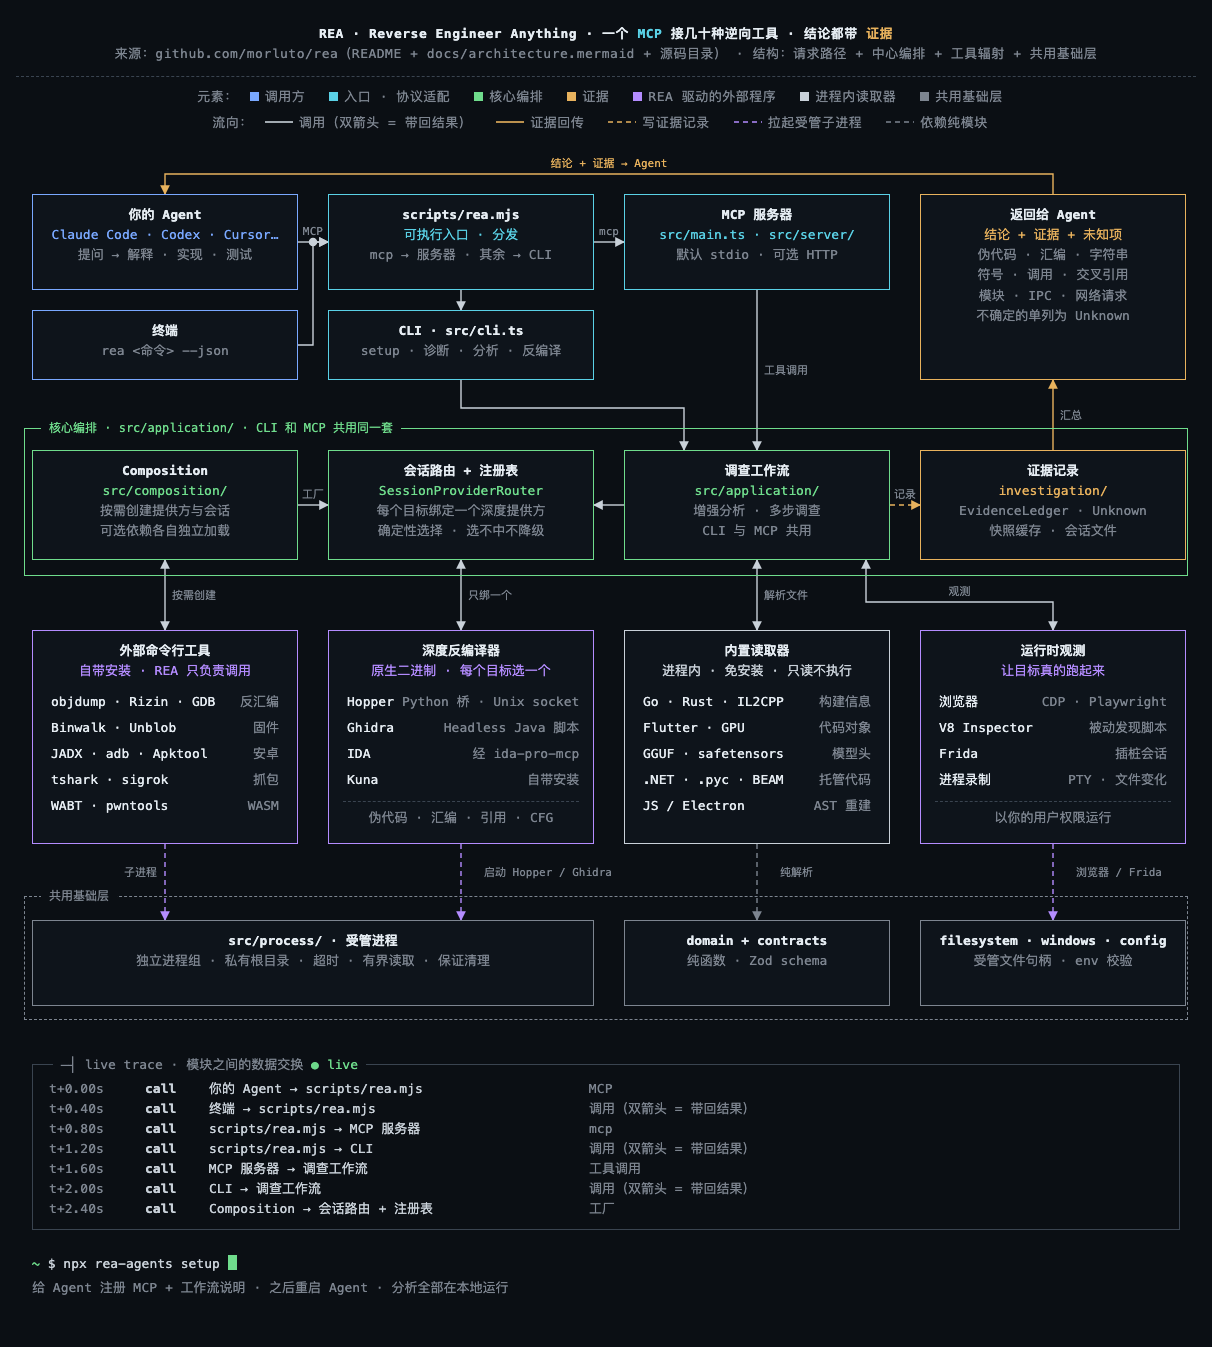
(Image from the arch-diagram-skill repository; the original is an animated web page.)
Diagrams are saved by default under ~/Documents/arch-diagrams/; when drawing the project you have open, they are saved in its architecture/ folder. The .spec.json beside it is the working draft, so don't delete it.
The diagram's language follows your question: ask in English and every label comes out in English, even when the source is written in another language.
Step 4: Switch styles with one sentence
Say one line and the whole picture gets repainted while every box and label stays put. Try "Switch to a hand-drawn whiteboard style":
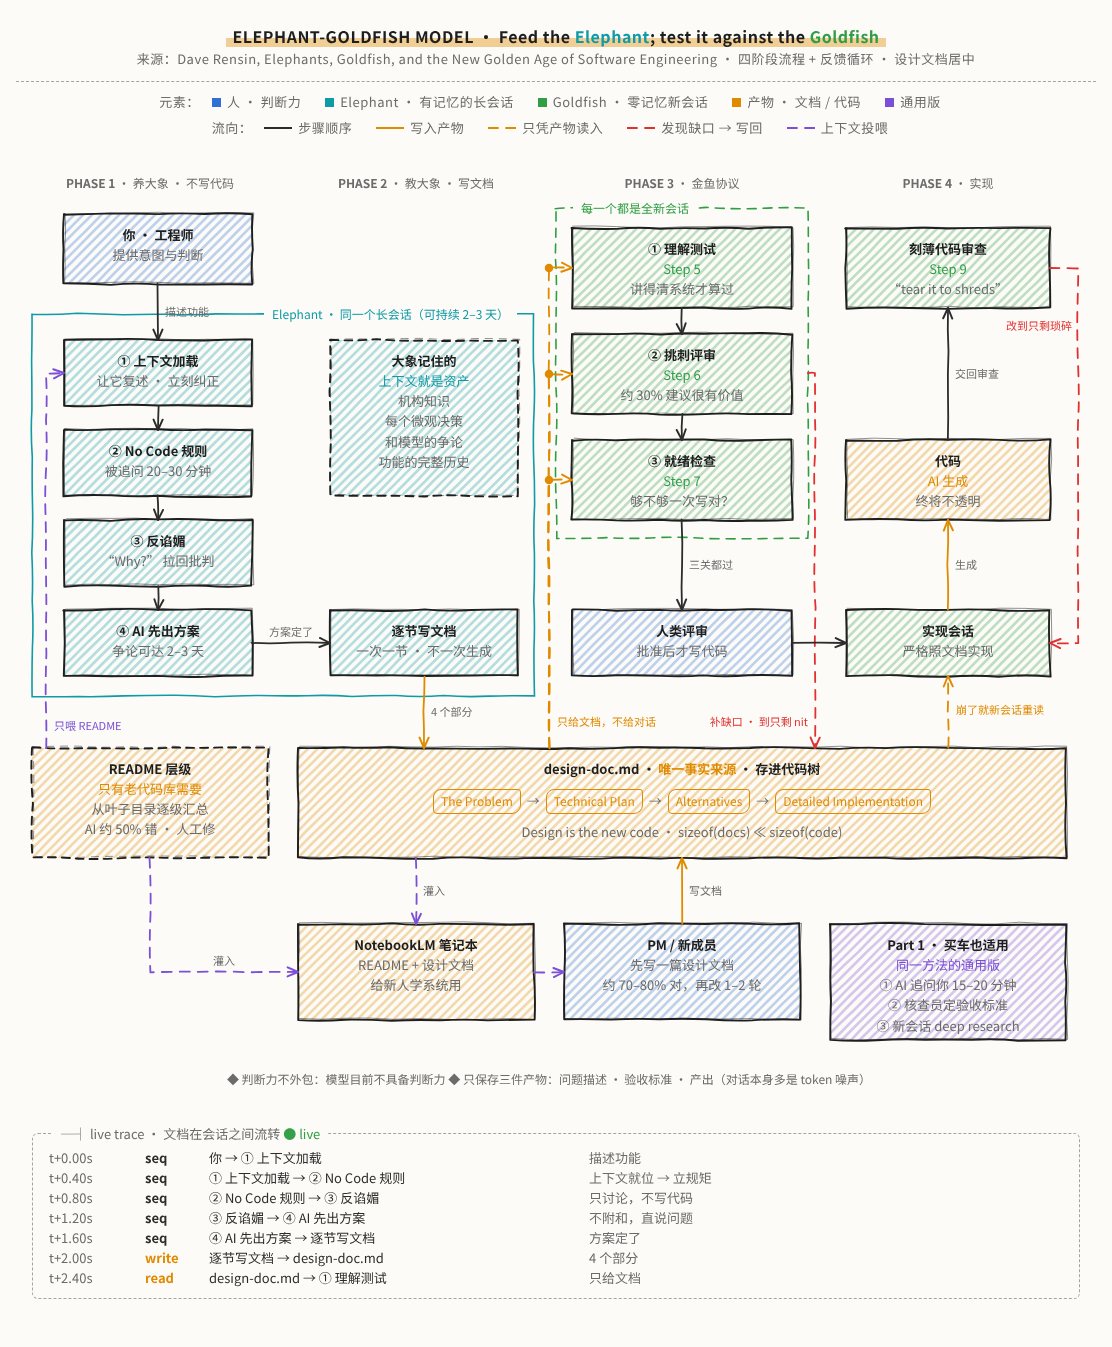
(Image from the arch-diagram-skill repository.)
8 styles, chosen by purpose:
| What you'll use it for | Say this | Style |
|---|---|---|
| Self-review, tech talks | Nothing needed | Dark terminal (default) |
| Design reviews, technical docs | "Make it blueprint style" | Blueprint |
| Printing, paper illustrations, referencing by number | "Engineering drawing style" | Kraft paper drafting |
| Explaining to non-coders, early discussions | "Hand-drawn style" | Hand-drawn whiteboard |
| README header image, social media, slides | "Make it bolder, poster feel" | Brutalist color |
| Security and ops topics, video covers | "Retro terminal style" | Phosphor terminal |
| Product docs, light-colored doc sites | "Clean light style" | Soft glow cards |
| Cover images, overviews with few modules | "Switch to 3D isometric" | Isometric diorama |
In the 3D isometric style, text tilts with the ground plane. Don't choose it if there are more than 12 modules, as it becomes too crowded to read.
Step 5: Export as an image, video, or editable flowchart
The web page is good for clicking through yourself. To send to others, just say:
- "Export as image": get a PNG at twice the resolution, good for pasting into docs or posting in group chats.
- "Export as a 30-second video": get an MP4; if you don't specify seconds, the default is 20 seconds, good for video material.
- "Export as GIF": get an infinitely looping GIF.
- "Export as Mermaid": get flowchart code you can paste into GitHub, Notion, or Obsidian, editable by hand later. Mermaid re-lays out the diagram itself, so it will look different from the web page; this is normal.
Video and GIF exports need the ffmpeg mentioned in Step 1.
Changing the diagram: edit the draft, not the web page
If you notice a mistake, want to add a module, or want to rephrase something, just tell it what to change, and it will edit the spec and regenerate. Don't open the HTML to edit it yourself, since the next generation will overwrite your changes. For example:
Change the connection between "Cache" and "Database" to bidirectional, labeled "read/write"; merge the three tools in the bottom left into one "External tools" box; re-check after the changes, then export a PNG.
Listing several changes in one go is easier than going back and forth over multiple rounds, and it also uses less quota.
Notes
- It only reads, it doesn't run: the Skill specifies that cloned repos are not installed with dependencies or have scripts executed. If you ask it to "run it and see," that's a different matter; think it through first.
- Large repos get simplified: very large projects are drawn only at the top one or two layers, with details merged into lists. To see a specific part, ask for that part alone.
- Dashed lines are inferences: before explaining to others, check the dashed parts against the source.
- Running
npx @rokoai/arch-diagraminside the arch-diagram repo directory will report the command not found; just switch to another directory.
Comments (0)
No comments yet. Start the conversation.