


What you will get
An independent creator used Claude Code (Opus 5.5) to drive Blender on a laptop with only integrated graphics, and made a 36-second cinematic short called ESCAPEMENT. Every gear, sports car, canyon, temple, and desk prop in it was generated by Python scripts. No ready-made models or textures were downloaded. Editing, color grading, and audio mixing were also done in code. According to the creator, the whole film took one main prompt plus a few rounds of fixes. This article breaks the method into steps you can follow. It includes 4 prompts you can copy and give to the agent directly.
Set your expectations first: this is a way of "giving an agent a goal, a standard, and enough time, then letting it polish the work over and over." It is not one-click filmmaking. Rendering takes many hours. Long, high-intensity runs also use up subscription quota quickly. You keep the direction and the final decisions. The agent handles writing scripts, rendering, and checking and revising its own work.

See the final cut
Below is an overview of the short's shots: from clock gears in the dark, to a sports car being assembled in a studio and racing into a dusk canyon, dust turning into clouds, then a clock temple and a pocket watch on a desk.
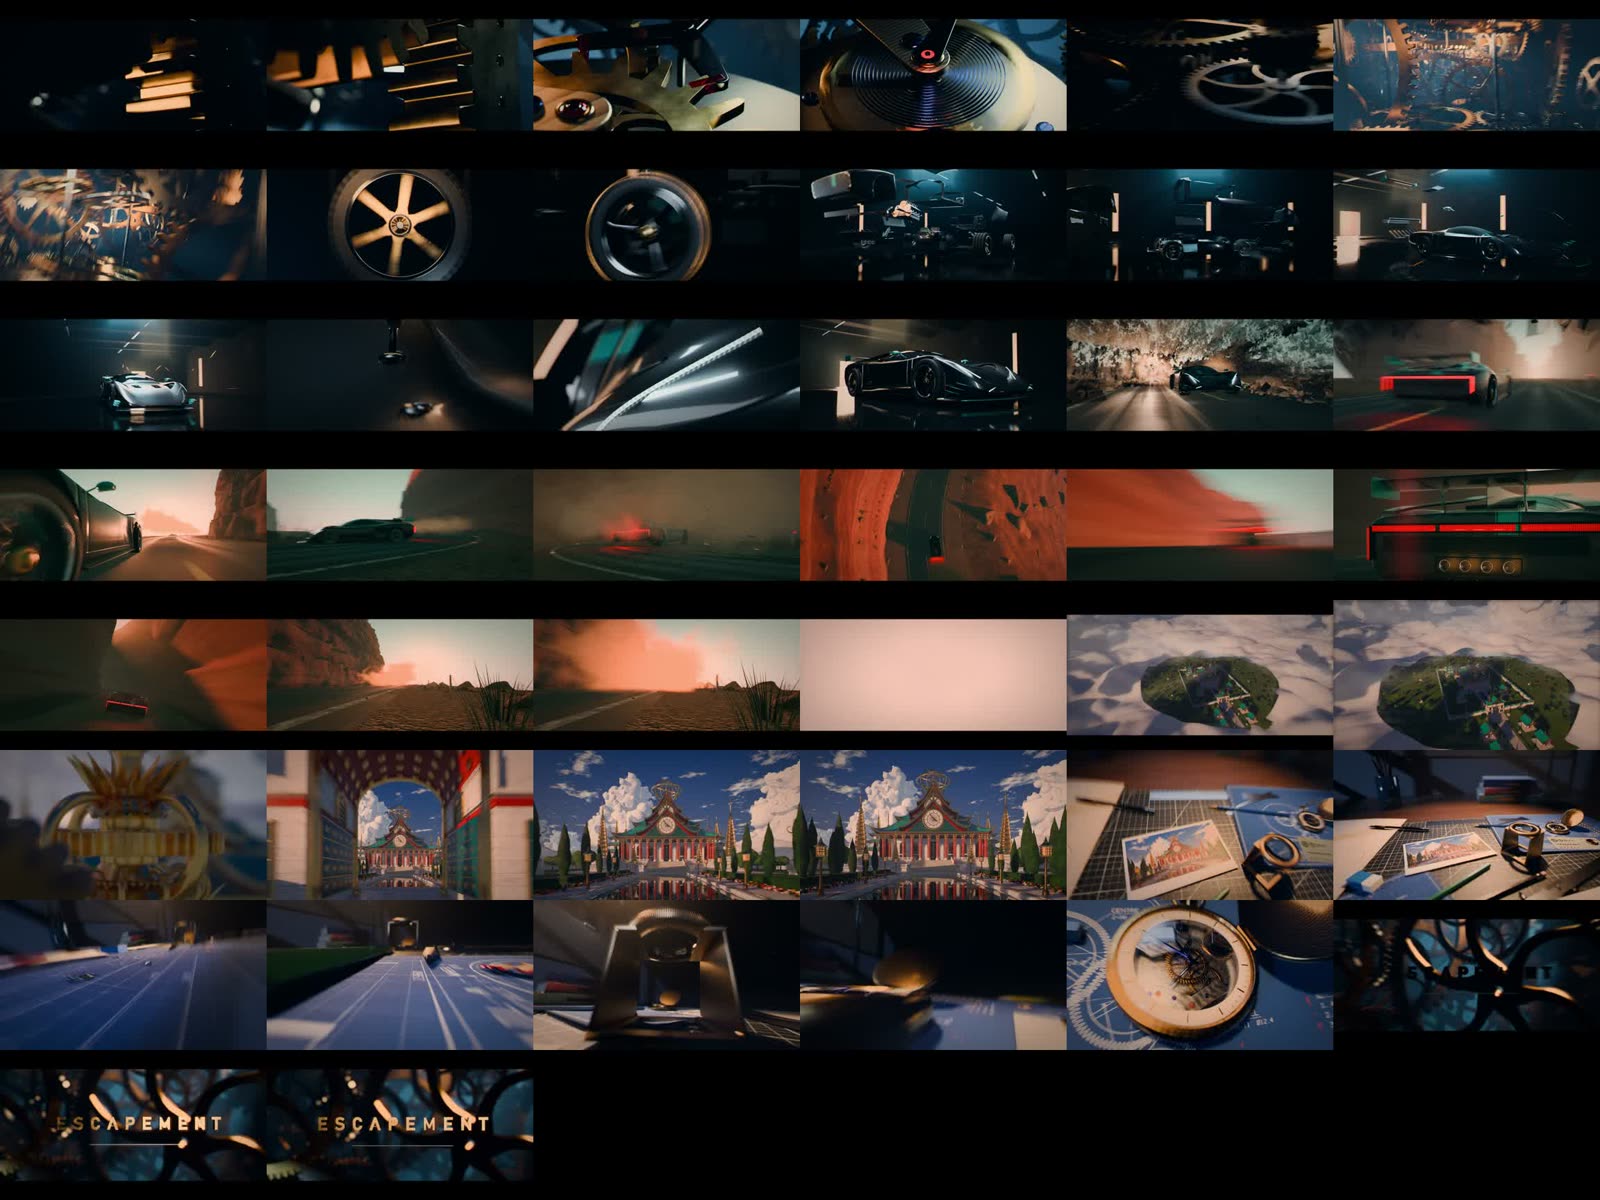
(The image comes from the project repository. The finished film can be downloaded from the repository's Releases page.)
Why this works
- Everything is code: The models, materials, lights, and camera angles are all written in the script. If something is wrong, change one line and render again. You don't have to start over.
- Acts run in parallel, then a "director" reviews: The creator had 5 agents each build one act. Then a director agent pointed out problems act by act. The second round revised the work based on those notes. The revision log for each act stays in the repository.
- Check with numbers, not just your eyes: A script checks every still frame for blown-out highlights, grey shadows, and colors that look too dull. Only frames that pass move on to the next step.
Step 1: Prepare the environment
You need four things: Claude Code (long runs use a lot of quota, so a higher-tier subscription is recommended), Blender 5.x, ffmpeg, and the cook Skill, which the creator open-sourced. It makes the agent ask all its questions about your goal in one go. Then it keeps cycling on its own: make, look, find flaws, fix. Send the following to Claude Code:
Help me set up an environment for making a 3D short film with code:
1. Install the Skill: npx skills add Leonxlnx/cook
2. Check whether this computer has Blender 5 or newer and ffmpeg. If not, tell me how to install each one and how big it is. Wait for my approval before installing anything.
3. Tell me what graphics card this computer has, and how many Blender instances I can safely run at once when rendering.
Report back in plain language: what is ready and what is still missing.
After installing, open a new conversation. The Skill only takes effect in a new session.
Step 2: Use cook to set the goal, standard, and time
This step sets the ceiling for the final film. cook asks all its questions at once, then works on its own. So the opening message needs to be clear:
Sign in to unlock this key section
New accounts get 10 free credits, plus 1 more for each daily check-in. Spend 1 credit to unlock and it stays open for you.
The "Hard rules" and "Standard" lines matter most. Banning downloaded assets forces the agent to actually build things. A passing score tells it when the work is done, so it doesn't stop after one rough version.
Step 3: Change direction, not details
After the agent hands back BRIEF.md and the shot list, you only need to check three things: whether the story flows, how the shots connect, and which frames matter most. If you're not happy, say so directly. For example: "Act 2 is too long, cut two shots," or "The ending should return to the opening gears." According to the creator, the whole film needed only a few rounds of correction in total.
Step 4: Check still frames before batch rendering
Before the full render, ask the agent to render only a few low-resolution still frames per shot so you can review them:
For each shot, first render 3 still frames at half resolution. Combine them into one comparison image and send it to me, with your check results (highlights, shadows, color).
Render only one Blender at a time. After I approve the stills, batch render the full shots from the shot list.
Running only one Blender at a time matters. The creator's laptop once crashed to a blue screen from running several renders at once. After that, every render was queued. Batch rendering on integrated graphics can take many hours, so you may want to let it run overnight.
Step 5: Use transitions to tie the shots into one story
Much of what makes this film work comes from a few transitions where one thing turns into another. Gears become a wheel hub. A studio shatters into a canyon. A screen full of dust turns into clouds. The temple image freezes into a photo on the desk. To get the same feel in your own short, ask for this:
Find places in the shot list where you can connect shots using "similar shape" or "color fills the frame". Design 3 to 4 transitions: a shape at the end of one shot becomes a different object at the start of the next. Draw the before and after frame of each transition and show them to me first.
Step 6: Hand editing, color, and music to code too
The creator used numpy and ffmpeg scripts for editing, color grading, grain, and letterboxing. The music is cut to the beat at 120 BPM. The music and sound effects come from free material on Mixkit and Freesound, and the repository lists the source and license for each file. Note that some free material is allowed in your work but may not be redistributed on its own, so the creator did not put the audio files in the repository.
Notes
- Time and quota: This is not something you can finish in ten minutes. Rendering is measured in hours. Long, high-intensity runs use up subscription quota fast, so set a time limit first.
- Don't push the hardware too hard: On integrated graphics, run only one render at a time. When the creator made the scene details too heavy, the computer froze. In the end they had to switch back to an older version of the clouds.
- Copying settings doesn't work: The creator's sample counts and file paths were tuned for their own laptop. On a different computer, you have to tune them again.
- Check the material licenses: Free music and sound effects each have their own license. Before publishing, confirm whether you can use them commercially and whether you must give credit.
Comments (0)
No comments yet. Start the conversation.