


What you get
For talking-head videos, the most time-consuming part is often not the creative work but the grunt work: trimming pauses, cutting slip-ups, adding captions. editonny is a free, open-source video editing skill for Claude Code and Codex. You describe what you want in plain language, and it transcribes, edits, and renders on your own computer. Your video is not uploaded anywhere. This article walks you through installing it and cutting your first video.
It can help you with these things:
- Remove pauses, breaths, slip-ups, retakes, and repeated lines, while keeping complete words and the pauses you intentionally leave in.
- Add captions, with several font styles and word-by-word highlighting.
- Fix audio: even out the volume of the voice.
- Change the frame: vertical 9:16, horizontal 16:9, square 1:1, 4:5, with the subject kept centered.
- Turn part of your speech into an animated visual, such as three steps, a before-and-after comparison, or highlighting one number.
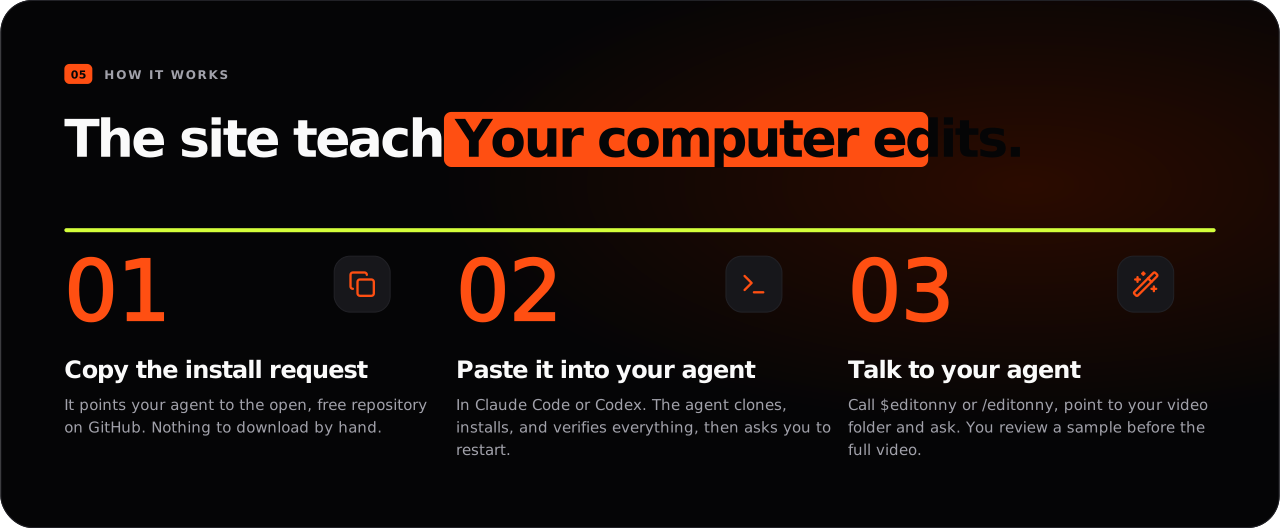
The image comes from the project repository README. It is an illustrative animation made by the project itself.
Step 1: Check what you need
You first need Claude Code or Codex, and you need to already be able to use it normally. You also need the following. If something is missing, the Agent will help you fill it in and will tell you before doing so.
| Requirement | Notes |
|---|---|
| Python | The launcher needs 3.9 or higher; the engine needs 3.10 to 3.13, managed through uv |
| FFmpeg and ffprobe | Must be findable from the command line |
| Node.js | 22.13 or higher, or 24 or higher |
| Local text recognition | macOS uses the built-in Apple Vision; other systems use Tesseract, to check whether captions contain errors |
No large model API key is required: transcription and rendering run locally. Your Claude Code or Codex subscription is separate.
Step 2: Install with one sentence
Open Claude Code or Codex, and paste the following sentence in any folder:
Install the editonny skill from https://github.com/soumatheusgomes/editonny. Read skills/editonny/SKILL.md and follow its setup.
The Agent will download the skill itself, follow the installation steps in it to check your system, prepare the renderer, browser, transcription model, and text recognition, and finally verify everything with a synthetic test clip. The first run downloads software and model files, which takes some time and disk space. Your videos are not involved in this step.
After installation, restart the Agent. To update later, paste the same sentence again. It will compare versions, tell you what changed, and ask whether you want to update.
Step 3: Hand over your footage
In Claude Code, type /editonny; in Codex, type $editonny. Then say clearly where the footage is and what result you want. For example:
Sign in to unlock this key section
New accounts get 10 free credits, plus 1 more for each daily check-in. Spend 1 credit to unlock and it stays open for you.
If you write in Chinese, it will communicate with you in Chinese. Whatever language is spoken in the video is the default caption language, unless you ask for a translation.
Step 4: Read the "settings card" and reply to agree
This is its most distinctive feature: for every new edit, it first looks at the footage, then lists a settings card and waits for your confirmation before doing anything, even if your request is very detailed. The card covers ten items:
| Item | What it tells you |
|---|---|
| Goal | Length and pacing |
| Footage | Which clips to use and in what order |
| Picture | Kept as-is by default; no automatic filters, color grading, or "enhancement" |
| Format | Size, aspect ratio, frame rate, encoding |
| Language | Spoken language, detected speech language, caption language |
| Captions | Style, number of words at a time, position |
| Editing | Which pauses to keep |
| Sound | Voice volume, noise reduction, whether to add music |
| Visual effects | Animated scenes, transitions, camera movement |
| Review and delivery | Who checks the sample, where files are saved |
Each item is labeled with its source: what you said, what it read from the video, or its own suggestion. Anything uncertain (for example, a clip missing color information) is placed at the top for you to choose A or B.
The default settings are: keep the original picture and frame rate, standard cleanup (remove pauses, breaths, slip-ups, repetition), captions on with at most three words at a time, voice volume evened out to a standard common on social platforms, and noise reduction, music, sound effects, animated scenes, and camera movement all turned off. It will not secretly add background music because you said "make it more rhythmic"; adding audio requires your explicit request.
After reviewing, reply ok, or edit directly, for example "add background music", "no captions", or "keep the pause at 0:42". After changes, it will show you the whole card again.
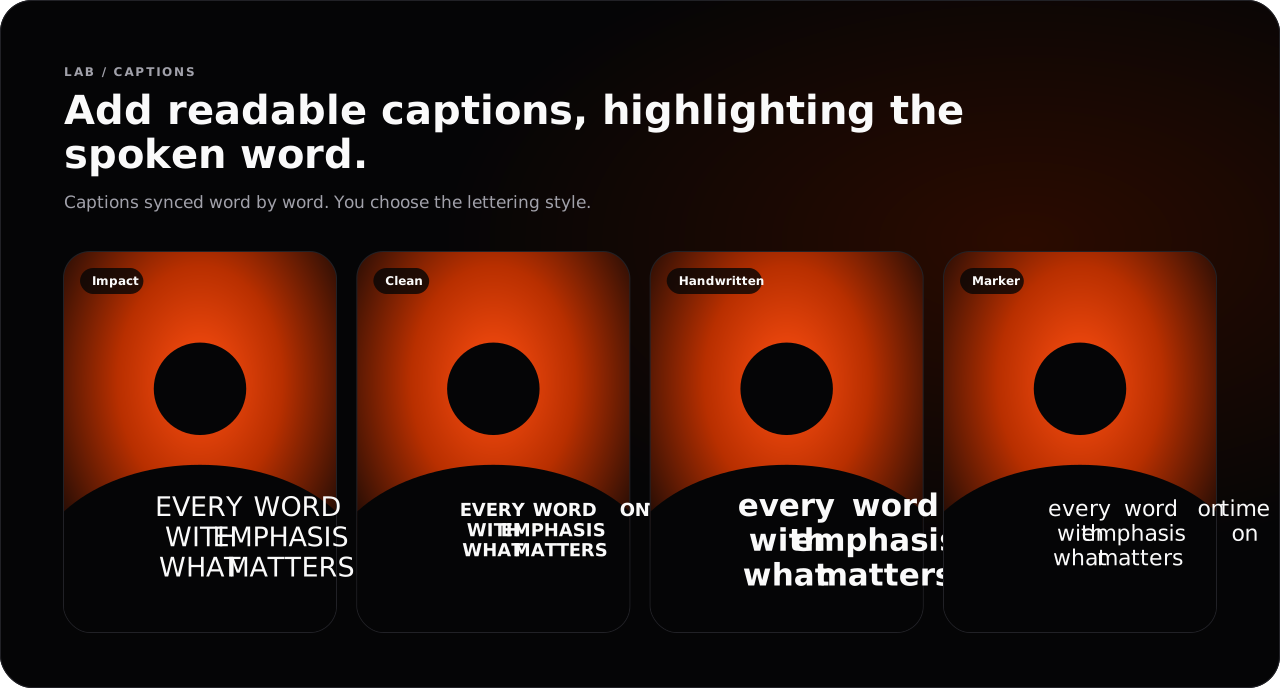
The image comes from the project repository README. It is an illustrative animation made by the project itself, not a render of client footage.
Step 5: Check the sample, then export
Only after you confirm does it create the working folder and begin transcription and editing. Finished videos and project files are saved in ~/Downloads/editonny/date-title/: the final video is in exports/, and the editing project is in project/.
It first produces an 8 to 15 second sample for checking. After it passes, it exports the full MP4 (along with a caption file if you need one). If you want to review it yourself, you can choose "I review the sample" in the settings card, and it will stop and wait for you to look.
To change the frame, simply say "export a horizontal version too".
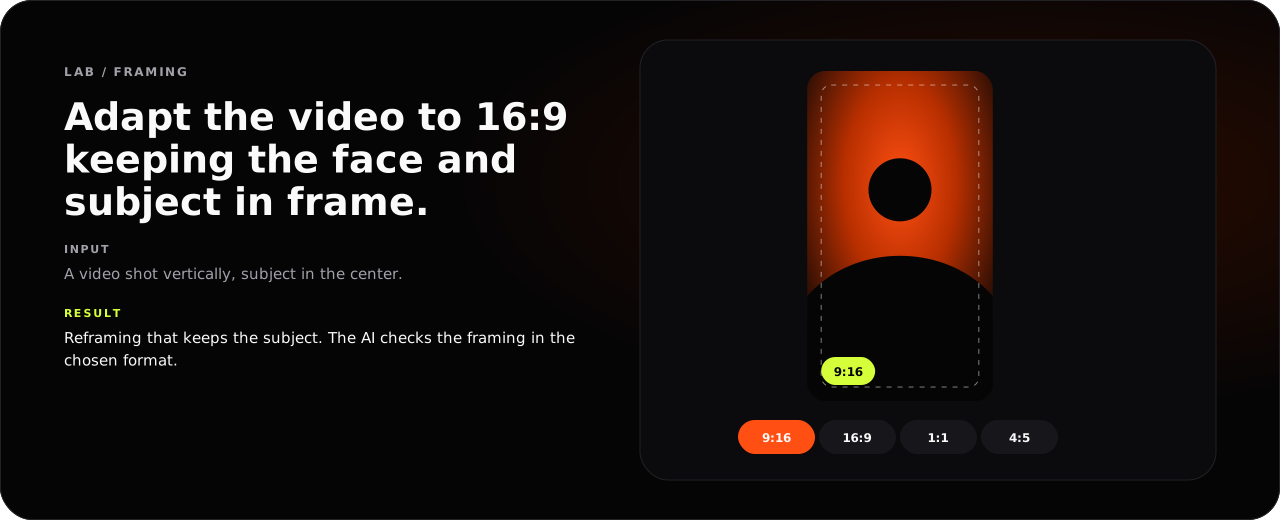
The image comes from the project repository README. It is an illustrative animation made by the project itself.
Want animated visuals
It comes with 145 animation scenes and 79 original pieces of material, plus 54 example requests. You can simply say "make these three steps an animation". Keep two things in mind:
- Sample numbers, offers, reviews, and brands in the scenes are only illustrations. Replace them with your own real content.
- Generated visuals cannot be used as evidence.
The project also has an official website guide that helps you put together editing requests and browse scenes. It does not receive or upload your footage. To run it locally, clone the repository and run python3 editonny.py guide (requires Node.js 22.13 or higher).
Notes
- System: The author has verified the environment on macOS Apple Silicon. Windows and Linux need to be verified separately and may run into problems; the Agent should honestly tell you about any failures.
- Privacy: Transcription and rendering happen locally. Installation downloads software and model files. Optional external generation services will only be used after your consent, and anything involving costs or uploading footage will be confirmed with you first.
- Updates: Each time you use it, it checks the local environment and GitHub for new versions, but it does not update automatically.
- License: The author's own code and documentation are under the MIT license; third-party libraries, models, fonts, audio, and materials each have their own licenses, so review them before use and distribution.
- Don't use other people's videos as footage. Use footage you shot yourself or have the right to use.
References
- editonny project homepage, MIT license (third-party resources have separate licenses)
- Installation and troubleshooting guide
Comments (0)
No comments yet. Start the conversation.