


What You Will Get
Hermes Agent is installed on your own computer. Once you pick a model, you can chat with it continuously in the terminal, and when you close and reopen it, you can pick up where you left off. If you want, you can also have it run in the background and connect it to chat apps like Telegram. Windows can now run it natively, so you no longer need to install WSL first (the Linux subsystem for Windows). On both Mac and Windows there are two paths: download the desktop installer, or paste a one-line command.
At the end of the article there is a prompt you can copy directly. If you get stuck after installing, hand it to your Agent to help troubleshoot. The most important step is not installation but choosing a model: Hermes does not come with a model. If you choose the wrong one or don't log in, it will open but fail to give answers.

Choose a Route First
| Your situation | Recommended route | Key points |
|---|---|---|
| Want a graphical interface, Mac with M-series chip | Desktop DMG | Drag Hermes.app into Applications; Intel Macs are not supported |
| Want a graphical interface, Windows | Desktop .appinstaller | Install with the Windows built-in App Installer; signed MSIX package with automatic updates |
| Command line only, Mac | Terminal one-line command | Installed in ~/.hermes |
| Command line only, Windows | PowerShell one-line command | No administrator rights needed; installed in %LOCALAPPDATA%\hermes |
The desktop version already packages Python and its dependencies, so you don't need to compile anything the first time you open it. After installing the command-line version, if you want a desktop interface, just run hermes desktop.
Not sure what chip your Mac has: click the Apple icon in the top left → About This Mac, and check whether the "Chip" line says Apple M-series or Intel.
Step 1: Install Hermes
Desktop version: Go to the Hermes official website (link in "References" at the end) and download the installer for your system. On Mac, open the DMG and drag Hermes.app into Applications; on Windows, double-click the .appinstaller file and follow the prompts.
Command-line version (Mac): Open Terminal and paste:
curl -fsSL https://hermes-agent.nousresearch.com/install.sh | bash
After installing, reload your terminal configuration, otherwise it will say it cannot find hermes:
source ~/.zshrc
Command-line version (Windows): Open PowerShell (Windows Terminal is recommended, as Chinese display is more stable there) and paste:
iex (irm https://hermes-agent.nousresearch.com/install.ps1)
After installing, close this window and open a new PowerShell. The installer added hermes to the user PATH (the list of directories the system searches for commands), and windows that were already open cannot see the new setting.
This one-line command also installs what it needs: Python 3.14, Node.js, ripgrep (a tool for fast file search), FFmpeg (for processing audio and video), plus a Chromium browser for the Agent to access the web and a computer-control driver. If the download is slow or you don't need browser features, you can skip these two:
& ([scriptblock]::Create((irm https://hermes-agent.nousresearch.com/install.ps1))) -SkipBrowser -SkipComputerUse
On Mac, the equivalent is to add -s -- --skip-browser --skip-computer-use to the end of the command. To add these later, run hermes pm install chromium.
Step 2: Choose a Model (Most Important)
When the command-line install runs in interactive mode, it automatically continues into the setup wizard. If it didn't, or if you want to start over, run:
hermes setup
A fresh install offers three modes:
| Mode | Suitable for | Description |
|---|---|---|
| Quick Setup (Nous Portal) | People who don't want to manage a pile of API keys | Log in on the web to a Nous Portal subscription; the model, web search, image generation, and voice all go through this one account |
| Full Setup | People who already have their own keys | Choose the model provider, tools, and options one by one |
| Blank Slate | People who want to start with the fewest features | Only enables the model, file operations, and terminal; everything else is off, and you can turn features on later with hermes tools |
If you already have a ChatGPT or Codex subscription, you can choose ChatGPT or Codex Subscription in hermes model, log in with a device code, and avoid paying extra for API usage. You can also choose Anthropic, OpenRouter, Google AI Studio, Kimi, MiniMax, and others, and enter the corresponding API key. If you want to first understand what an API key is, see the API handbook.
To switch models later, you only need one command, with no need to edit any configuration file:
hermes model
Do you have OpenClaw, Claude Code, Codex, or Cursor installed on your computer? At the start, hermes setup asks whether you want to import their settings, memory, and Skills, and it shows you a preview before importing.
Step 3: Get the First Conversation Working
hermes --tui
--tui is the newer terminal interface, which supports mouse selection and isn't interrupted while you type. hermes without parameters is the classic interface; both share the same sessions and settings.
When it opens, first check that the model shown in the welcome message is correct, then send a sentence that is easy to verify, for example "Look at what's in the current folder and tell me which one looks like the main file." Only when it replies and can call a tool to read files is the installation truly working.
Verify follow-up chat once more: after exiting, run hermes -c, and it should return to the previous conversation. If you don't confirm this now, it will be hard to troubleshoot later when you have multiple computers or multiple configurations.
To manage models and sessions in the browser, run hermes dashboard. It opens the management page at http://127.0.0.1:9119 on your machine, and your data does not leave your computer:
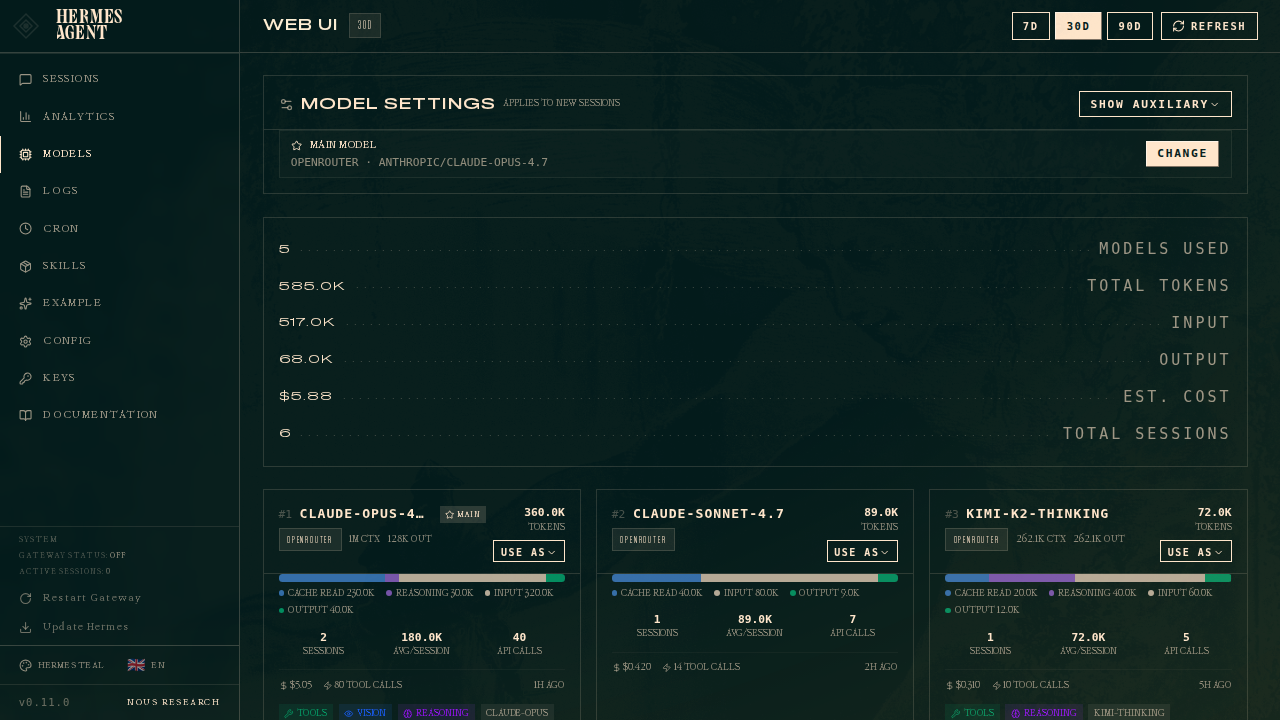
(Image from the official documentation in the Hermes Agent repository.)
Step 4 (Optional): Run in the Background and Connect Chat Apps
Add this layer only after chatting in the terminal feels smooth, and keep the order:
hermes gateway setup     # follow the prompts to connect Telegram, Discord, Slack, etc.
hermes gateway install   # start automatically at boot
hermes gateway status    # confirm it is running
On Windows, auto-start at boot uses a "Scheduled Task" and does not need administrator rights. If company policy blocks this, it switches to a small script in the "Startup" folder, with the same effect.
When Installation Fails: Hand It to the Agent
First run hermes doctor yourself. It lists what is missing from the configuration. If that's still not enough, send the following to your Agent:
Sign in to unlock this key section
New accounts get 10 free credits, plus 1 more for each daily check-in. Spend 1 credit to unlock and it stays open for you.
Item 5 is the bottom line: the data directory stores the skills and memory it has learned, and once deleted they cannot be recovered.
How to Update Later
Run hermes update. It follows the stable release by default. The desktop version checks for updates on its own.
To compare with another popular open-source Agent, see OpenClaw's Windows and Mac deployment tutorial. To learn about Hermes's feature of growing its own skills, see this introduction.
Notes
- The Mac desktop version only supports M-series chips; Intel Macs are officially listed as an unsupported platform.
- Windows antivirus may flag
uv.exeas a virus (it is the tool Hermes uses to manage Python). When adding it to the allowlist, choose the entire%LOCALAPPDATA%\hermes\binfolder, because the file fingerprint changes with every update. - Chinese text shows as question marks: most likely you are using an old cmd window; switch to Windows Terminal.
- API keys are written to the
.envfile in the Hermes data directory. Do not set them as system environment variables, or every program on the computer can read them.
Comments (0)
No comments yet. Start the conversation.