

What you get
With the open-source GameFactory-3A (the project calls itself 3AGameFactory, Apache-2.0 licensed), your AI agent can follow a proper game development process to turn a short brief into a playable game slice. It writes a chapter plan first, builds a playable whitebox out of blocks, then swaps in generated 3D models, animations, sound effects, and cutscenes, and finally you playtest and revise over and over. It supports UE5, Unity, Godot 4, Blender, and three.js running in the browser. The article includes five prompts you can copy and paste directly.
First, set your expectations. The "3A" in the name refers to covering the full production pipeline of AAA games. It does not mean you can type one sentence and get a commercial blockbuster. Your job is to define the requirements, set the budget, and make the call when you playtest. Your AI agent handles the planning, coding, model tuning, and self-checks.
See what it builds
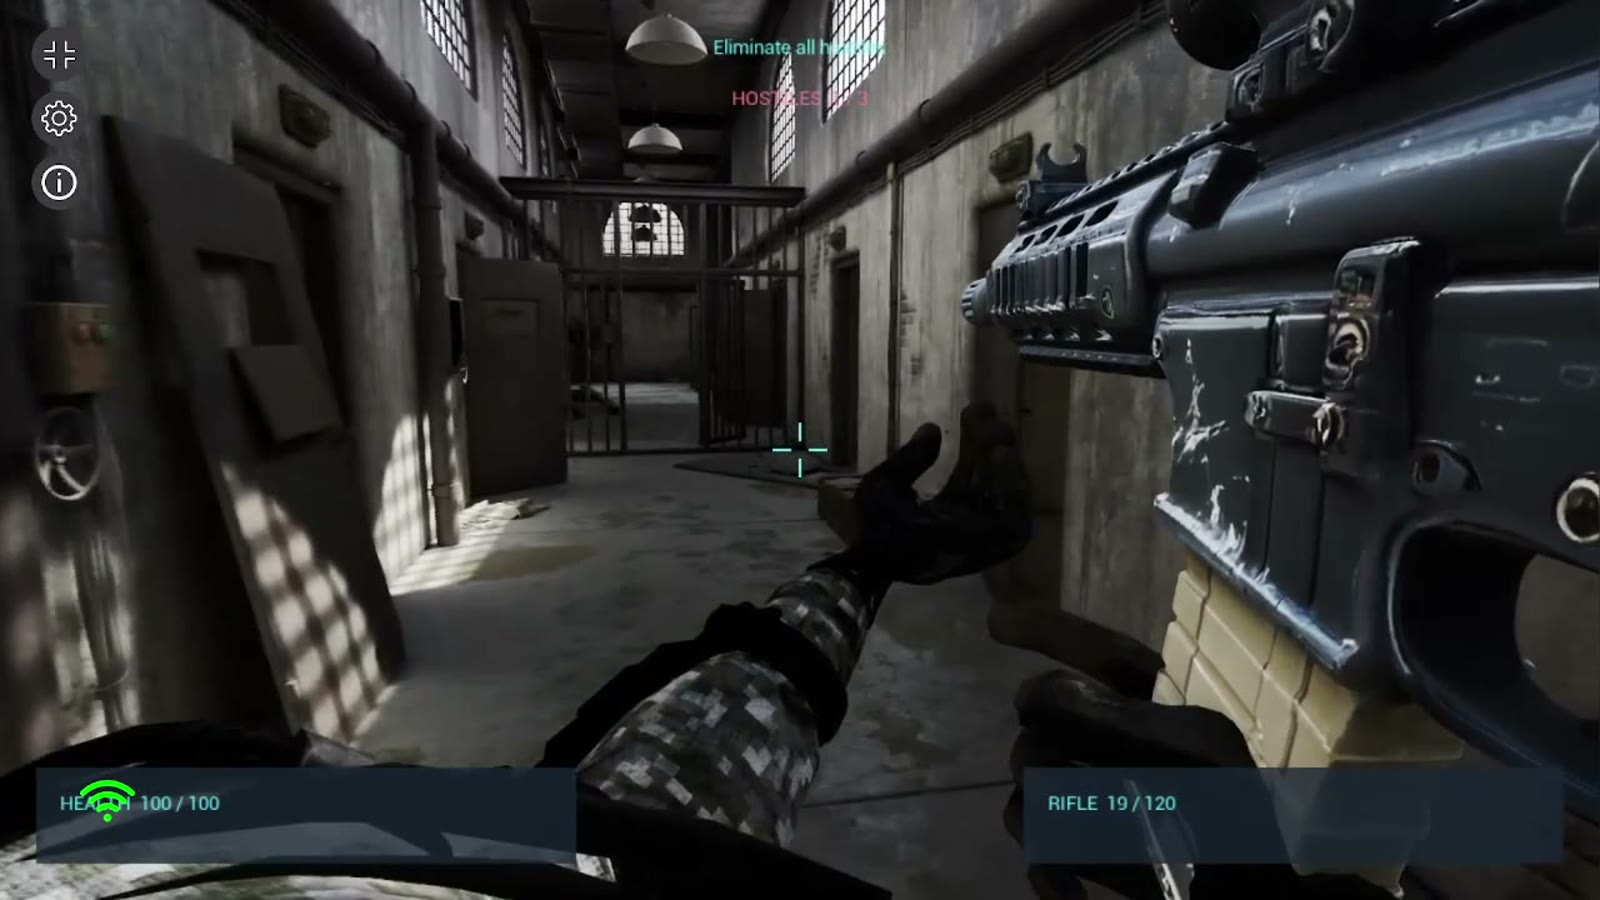
The project README includes a batch of gameplay recordings. Below are screenshots from two of them. The first is a first-person shooter made in UE5. The guns are generated with Hunyuan3D, and the character animations come from open-source motion libraries such as Mixamo:
The second is a three.js version that runs in the browser without any game engine installed:
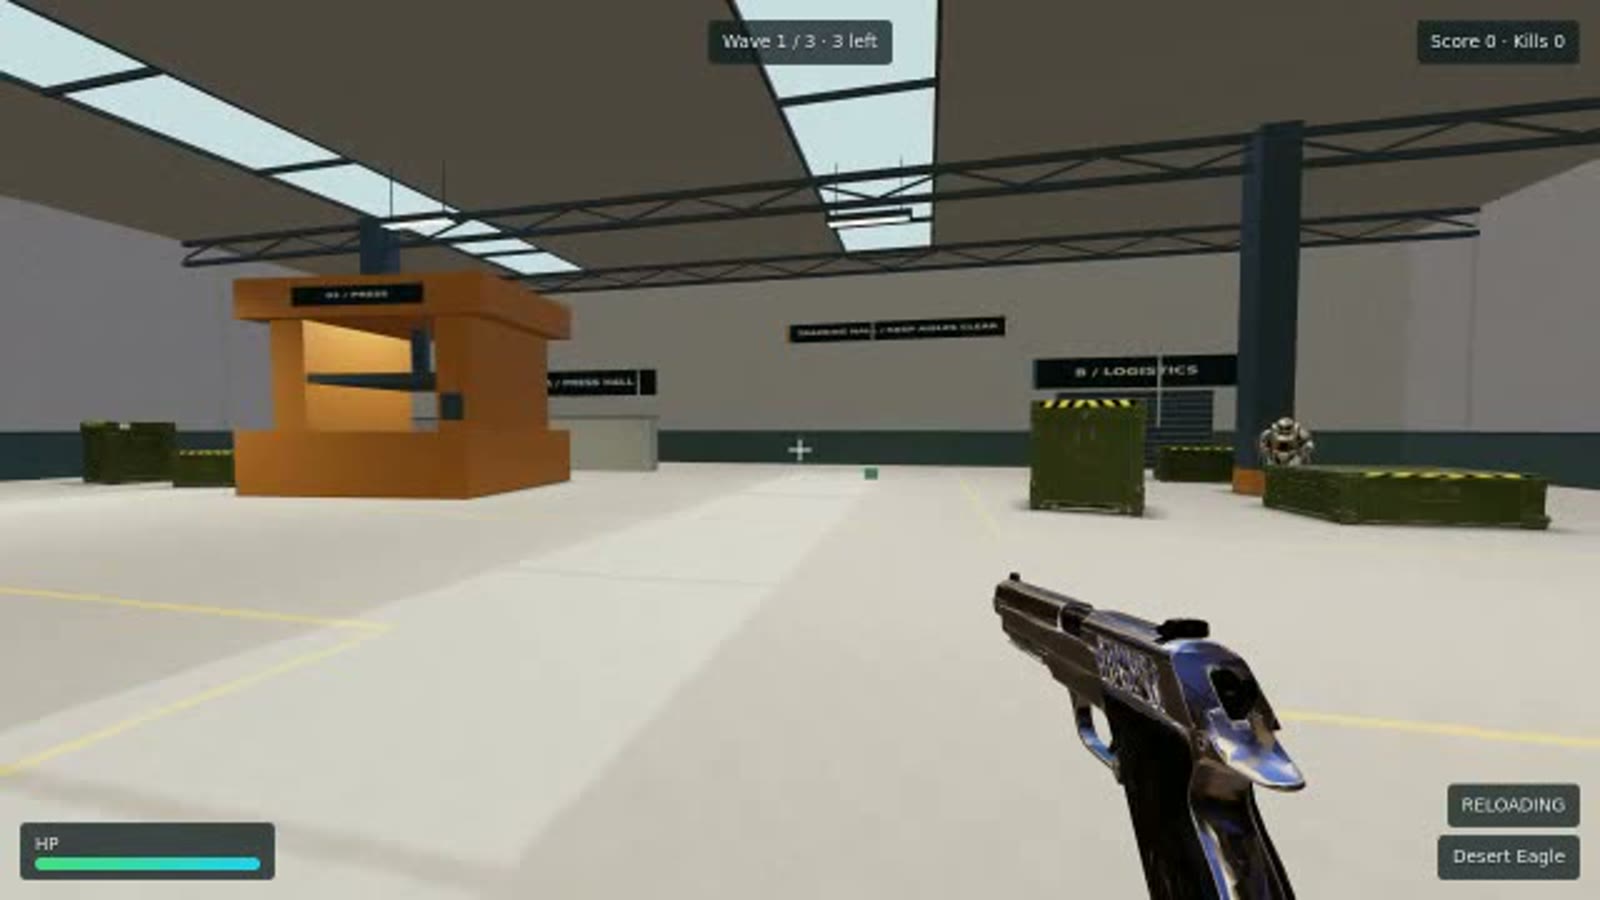
The screenshots come from demo videos in the project's repo README. According to the project's own notes, many of the scenes and animations in those demos are ready-made open-source assets, not all of them are generated.
Why this beats asking AI to just write a game
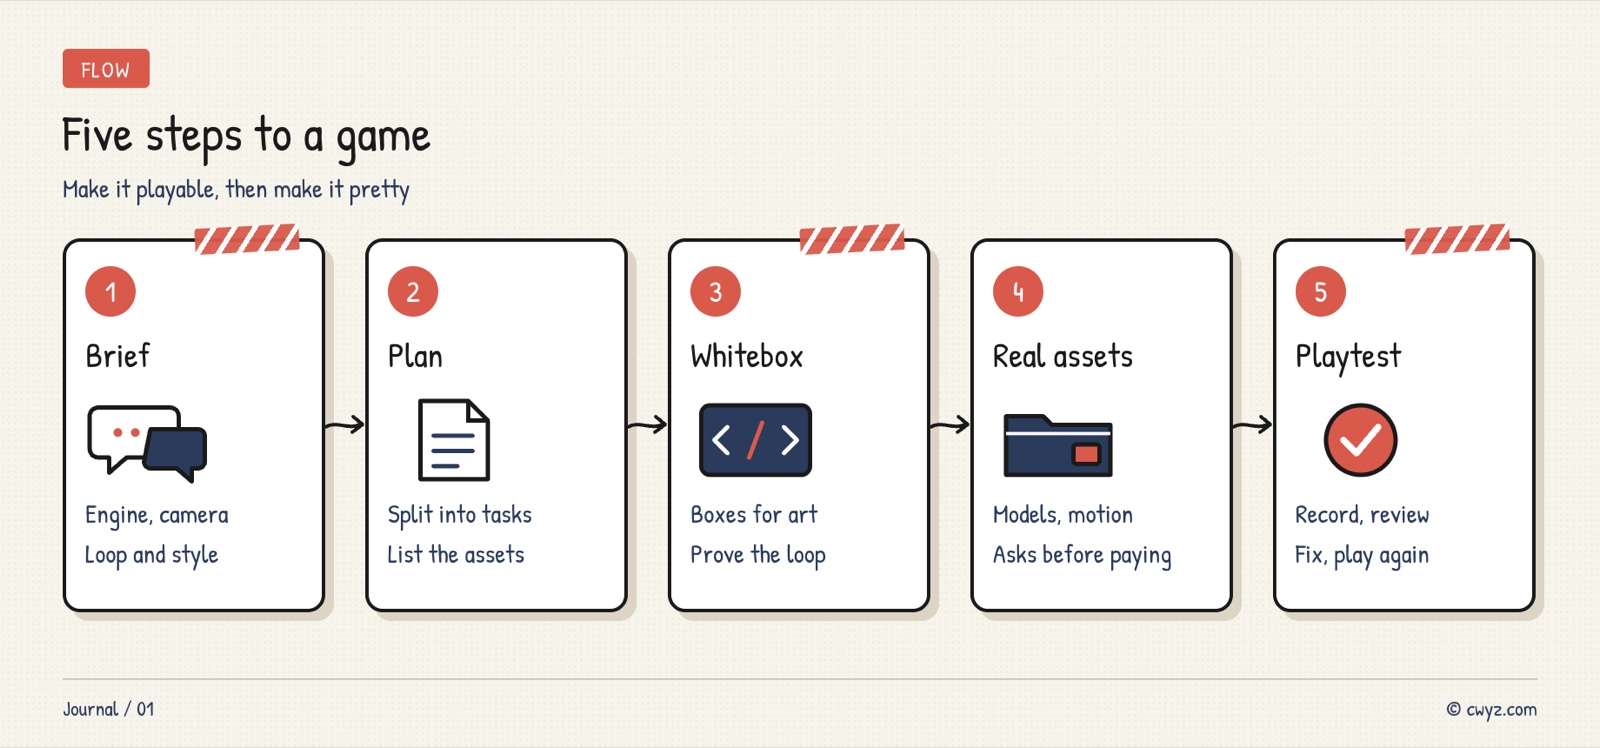
If you ask AI to write a game directly, the usual result is a game that runs but isn't fun, or art that doesn't match the code. This project sets a working discipline for your AI agent. The entry file is agent_skills/setting_overview.md. Three points are worth learning:
- Make it playable first, pretty second: Build a playable whitebox with blocks and solid colors first, and get the controls, rules, and level transitions working. Only then swap in real art. Every placeholder object has a fixed ID, so you can change models without touching the code.
- Camera view matters more than genre: The project's reference code is organized by camera view. First-person, third-person follow, and top-down each have their own setup. Two shooters with different camera views may share almost no code.
- Don't generate what code can build: Props with simple shapes, such as crates, road signs, and guns, can be modeled in code in seconds at no cost. Only faces, creatures, and trees need to go to a generation model.
Pick a route first: check your computer and budget
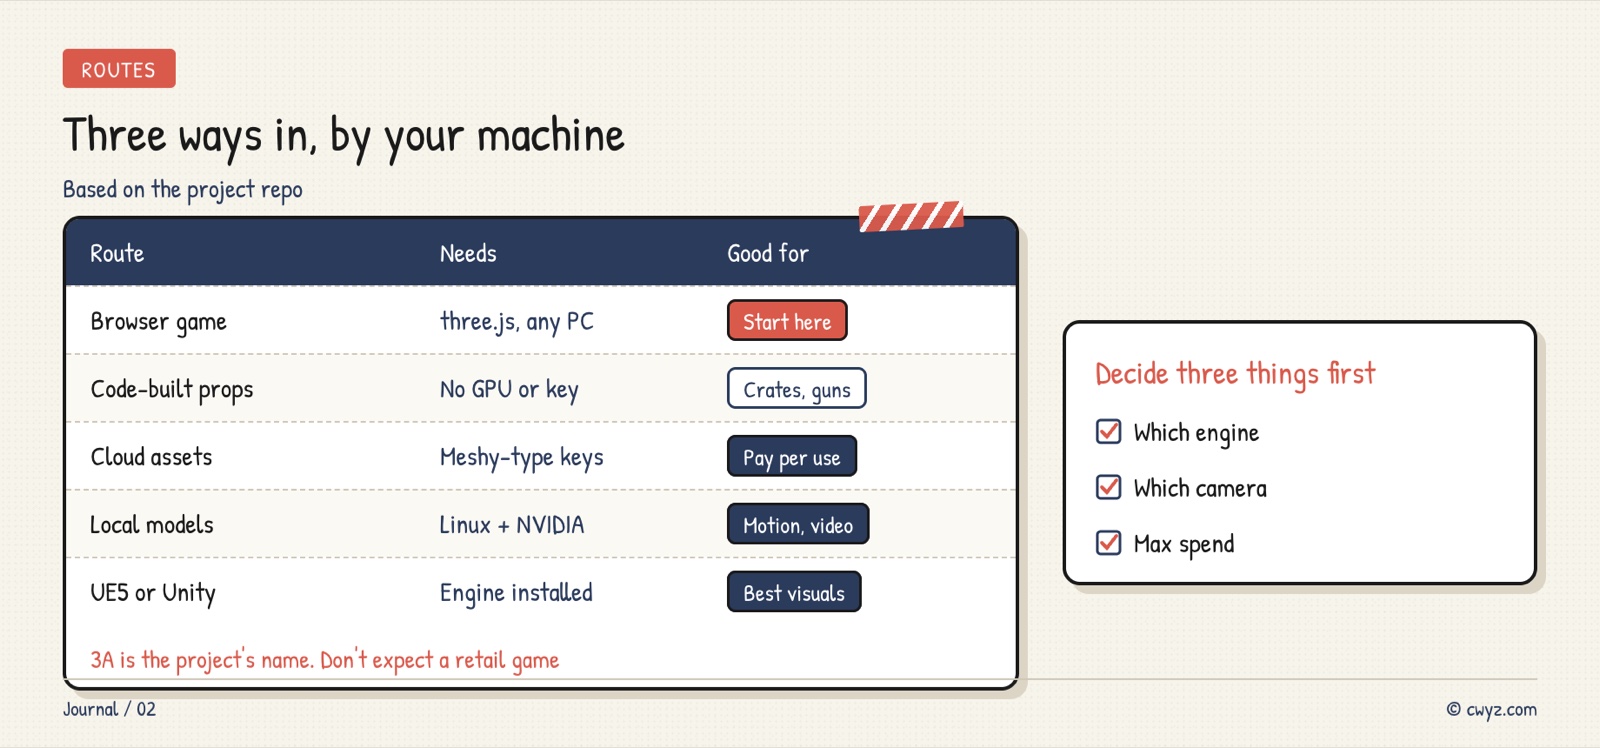
- Start for free: A three.js browser game plus code-built props works on a regular computer. You don't need a graphics card or any API key.
- Cloud-generated assets: To generate 3D models, images, audio, and video, connect cloud services such as Meshy or Tripo. You'll need an API key for each one, and they charge per use.
- Local generation: TRELLIS.2 for 3D, MoMask for motion, and local video models for cutscenes all require Linux (or WSL2 on Windows) and an NVIDIA GPU. Installation and downloading the model weights is heavy work.
For your first try, take only the first route. Add the others after you've got that one running.
Step 1: Set up, and first find out which route your computer supports
Help me prepare GameFactory-3A (https://github.com/OpenDCAI/GameFactory-3A). Only check, and don't install anything:
1. Download the repo into a folder I approve, then read the README and agent_skills/setting_overview.md.
2. Check my computer: the operating system, whether it has an NVIDIA GPU and CUDA, the Node.js version, and whether UE5, Unity, Godot, or Blender is installed.
3. Based on the results, tell me which routes I can take: browser three.js, code-built models, cloud generation, or local generation. For each route, state what needs to be installed, whether it needs an API key, and roughly whether it costs money.
4. Recommend the simplest route for me to start with, and wait until I've picked one before installing anything. Tell me before you install anything at all.
Step 2: Spell out what you want
The entry file asks your AI agent to confirm the engine, genre, gameplay loop, platform, style, budget, and acceptance criteria before it starts working. You can give it all of that at once to avoid back-and-forth:
Use GameFactory-3A to make a game. Don't write any code yet. Draft a plan according to agent_skills/game_design/SKILL.md. My requirements:
- Engine: [three.js / Godot / Unity / UE5]
- Camera view: [first person / third-person follow / top-down]
- Gameplay: [one sentence, e.g. "clear three waves of enemies in an abandoned warehouse, with weapon swaps and reloading"]
- Style: [e.g. low-poly, realistic, cartoon]
- Budget: [e.g. "free, only code-built models and open-source assets", or "cloud generation, spend at most $X"]
- Definition of done: [e.g. "can enter from the start menu, and a victory screen appears after clearing three waves"]
The plan should include the chapter flow, the characters, scenes, and props each chapter needs, and a task list ordered by dependencies.
Step 3: Build a playable whitebox first
This step makes or breaks the rest of the project. Once you've approved the plan, send this:
Sign in to unlock this key section
New accounts get 10 free credits, plus 1 more each day you sign in (none on days you don't). Spend 1 credit to unlock and it stays open for you.
Rules 4 and 5 are ones the project repeats often: compiling without actually playing through does not count as finished.
Step 4: Swap in real assets, and ask before spending
Once the whitebox is fun, it's time to swap in the art. The project recommends cloud services for mature asset types, so set clear spending rules before this step:
Start swapping in chapter one's assets. First read agent_skills/asset_qa/README.md and the skill for each asset type you'll use.
1. Make a table listing how each placeholder object will be produced (code-built / open-source asset library / cloud generation / local generation). For cloud generation, write the estimated cost. Wait for my confirmation before starting.
2. Don't send anything code can model to be generated.
3. Before each asset goes in, check it against the project's checks: size, orientation, collision, and animation. Redo any that fail.
4. Record the source and license of every open-source asset you use.
5. After each batch, replay the affected parts before swapping in the next batch.
Step 5: Playtest, record, and revise
The assets are swapped in. Following the "verify, playtest, iterate" section of agent_skills/setting_overview.md, fully package the game, launch it, and play it from the beginning while recording the session.
List the problems you find, sorted by impact. Fix the top three first, then play it again and show me the result.
You should play it too. Tell your AI agent directly about things like "the feel is off," "too hard," or "hard to see." If you want to adjust the controls and camera, ask it to read agent_skills/game-feel/SKILL.md.
Notes
- Local generation has a high bar: The install scripts for motion generation only support Linux. The 3D and video models require an NVIDIA GPU, and you'll have to download very large model weights. On a typical laptop, stick with three.js and cloud services.
- Cloud generation costs money: Services like Meshy and Tripo charge per use. Always have your AI agent quote the price before it starts.
- You are responsible for asset licenses: The character animations in the demos come from Mixamo, and the scenes come from engine asset libraries. Each has its own terms of use. Check them before you use anything commercially.
- We have not installed and tested this ourselves. Everything above comes from the project's README and the agent instruction files.
Comments (0)
No comments yet. Start the conversation.