
What you get
Give your AI agent the open-source gbro-cover-design skill, hand it your finished article, and answer three rounds of multiple-choice questions. It then returns a cover prompt you can run in an image model right away: a portrait layout with you in the picture, and the title, expression, background, and fonts all worked out for you. You don't need to know design, and you don't have to write the prompt yourself. The guide includes 3 copy-ready prompts.
First, to be clear about what it covers: the skill only plans the cover and writes the prompt. The image itself is made when you run that prompt in an image model. So you need an image tool that accepts several reference images at once.
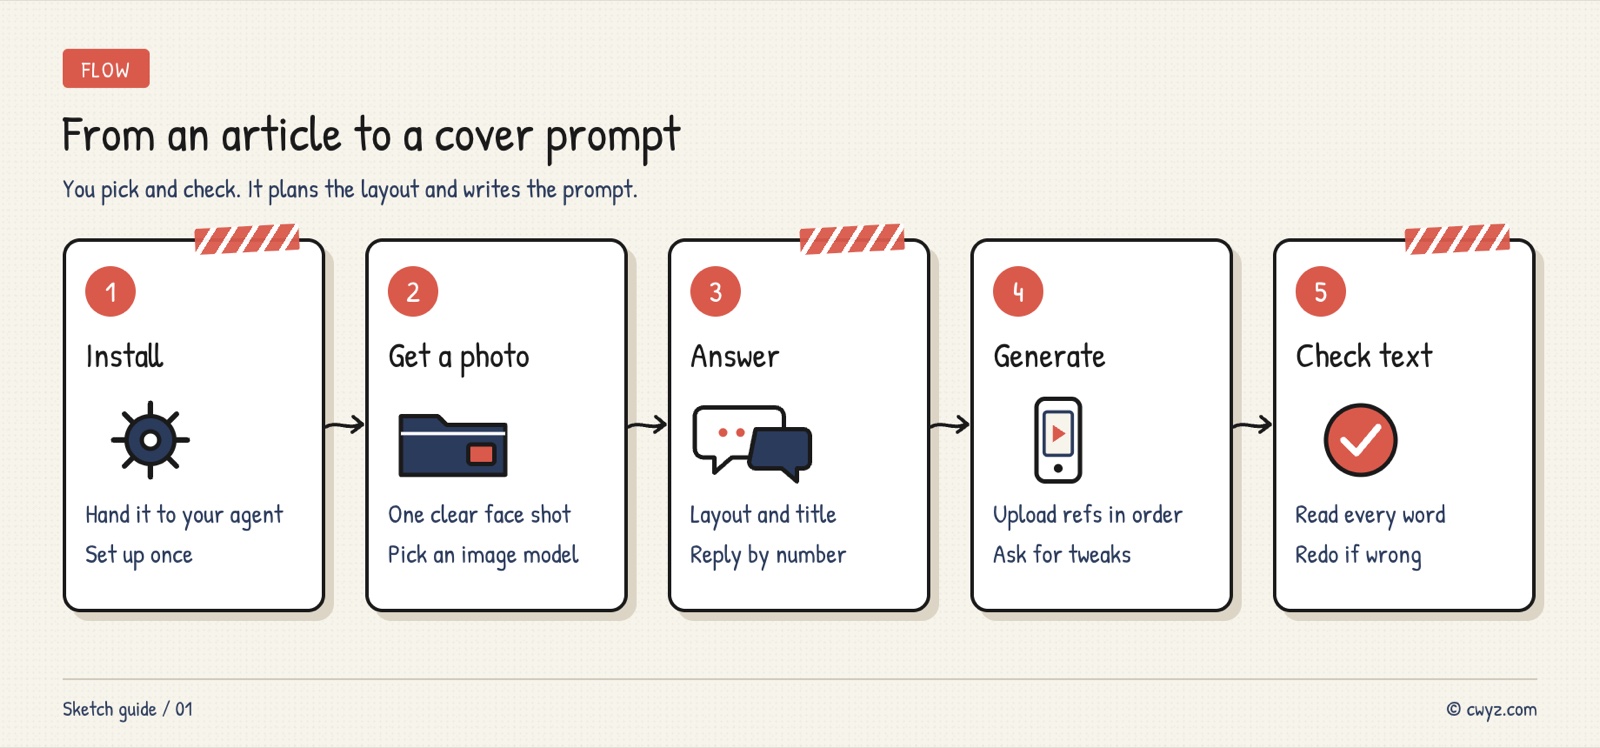
There are five steps in total: have your AI agent install the skill and run the one-time setup, prepare a front-facing photo, hand over the article and answer three rounds of questions, run the prompt in an image model, and finally check the Chinese text on the cover character by character.
Why its covers do not look like templates
Template covers all start to look the same. This skill doesn't hand you a ready-made image. Instead, it builds a cover from scratch based on the article's content:
- It reads the article before recommending: It suggests one or two layouts based on the content and pulls out a few candidate titles of 4 to 8 characters each, so you just pick one.
- Each layout has its own rules: It has 10 built-in layouts. Each one fixes where the person and the title go, and the background and fonts are styled to match, so it never applies the same color scheme to every cover.
- The prompts are very specific: They spell out where hands go, what the props look like, and who overlaps whom. The skill also includes a few finished prompts as references, which helps the image model get it right on the first try.
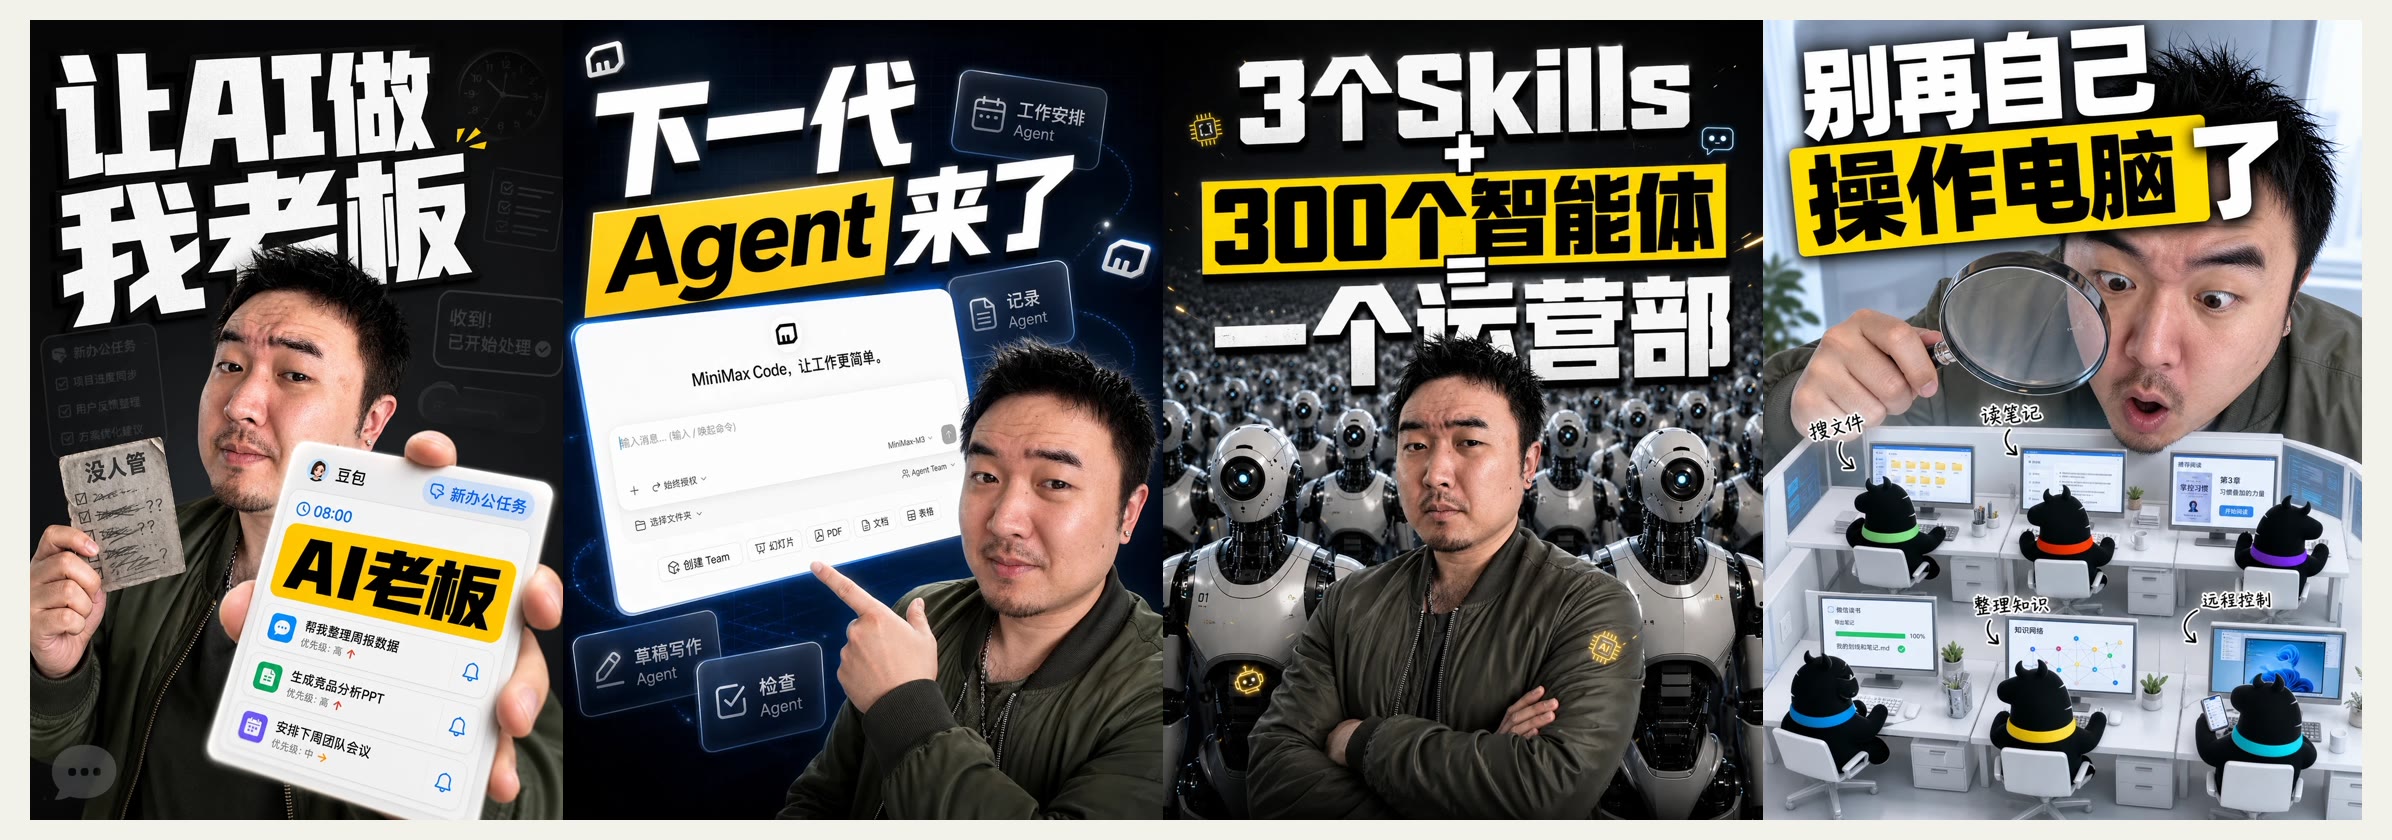
The images come from the example covers in the project's README. Each one was made from a prompt this skill produced.
Step 1: Have your AI agent install the skill
A skill is a specialized instruction manual written for AI. Once it is installed, your AI agent follows it whenever it gets a request like "make a cover." Send this to your AI agent:
Please install the open-source cover design skill gbro-cover-design for me (GitHub: pyang5166/gbro-cover-design):

1. Clone the entire repository into your skills directory. The references folder contains style templates and examples, so copying only SKILL.md is not enough. If you don't know where your skills directory is, tell me where you plan to put it first.
2. After installing, read through its SKILL.md and tell me in plain language what it does and what it does not do.
3. Then follow its "first use" process and ask me two things: how I will provide a face photo, and which image model I use. Give me options for each question, and after I choose, write the settings in.
4. Ask me before installing. Don't spend any money or sign up for any service along the way.
Item 1 needs a closer look. The author warns that copying only the SKILL.md file will not work. Item 3 covers the skill's one-time setup. Your answers are saved to config.md in the skill folder, so it won't ask again.
Step 2: Prepare a front-facing photo and an image tool
This skill makes covers with a real person in them. The prompt says "the facial features from reference image 1," so you need two things:
- A clear front-facing photo: You can save it in the skill folder as your default photo, so it is used automatically every time. Or you can upload one each time you generate. If you have no photo, the skill describes the person in words instead.
- An image model that accepts several reference images: Image 1 holds your face, and image 2 onward holds materials such as product screenshots or interface images. The models the author lists are Seedream 4.0 (Jimeng), Nano Banana (Gemini's image model), and GPT-Image. A model that only takes one image will not keep your face, and the result will not look like you.
If you want a product interface on the cover, prepare a screenshot too. The second round will ask for it.
Step 3: Hand over the article and answer three rounds of questions
Once it is installed, paste the article to your AI agent and the skill will start. To get all your requirements across in one go and cut down on back-and-forth, use this prompt:
Sign in to unlock this key section
New accounts get 10 free credits, plus 1 more each day you sign in (none on days you don't). Spend 1 credit to unlock and it stays open for you.
"I want readers to feel at a glance" is the most important line to fill in. It decides which layout is recommended and which expression the person uses. The last line asks it to state the order of the reference images, because if you upload them in the wrong order, your face may be treated as just another material.
The three rounds of questions look like this:
| Round | What it asks | How you answer |
|---|---|---|
| Round 1 | Recommended layouts and candidate titles | Reply "pick 3, use the second title" |
| Round 2 | Whether you have a face photo and how many material images | If you saved a default face photo, this question is skipped |
| Round 3 | Expression, background tone, font, and font color | Reply with the numbers, for example "5 / 2 / 1 / 1" |
Here is how the most common of the 10 layouts break down:
| Layout | Best for |
|---|---|
| Dark gradient | Opinions and hot takes, where you want impact |
| Product hero | Tool introductions with an interface screenshot as the star |
| Comparison card | Before-and-after or right-versus-wrong comparisons |
| Minimal whitespace | When the title is strong enough on its own and less in the picture is better |
| Poster collage | Lots of material, layered to create depth |
| Partial appearance | Only a hand or half a face shows, letting the product or text take center stage |
There are four more: flat solid color, person on the side with open space, back view, and direct eye contact. It lists all of them in round one.
Step 4: Run the prompt in an image model
Copy the prompt into your image tool and upload the reference images in the order the skill gave. Image 1 is your face, and the rest are materials.
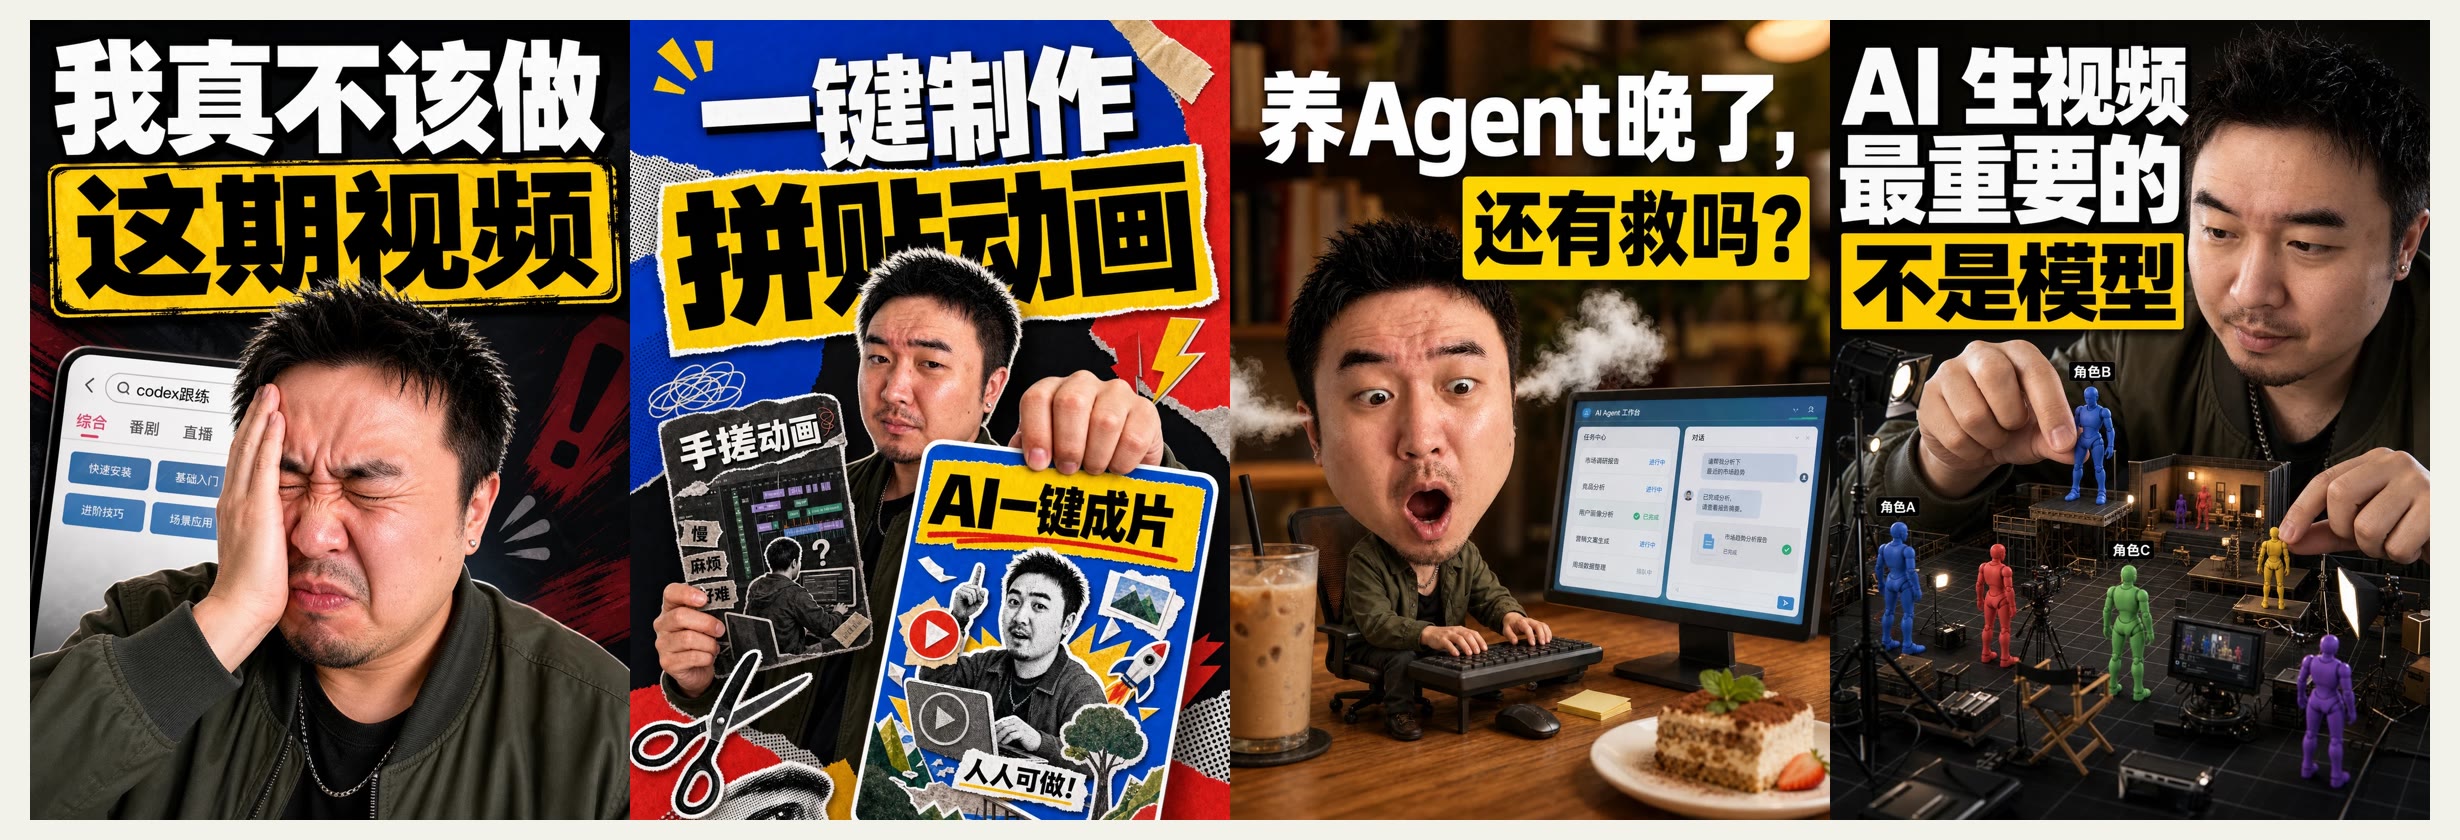
The images come from the project's README. They are example covers made with this skill, and they show how different layouts, expressions, and fonts look.
If the result is off, you don't need to start over. Go back to the same conversation and say what is wrong:
The cover from the last run came out, but it has these problems: [for example: the second line of the title has a typo / the person is too small / the background is too busy].
Keep the changes to only those parts of the original prompt and leave everything else the same. Output the full prompt again, and mark which sentences you changed.
Only the sentences that cause the problem get changed, and everything else stays the same. That way the next image will not drift in other places.
Step 5: Check every Chinese character on the cover
Image models often get Chinese characters wrong. An extra or missing stroke, or a character that can't be read, is common. The author also built a reminder about this into the skill. After each image comes out, check the title character by character. If anything is wrong, regenerate it. Don't publish it.
Notes
- It does not make images itself: The skill only writes its prompts in Chinese. It does not call any model and does not need an API key. Image costs and limits depend on the image tool you use.
- The canvas is fixed to portrait: The skill is fixed to a 3:4 portrait layout, which suits portrait feeds. For a landscape blog header or thumbnail, ask your AI agent to rewrite the prompt for a landscape layout or crop afterwards.
- Face photos stay on your computer: The photo you save in the skill folder and
config.mdare excluded from Git. But check how the image platform you upload to handles your pictures first. - Ask before using someone else's face: The cover shows a real person, so you need that person's consent to use their photo.
Comments (0)
No comments yet. Start the conversation.