

What You Get
Give your AI agent the free, open-source brief2mp4 tool, then describe the animation you want as a brief: how long it runs, what size it is, which lines of text appear on screen, and what happens at each moment. It renders an MP4. It also measures the file's size and length itself, pulls frames to look at, checks the video against your brief line by line, fixes anything that falls short and re-renders, and finally hands you the video along with a check report. Text animations, science explainers, data charts and vertical short videos all work, and everything renders on your own computer. The guide includes 4 copy-ready prompts.
Keep the division of labor in mind: you write the brief clearly and watch the final video. The AI agent handles the animation, the measurements and the rework. The more specific your brief, the less the agent has to guess, and the closer the result will be to what you had in mind.
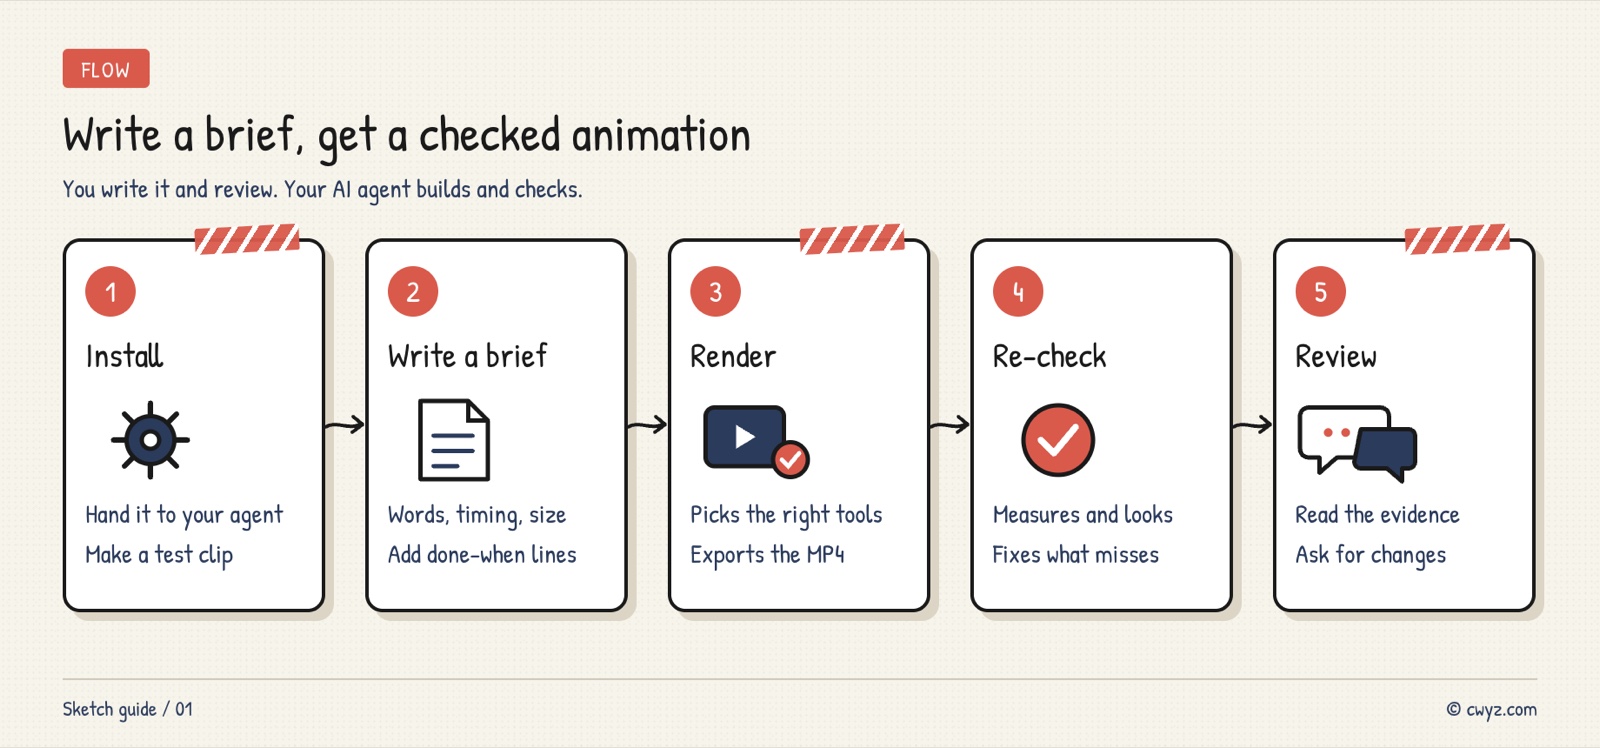
There are five steps: have your AI agent install brief2mp4 and render a test clip, write your idea as a brief, hand it off to render, have it check the video against the brief one more time, and then review the video and the report and say what to change.
How It Differs From Asking AI Directly
You can simply tell an AI agent "make me an animation," and it will usually manage. But it often stops once the video is done. Nobody checks whether the text is too small, whether the length is right, or whether any words touch the edge of the frame. brief2mp4 adds three things:
- It writes a spec first: Before starting, it turns your brief into a spec. Each requirement becomes a pass or fail line you can check.
- It measures its own output: After rendering, a script measures the file's size, length and volume, then pulls a few frames and reviews them one by one.
- It delivers with a report: Anything that falls short gets fixed, starting with the most serious problem, for up to three rounds. The final report lists every requirement with proof attached, such as "Title measures 126 pixels, requirement is at least 120 pixels."
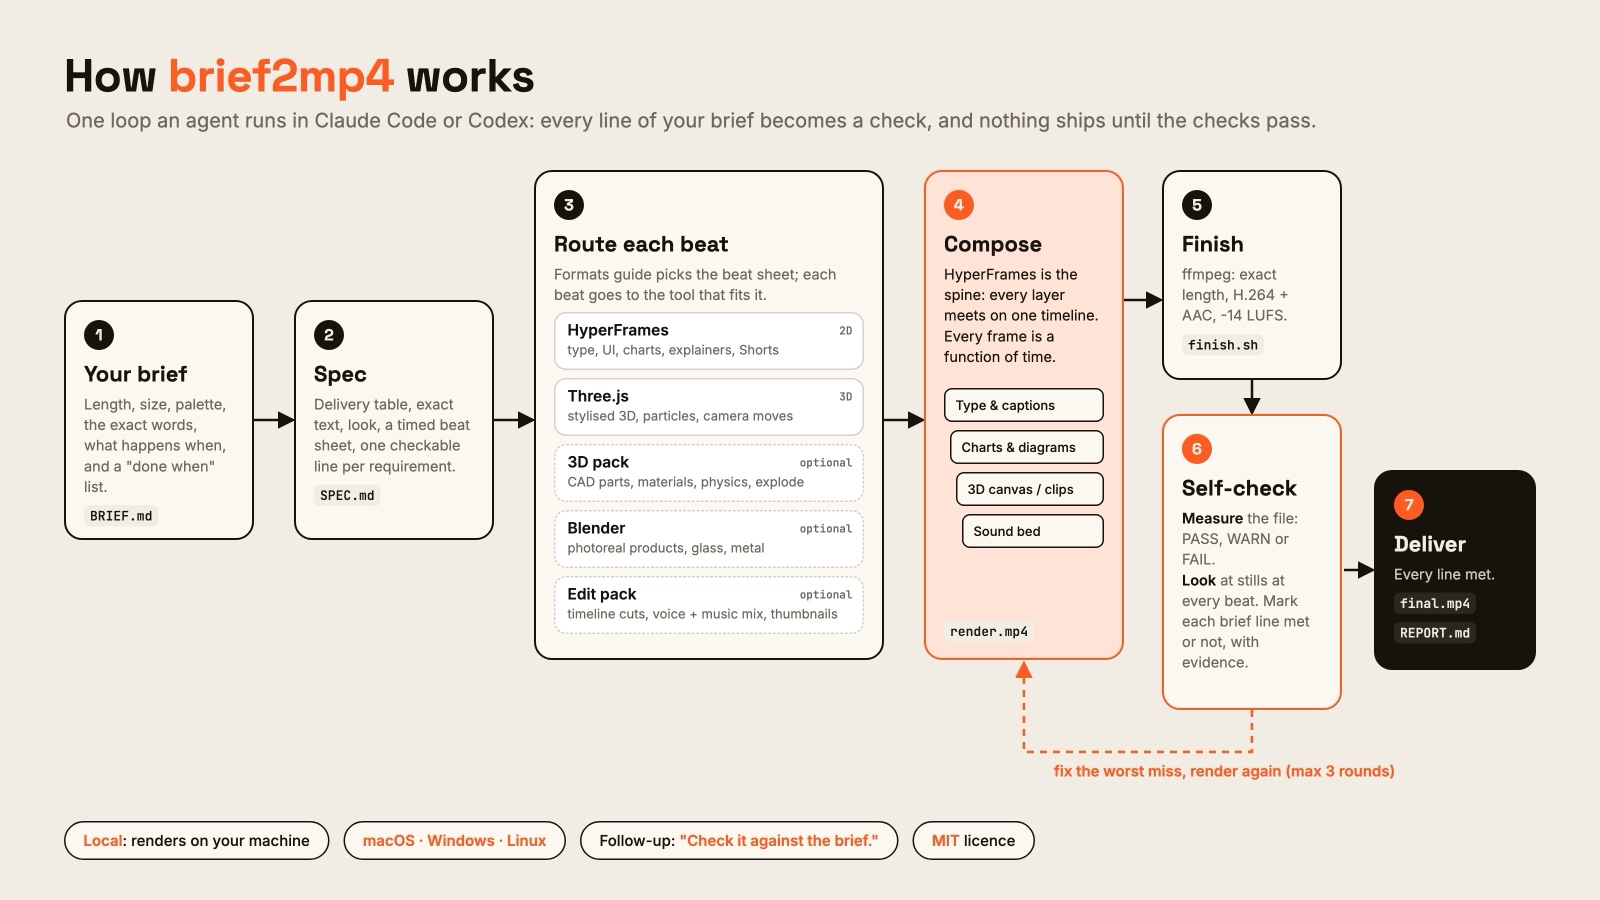
Image from the project's GitHub repository, showing the seven stages from brief to final video.
Step 1: Have Your AI Agent Install It and Render a Test Clip
brief2mp4 works with Claude Code and Codex, on macOS, Windows and Linux. The easiest route is to have your AI agent follow the setup instructions included with the project. It will check what your computer is missing first, and it will ask before installing anything:
Please follow the SETUP.md file in the https://github.com/qualixar/brief2mp4 repository and install brief2mp4 for me.

1. First, check my computer: which operating system it runs, and whether it has Node.js 22 or newer, ffmpeg and git. List anything that's missing, ask me before installing it, and show me each command before you run it.
2. I don't need the 3D or editing extension packs right now. Install only the basic version.
3. After installing, run its self-check, then render a 12-second test video. Tell me where the file is saved and whether it plays normally when I open it.
4. Don't install npm packages globally with administrator privileges. If a step gets stuck, stop and tell me why.
The test video in step 3 matters most. If it renders properly, the install worked. After installing, start a new conversation so your AI agent loads the newly installed Skill.
Step 2: Write Your Idea as a Brief
This step decides how good the final video will be. The brief doesn't need to be technical. Just cover these items:
| What to specify | Example |
|---|---|
| Length and size | 15 seconds, landscape 1920×1080, 30 frames per second |
| Visual style | Off-white background, black text, one orange accent color, bold font |
| On-screen text (word for word) | "Do one thing a day" / "Finish it, then the next" / "Look back in a month" |
| What happens when | From 0 to 4 seconds, the first line types out one letter at a time. At 4 seconds, it switches to the second line. At 9 seconds, the third line drops in and stops. |
| Sound | Quiet background sound, with one low drum hit at 4 seconds |
| Pass criteria | Every line is easy to read, no text touches the edge of the frame, and the title is at least 100 pixels tall |
The last row, pass criteria, matters most. The check the AI agent runs at the end measures exactly these items. You can also name a specific visual style directly. It has 30 built-in animation styles, such as claymation, paper cutout, watercolor, pixel art and neon sign.
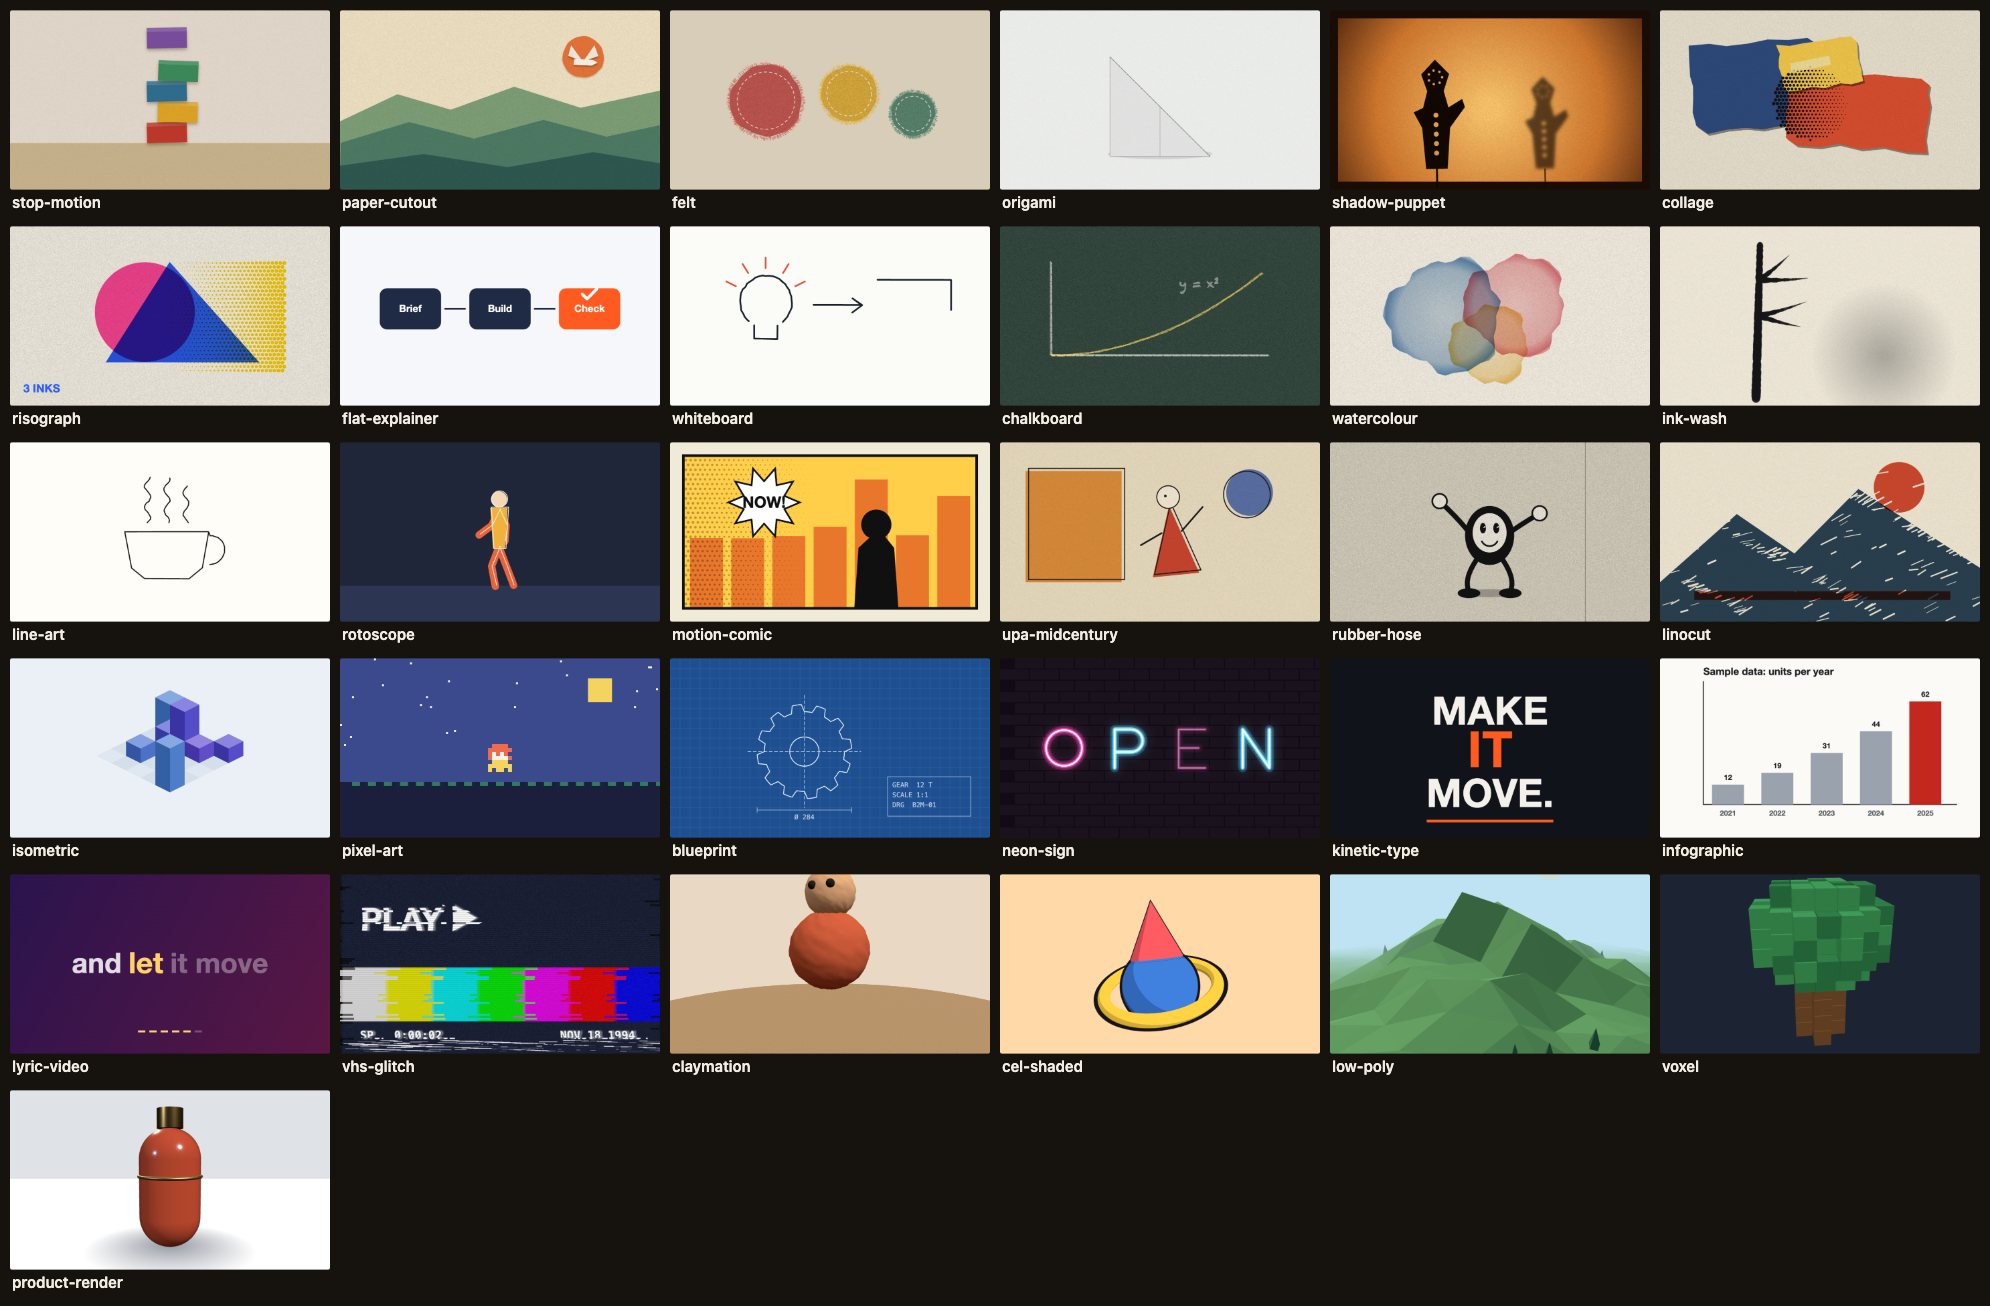
Image from the project's GitHub repository. Each tile is a style you can name in your brief.
If you can't write it all out yet, just describe the general idea and let your AI agent fill in the details:
Sign in to unlock this key section
New accounts get 10 free credits, plus 1 more each day you sign in (none on days you don't). Spend 1 credit to unlock and it stays open for you.
The third item asks for every line word for word because the text in the final video gets checked one line at a time. The sixth item asks for pass criteria written as numbers the agent can measure. Words like "nice" or "clear" give it nothing to check.
Step 3: Hand It Off to Render
Once you've confirmed the brief, open a folder just for this video and tell your AI agent:
Use the brief2mp4 Skill to make a video from the brief below: [paste the full brief here]
When you're done, tell me where the final video and the check report are saved.
It writes the spec first, then picks the right tool for each scene (HyperFrames for text and 2D animation, Three.js for 3D scenes), composites the scenes, exports the video and runs its self-check. For a simple video of about 10 to 20 seconds, rendering takes a few seconds to a few dozen seconds on an Apple silicon laptop.
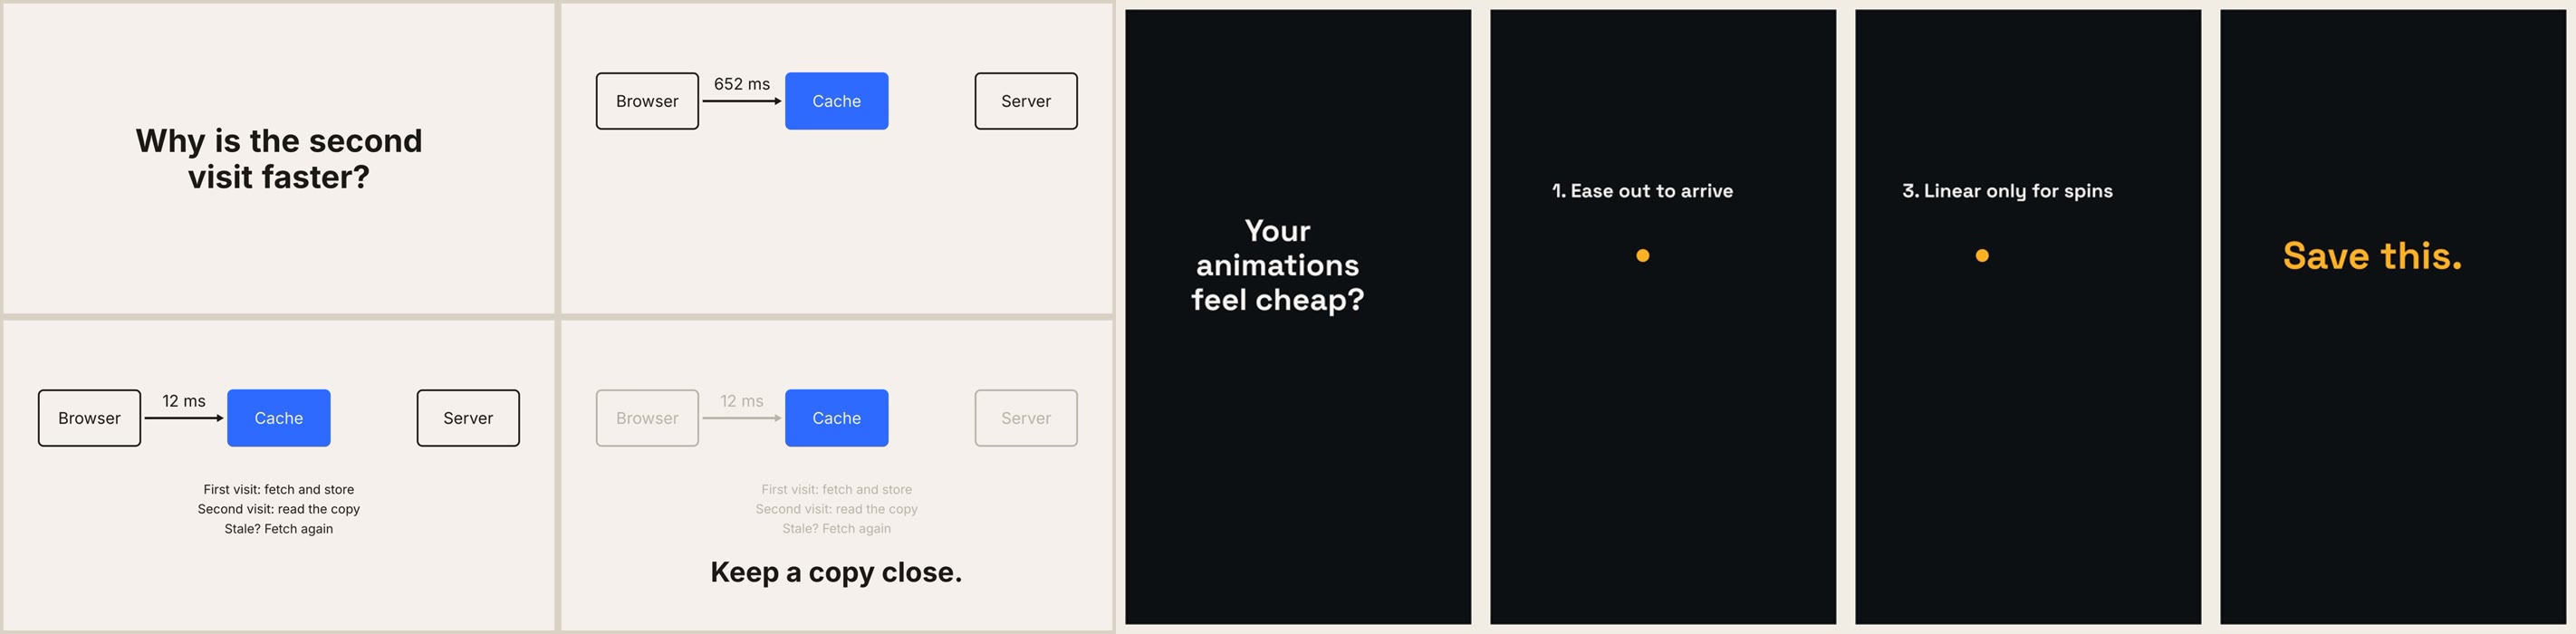
Image from the project's GitHub repository. Both examples were made by handing over the brief as written, and both passed the tool's delivery check.
Step 4: Have It Check the Video Against Your Brief
When it says it's finished, send one more message:
Check the final video against my original brief, one item at a time. For each item, give evidence (a screenshot timestamp or a measured value). If anything doesn't meet the requirement, fix the most serious problem first, re-render, and then update the check report.
This makes it return to the original brief you wrote, not just the spec it drafted for itself. The project's author gave an example: a title was only a few pixels above the minimum requirement. This check round flagged it, enlarged it and re-rendered the video.
Step 5: Review the Video and Report, Then Say What to Change
Watch the final video all the way through, then open the report (REPORT.md). Each requirement is marked as met or not met, with a matching screenshot or measured value. If something isn't right, say so in the same conversation. For example, "The second line appears too fast. Extend its hold to 3 seconds." It will make the change, re-render and check again.
If you want to put the animation into a longer explainer video, or make a tutorial illustration for a website, see Let Your AI Agent Make Explainer Animation Videos on Your Own Computer for Free.
Things to Know
- It won't write music for you: By default, it adds only a quiet placeholder background track. For real music, you'll need to supply your own licensed music file.
- A vague brief means more rework: The agent can only guess at anything you leave out. Writing the on-screen text and pass criteria clearly the first time saves the most time.
- 3D and realistic scenes need extra tools: Realistic product images need Blender, and physics-based 3D needs the 3D extension pack. Don't try to do everything on your first run.
- Usage counts against your agent plan: The Skill itself is free, but generating and checking both use up your Claude Code or Codex quota. Complex videos use more.
Comments (0)
No comments yet. Start the conversation.