

What you get
Browserr is an open-source tool that gives your AI agent its own private browser. The agent looks things up and fills in forms there. It never touches your own Chrome or the accounts you're logged into in it. Every step saves a screenshot and writes a log. You don't need to write any code. Your AI agent handles the installation and setup, and this guide includes four prompts you can copy and paste.
Here is how the work is split. Installation and web tasks belong to your AI agent. The final step, like submitting or paying, belongs to you. So does checking the log afterward.
Why give it a separate browser
The easiest option is to let your AI agent use your own Chrome. It can open any site you're logged into, such as through Meta Muse's Chrome extension. But that also means it can reach your online banking and your work email. Browserr takes a different approach. It's a small, separate browser. By default it wipes its data after each session, and it only does the tasks you give it.
Browserr was open-sourced in November 2026 (GitHub repository, Apache-2.0 license). It runs on the Servo browser engine, which started at Mozilla. According to the project's own description, it differs from a typical "AI controls the browser" tool in three ways:
- When in doubt, it blocks. A blocked network request is automatically denied if no one allows it within 5 seconds. On payment pages and CAPTCHA pages, someone has to click confirm before it submits.
- It hands the page back to you. It recognizes CAPTCHAs, one-time codes, and payment fields, and pauses so you can deal with them. Each button and input in a screenshot is numbered, so when you say "click e7," it knows which one you mean.
- Every action is recorded. Each action saves a timestamped screenshot, then adds one line to an append-only action log. Passwords are never written to the log.
It connects through MCP (think of it as a universal plug that AI agents use to reach outside tools; see the MCP handbook). It provides 42 tools in total. Any AI agent that supports MCP can use it without writing code.
Step 1: Check whether your task suits it
It isn't a cure-all. The project's README is candid about this: reading pages and filling in forms both work, and common web apps run fine. But sites with human verification won't even open the challenge box, and you won't get past it by hand either. This includes common checks like Cloudflare and reCAPTCHA. Videos with copy protection and video calls don't work either.
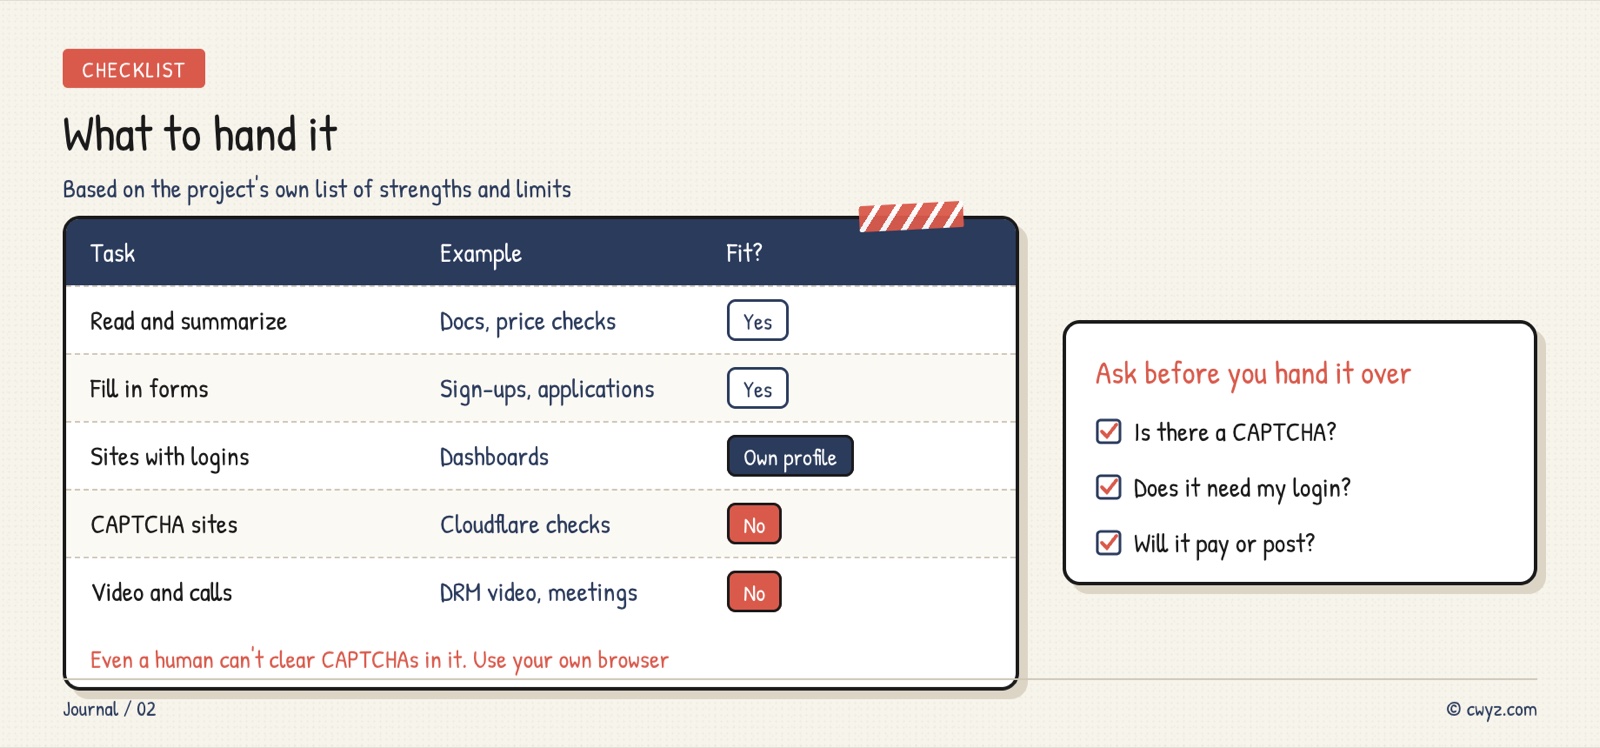
So first decide which kind of task you want to hand off. If you often run into human verification on a site, use your own browser for it.
Step 2: Have your AI agent install and connect it
Browserr runs on Windows, Linux (including ARM devices like the Raspberry Pi), and Macs with Apple chips. It needs Python 3.10 or newer. You don't have to download or unzip anything yourself. Send the following to your AI agent:
Sign in to unlock this key section
New accounts get 10 free credits, plus 1 more each day you sign in (none on days you don't). Spend 1 credit to unlock and it stays open for you.
The last instruction asks it to report back in three sentences, so you'll know how to call it next time. Some AI agents need a restart after you add an MCP before they recognize the new tools. If yours does, it will tell you.
Step 3: Start with a read-only task
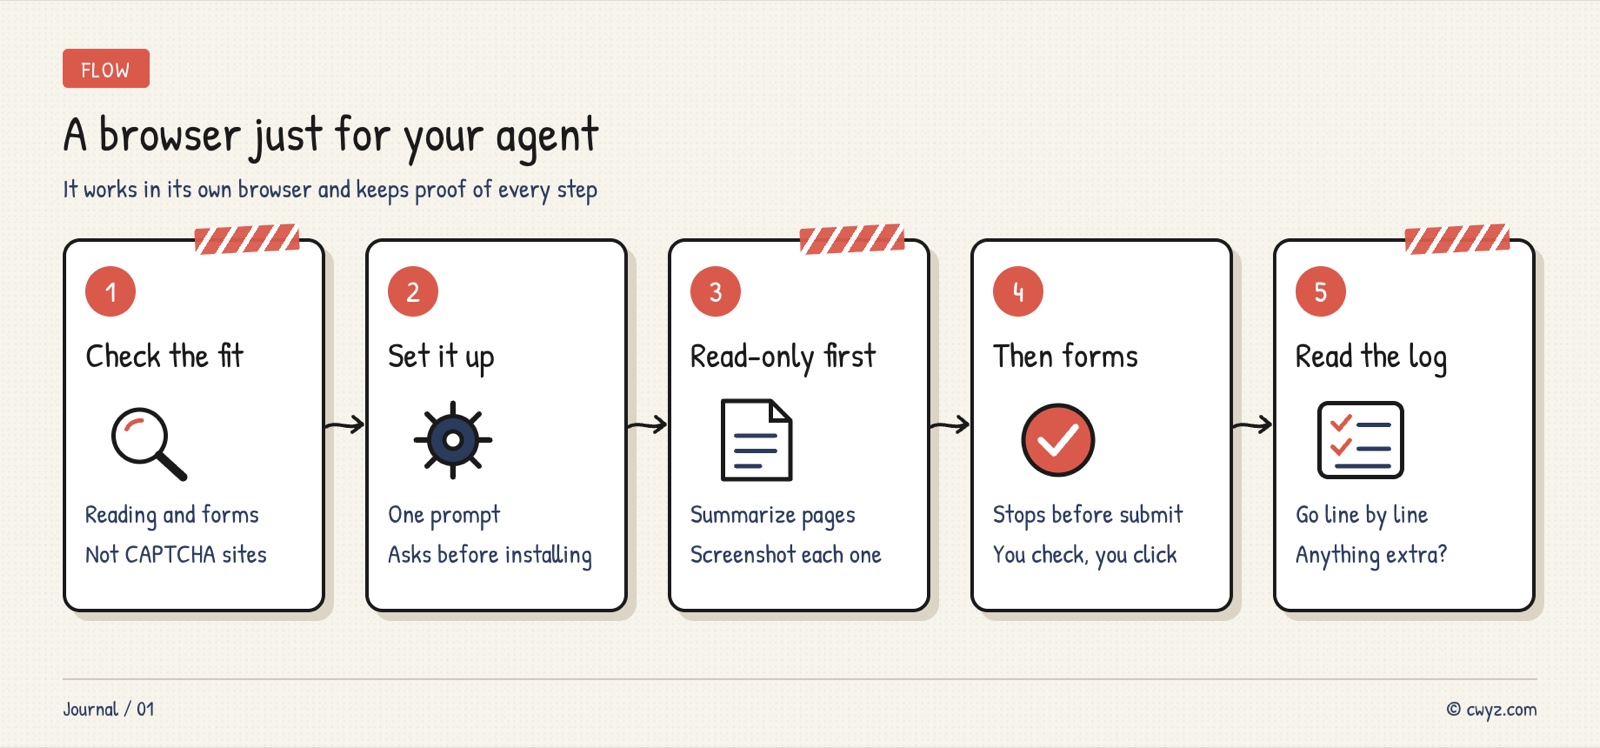
Don't let it submit anything the first time. Start with a lookup, and check how complete its evidence trail is:
Use browserr to look up something for me: [the question you want answered, for example "what the free plans of three note-taking apps include"].
1. Only open the official pages of these sites: [URLs, or "find the official sites yourself"].
2. Save a numbered screenshot of each page you open (browser_screenshot_annotated).
3. Read only. Don't log in, don't click submit, and don't download files.
4. If you hit a CAPTCHA or a page that won't open, note it and skip it. Don't try to get around it.
5. Finally, give me the conclusions as a table, with the URL each conclusion came from. Then tell me which folder the screenshots and action log are saved in.
The fourth item says "don't try to get around it" because the agent can't get past human verification anyway. It's better to tell it up front than to have it retry over and over.
Step 4: Have it fill in a form, and stop before submitting
Once read-only tasks work, you can hand it a task that changes something, like filling in a form:
Use browserr to fill in this form: [URL]. Information to enter: [name, email, the options to select...]
1. First read out every field in the form, and show me a table of how you plan to fill each one.
2. After I confirm, fill everything in at once with fill_form, but don't submit.
3. After filling it in, save a numbered screenshot and send it to me. Wait for me to say "submit" before submitting.
4. If you hit a payment, a one-time code, or a login, pause right away and tell me which step you're stuck on.
5. After submitting, use read_outcome to tell me the result, and list each field that has an error.
Have it lay out the plan before it acts, so you can catch mistakes before anything gets filled in wrong. Payments and one-time codes need a person to confirm anyway. Writing that into the prompt makes it stop sooner.
Step 5: Review the action log
After each task, have it read the record back to you to confirm it didn't do anything extra:
Read browserr's action log for this session (actions.jsonl) and list it in a table with: time, which site, and what it did.
Finally, tell me on its own line: was there any step I didn't ask you to do?
For the first few tasks, read the whole log carefully. After that, you can just check the final line.
Notes
- The project is new: when we wrote this, it had only been open source for a few days. The version is still 0.6, so features and usage may change. We haven't installed it to test it ourselves. Everything above comes from the project's README and website.
- No site isolation on Windows: the README warns about this itself. Web page code and the browser engine run in the same process, so use ephemeral profiles and don't let it open sites you don't trust.
- Don't log it into your main account: if you do need it to log in, create a separate profile and use a dedicated secondary account.
- Macs get only Apple-chip installers. Older Intel Macs have to build from source, which isn't suitable for beginners.
Comments (0)
No comments yet. Start the conversation.