

What you get
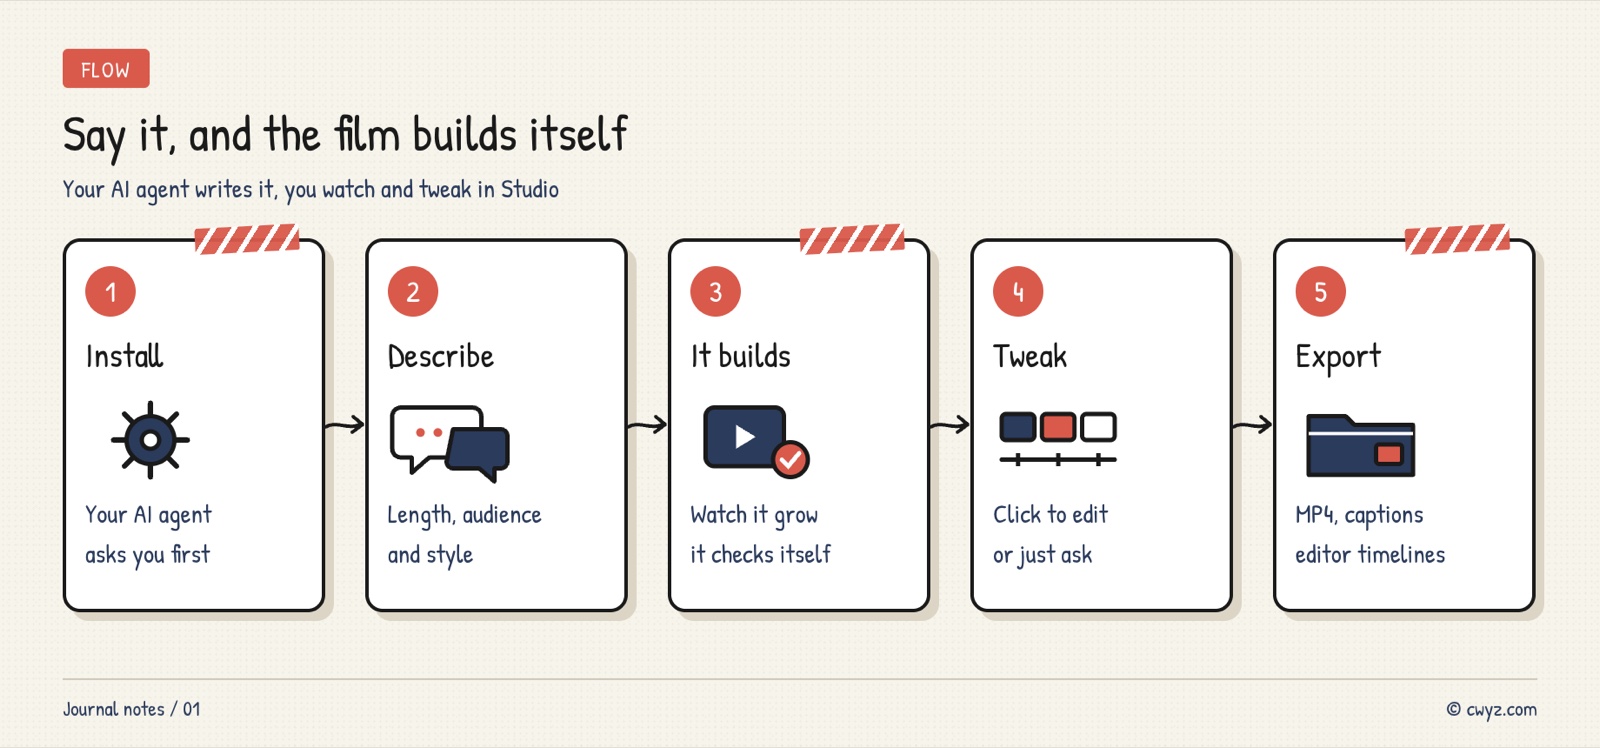
Want a product promo, an event teaser or an explainer animation? Describe your idea to your AI agent. It uses OpenFilm, a free and open-source tool, to make the video. You watch it take shape in your browser, change anything you don't like, and export an MP4. You don't need an account to make or render videos. This article includes three prompts you can copy and paste.
The official launch video at the top of the page was made entirely with OpenFilm, from start to finish. It is not the same as "AI-generated video." Your AI agent writes the frames line by line instead of rolling the dice, so when something is wrong, you fix that part instead of starting over.
Why changes don't mean starting over
Common AI video tools use a generative model. The same prompt gives a different result every time, so changing one word means rolling the dice again. OpenFilm takes a different approach: it writes the video as a web page. Each shot is a page. You tell it "second 3," and it draws the picture for that second. No matter how many times you render, the same second always comes out the same. AI agents already know how to write web pages, so they are a natural fit for making videos this way.
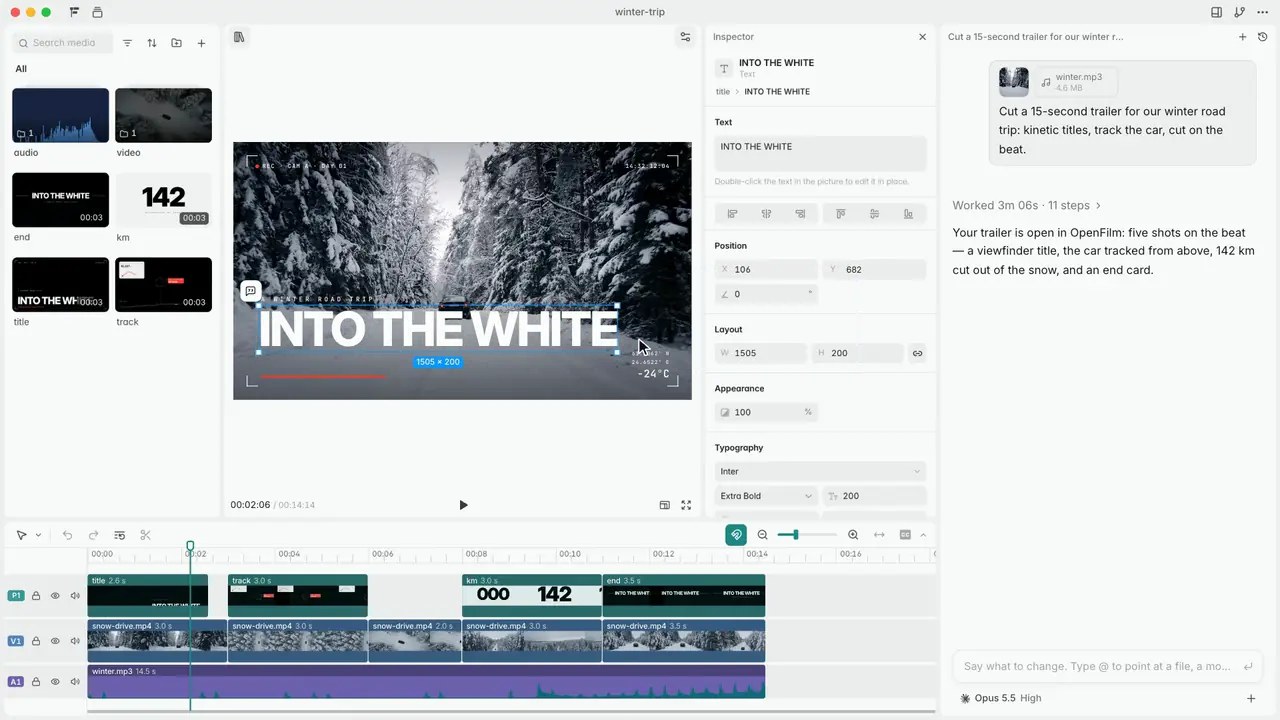
Image from the OpenFilm GitHub repo.
The finished video opens in Studio, an editor that runs on your computer and opens in your browser. A few things to know:
- Your edits are remembered: Changes you make by hand in Studio are saved in the video's files. When your AI agent edits later, your changes stay.
- Use real footage: You can add your own videos, photos and music, and cut them together with the animation your AI agent wrote.
- A built-in asset library: Music, sound effects, stickers, transitions, effects and templates are free to use. You only need to connect your own service if you want AI voiceover or music.
Step 1: Have your AI agent install OpenFilm
Please help me install OpenFilm (an open-source AI video tool, repo: https://github.com/openfilm/openfilm).
1. First, read the repo README and tell me in plain words what it will install.
2. Check whether my computer has Node 22.2 or later, ffmpeg and git. If anything is missing, tell me first and wait for my OK before installing.
3. The first run downloads a browser component of about 100 MB. Tell me before you download it.
4. Install its skill with npx skills add openfilm/openfilm, then run openfilm doctor to confirm everything works.
5. When that's done, stop and wait for me to tell you what video to make.
If you'd rather not use the command line, you can download the desktop app for macOS or Windows from the official site. It comes with everything it needs. Open it and you get Studio plus a chat window, and it works with the AI agent you already use.
Step 2: Describe the video you want
Sign in to unlock this key section
New accounts get 10 free credits, plus 1 more each day you sign in (none on days you don't). Spend 1 credit to unlock and it stays open for you.
The first requirement makes the shot list before anything is built, so you don't find out the direction is wrong at the end. The third requirement has your AI agent check the video itself before it hands it to you. Below is the check overview for one of the official sample videos: one thumbnail per shot, with the sound waveform along the bottom, so problems are easy to spot.
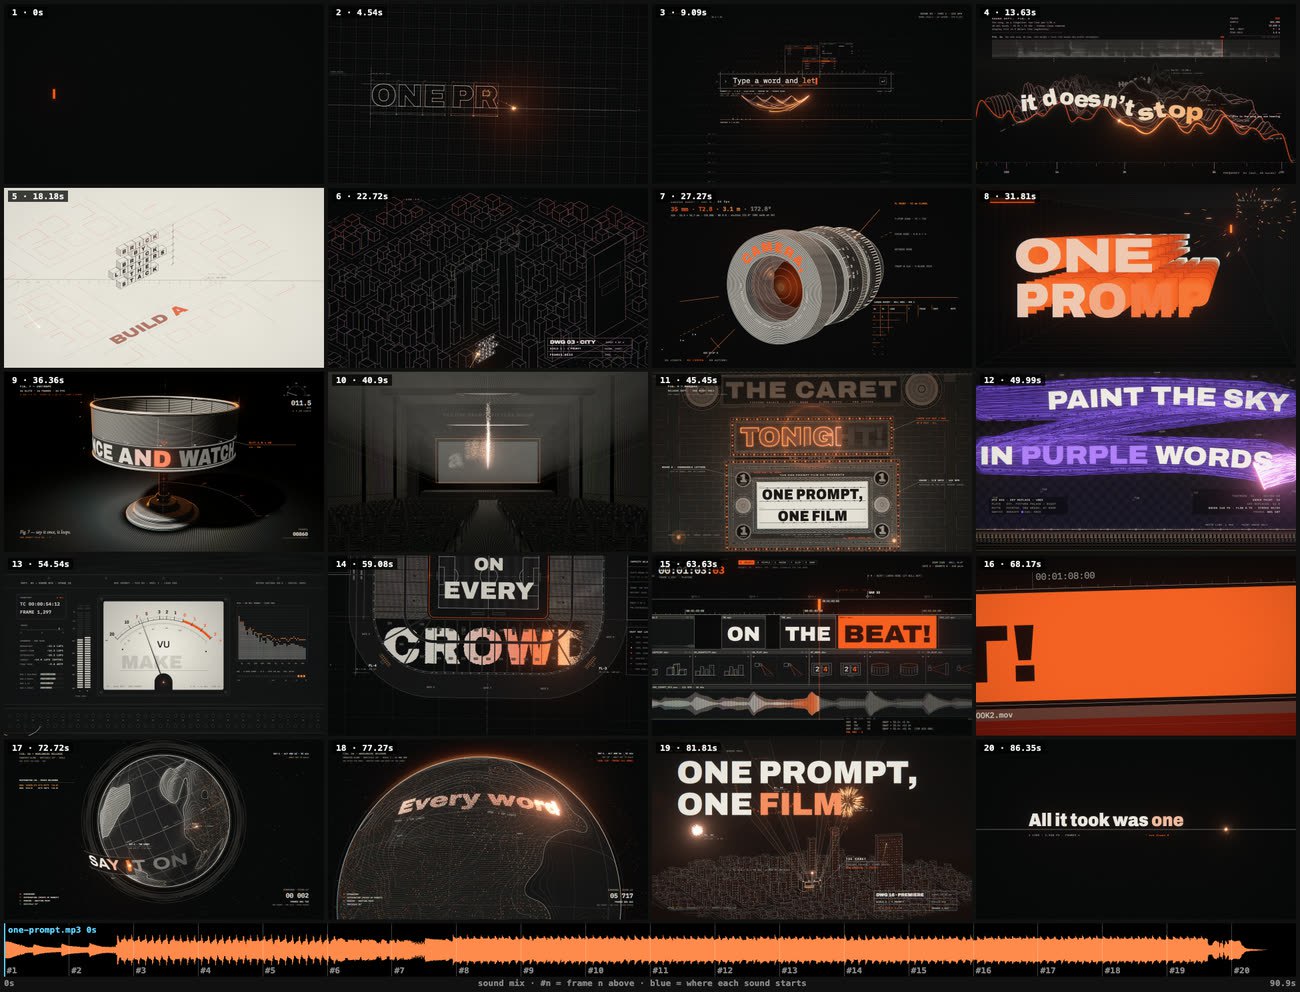
Image from the OpenFilm GitHub repo.
Step 3: Edit as you watch, then export when you're happy
Once the video is open in Studio, you have two ways to edit it:
- Edit by hand: Click a text, image or shape in the frame to change its content and color, or to change its size and position. You can drag, trim or split clips on the timeline.
- Tell it what to change: For example, "make shot three a three-panel split screen." Your AI agent edits the existing video and leaves everything else alone.
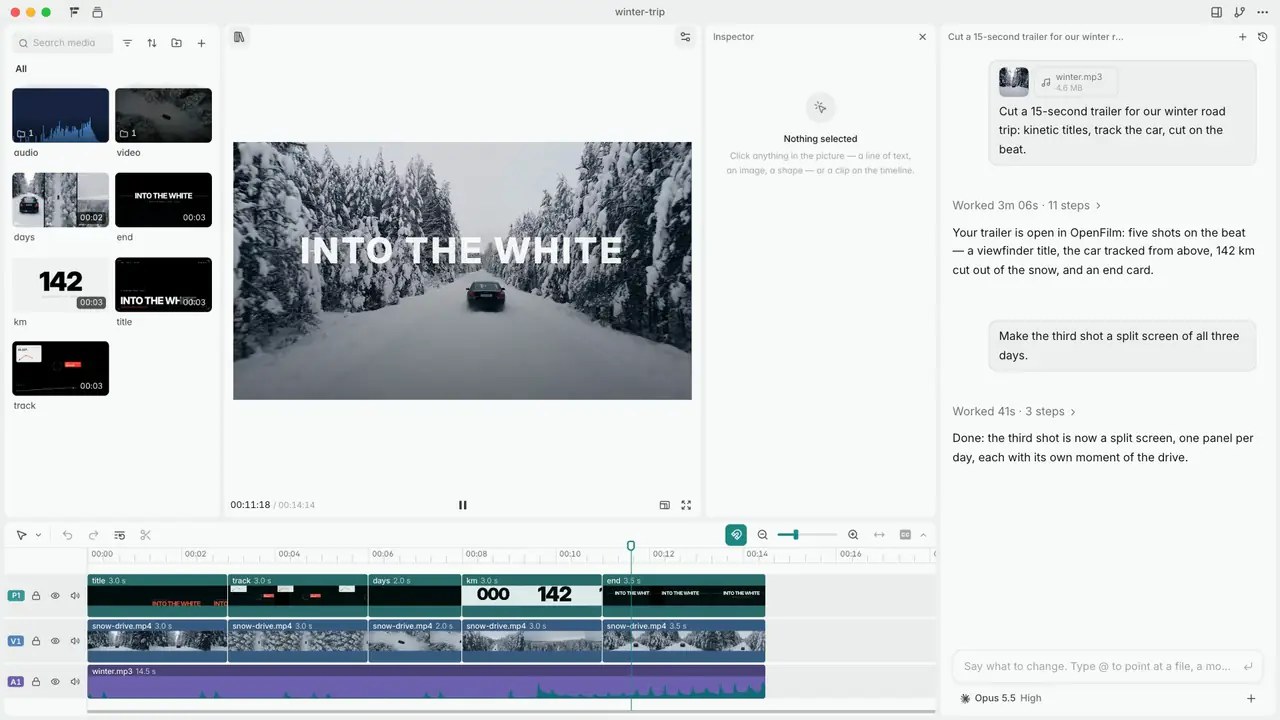
Image from the OpenFilm GitHub repo.
When you're happy with the changes, ask your AI agent to export:
I'm happy with the video. Please export it for me:
1. A 1080p MP4 file, with the volume normalized to a loudness that suits social platforms.
2. A subtitle file.
3. [If you still want to edit it] a timeline for [Final Cut Pro / Premiere Pro / DaVinci Resolve].
Before you export, save a version in Studio. After you export, tell me where each file is saved.
Besides MP4, Studio can export GIFs and still frames. You can export audio on its own or track by track, and you can export video with a transparent background.
Things to know
- It's best at what it writes: Animated text, charts, interface demos, 3D animation and cuts of your own footage are its strengths. For realistic people and real locations, generate the footage with a video generation model first, then bring it in.
- Generated voiceover and music may cost money: The asset library is free. Generating content with services like ElevenLabs or OpenAI is billed at each service's prices, or you can use an OpenFilm account.
- The project is new and moves fast: It was open-sourced in early October, and new versions come out every few days. If you hit a problem, have your AI agent run openfilm doctor first, then check the repo's Issues.
- For more ideas on making animated videos, see Have Claude Code make animated videos you can change just by asking.
Comments (0)
No comments yet. Start the conversation.