

What You'll Get
Install SmartSub, a free and open-source desktop app, and it can add subtitles to your videos on your own computer, translate them into another language, add an AI voiceover, and export the final video with the subtitles burned in. The whole workflow runs on local models, so you don't need an API key, and your videos never leave your machine. The guide includes three prompts you can copy and paste.
Doing this used to mean juggling several apps and passing files back and forth. SmartSub chains these steps into one pipeline, and you can also use each step on its own. If you want even less work, your AI agent can drive SmartSub and process an entire folder in one go.
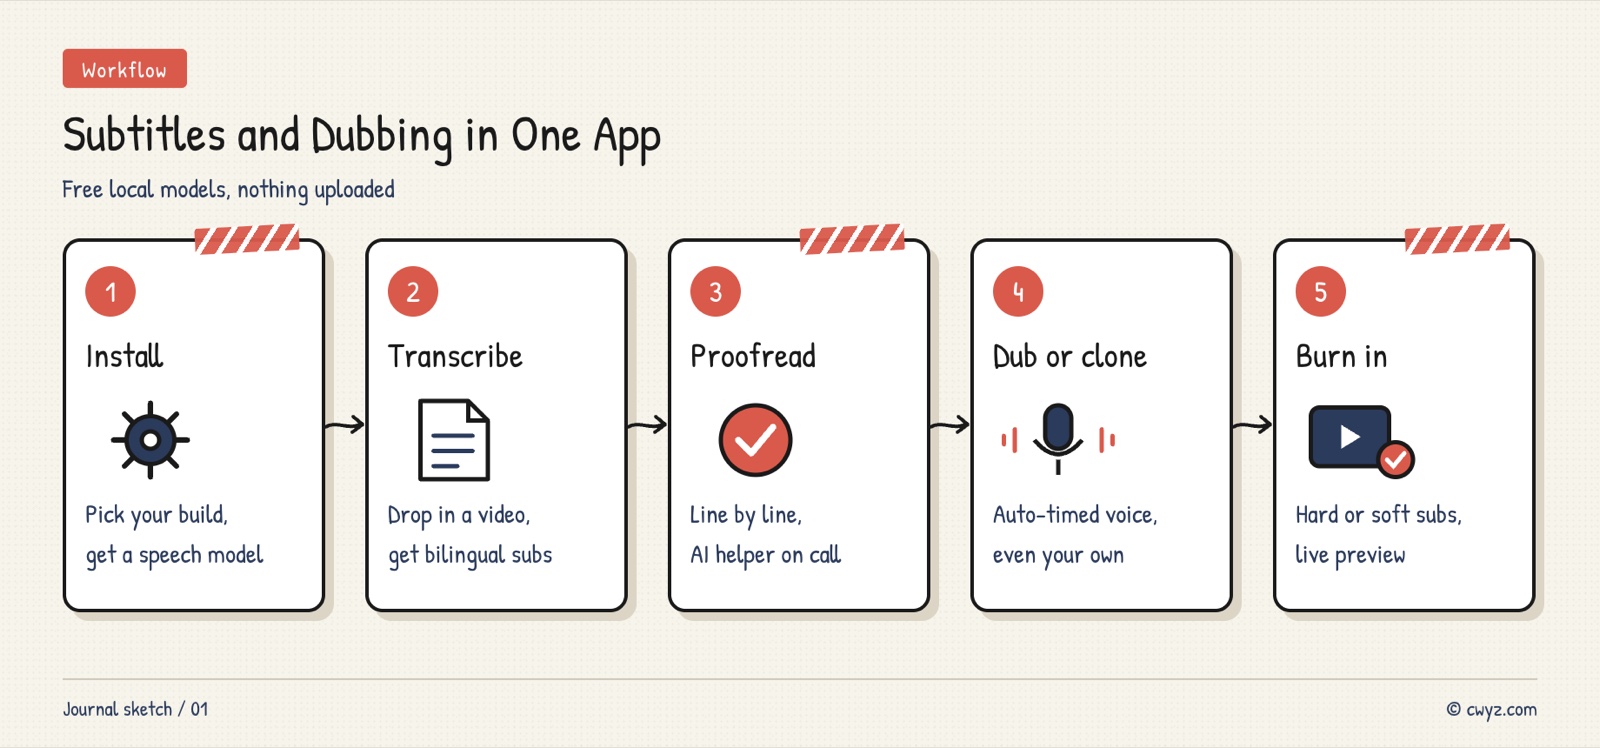
Install the app, download a speech recognition model, turn your video into bilingual subtitles, proofread them in the editor, add an AI voiceover if you need one, and finally burn the subtitles into the picture and export.
Meet SmartSub
SmartSub is an open-source project (MIT license) maintained by developer buxuku. It has about 6,000 stars on GitHub and runs on Windows, macOS, and Linux. According to the project's own documentation, every stage has a free local option, and paid cloud services are optional extras:
| Stage | Free option | Optional paid upgrade |
|---|---|---|
| Transcription (speech to subtitles) | Local models such as whisper and FunASR. Download once and use them offline | 9 cloud speech recognition services |
| Translation | The built-in free translation API, or a local large model through Ollama | Large model services such as DeepSeek and Qwen |
| Voiceover | Local voices, over 200 in Chinese and English combined. You can also clone your own voice from a recording | Cloud voice services such as ElevenLabs and Azure |
| Composing and export | Built-in FFmpeg, which burns subtitles into the picture or adds them as a separate subtitle track | Not needed |
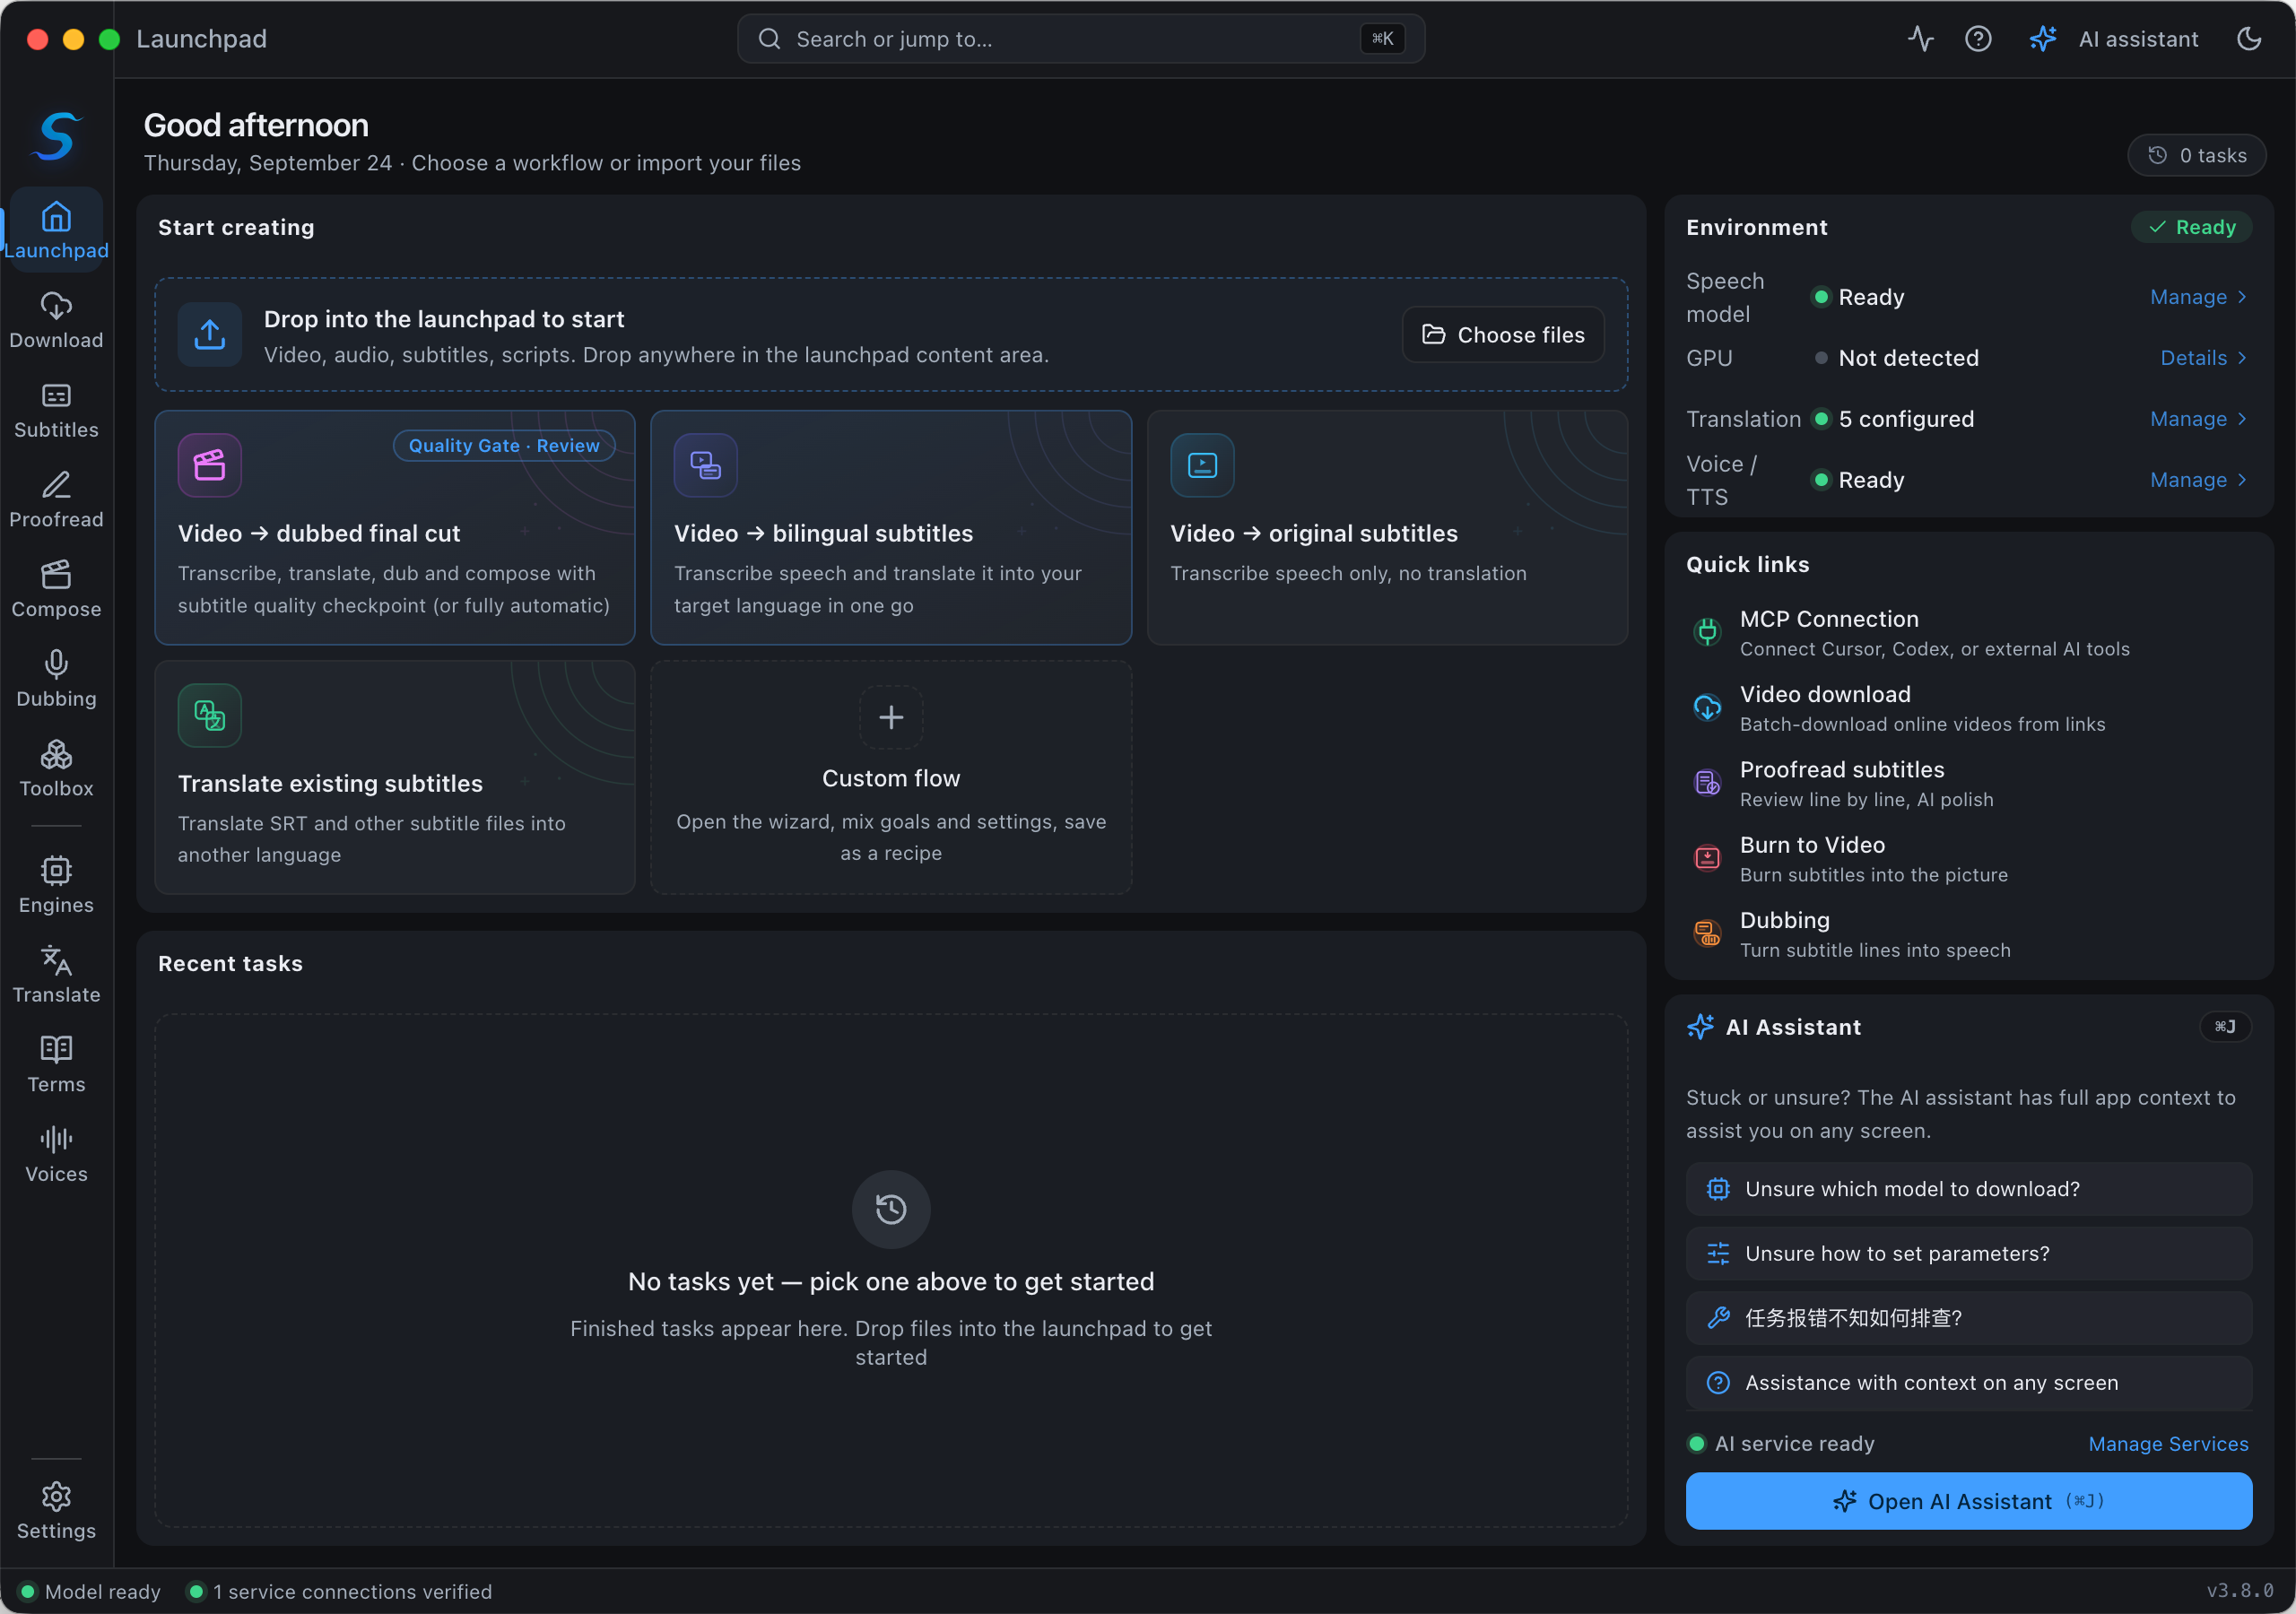
Image from the project's GitHub repository.
Step 1: Install the App and Download a Speech Model
Download the installer from the project's GitHub Releases page. Pick the one that matches your system and chip. On a Mac, there are separate builds for Apple silicon and Intel. After you install and open the app, the setup guide asks you to download a speech recognition model. Bigger models are more accurate, but they run slower and need more GPU memory.
Not sure which installer or model to pick? Give this to your AI agent:
I want to install the open-source app SmartSub (github.com/buxuku/SmartSub) to add subtitles and dubbing to my videos. Please help me:

1. Run a read-only check of my computer: operating system, chip (Apple silicon or Intel), memory, and whether I have a dedicated graphics card and how much VRAM it has.
2. Tell me which installer on the release page I should download, and give me the download link. I will download and install it myself. Do not run the installer for me.
3. Recommend a speech recognition model for my computer. My videos are mainly in [English / Chinese / mixed]. Tell me which engine to choose, which model size, and roughly how much disk space it will take.
4. If I'm on a Mac and it says the app is "damaged" when I open it, explain the cause and the official fix. I will decide for myself whether to run it.
On a Mac, the "damaged" warning appears because the installer has not been notarized by Apple. The fix means changing a system security setting, so that step is up to you.
Step 2: Transcribe and Translate to Get Bilingual Subtitles
On the launch screen, choose a task and drag in your video. Set the source and target languages, then click start. SmartSub first turns the speech into timed subtitles, then translates them into the language you want. You can export just the translation, or a bilingual file with the original and the translation together. You can also drop in several videos at once for batch processing.
For Chinese videos, pick a Chinese engine such as FunASR. For English videos, choose a model with "en" in its name, or an English Parakeet model. Start with the built-in free translation. If it sounds stiff, switch to Ollama running locally or to a large model service.
Step 3: Proofread Line by Line in the Editor
Both transcription and translation make mistakes, especially with names, proper nouns, and homophones. Open the proofreading editor and go through the subtitles one line at a time while you watch the video. Edit the text directly, or merge and split sentences.
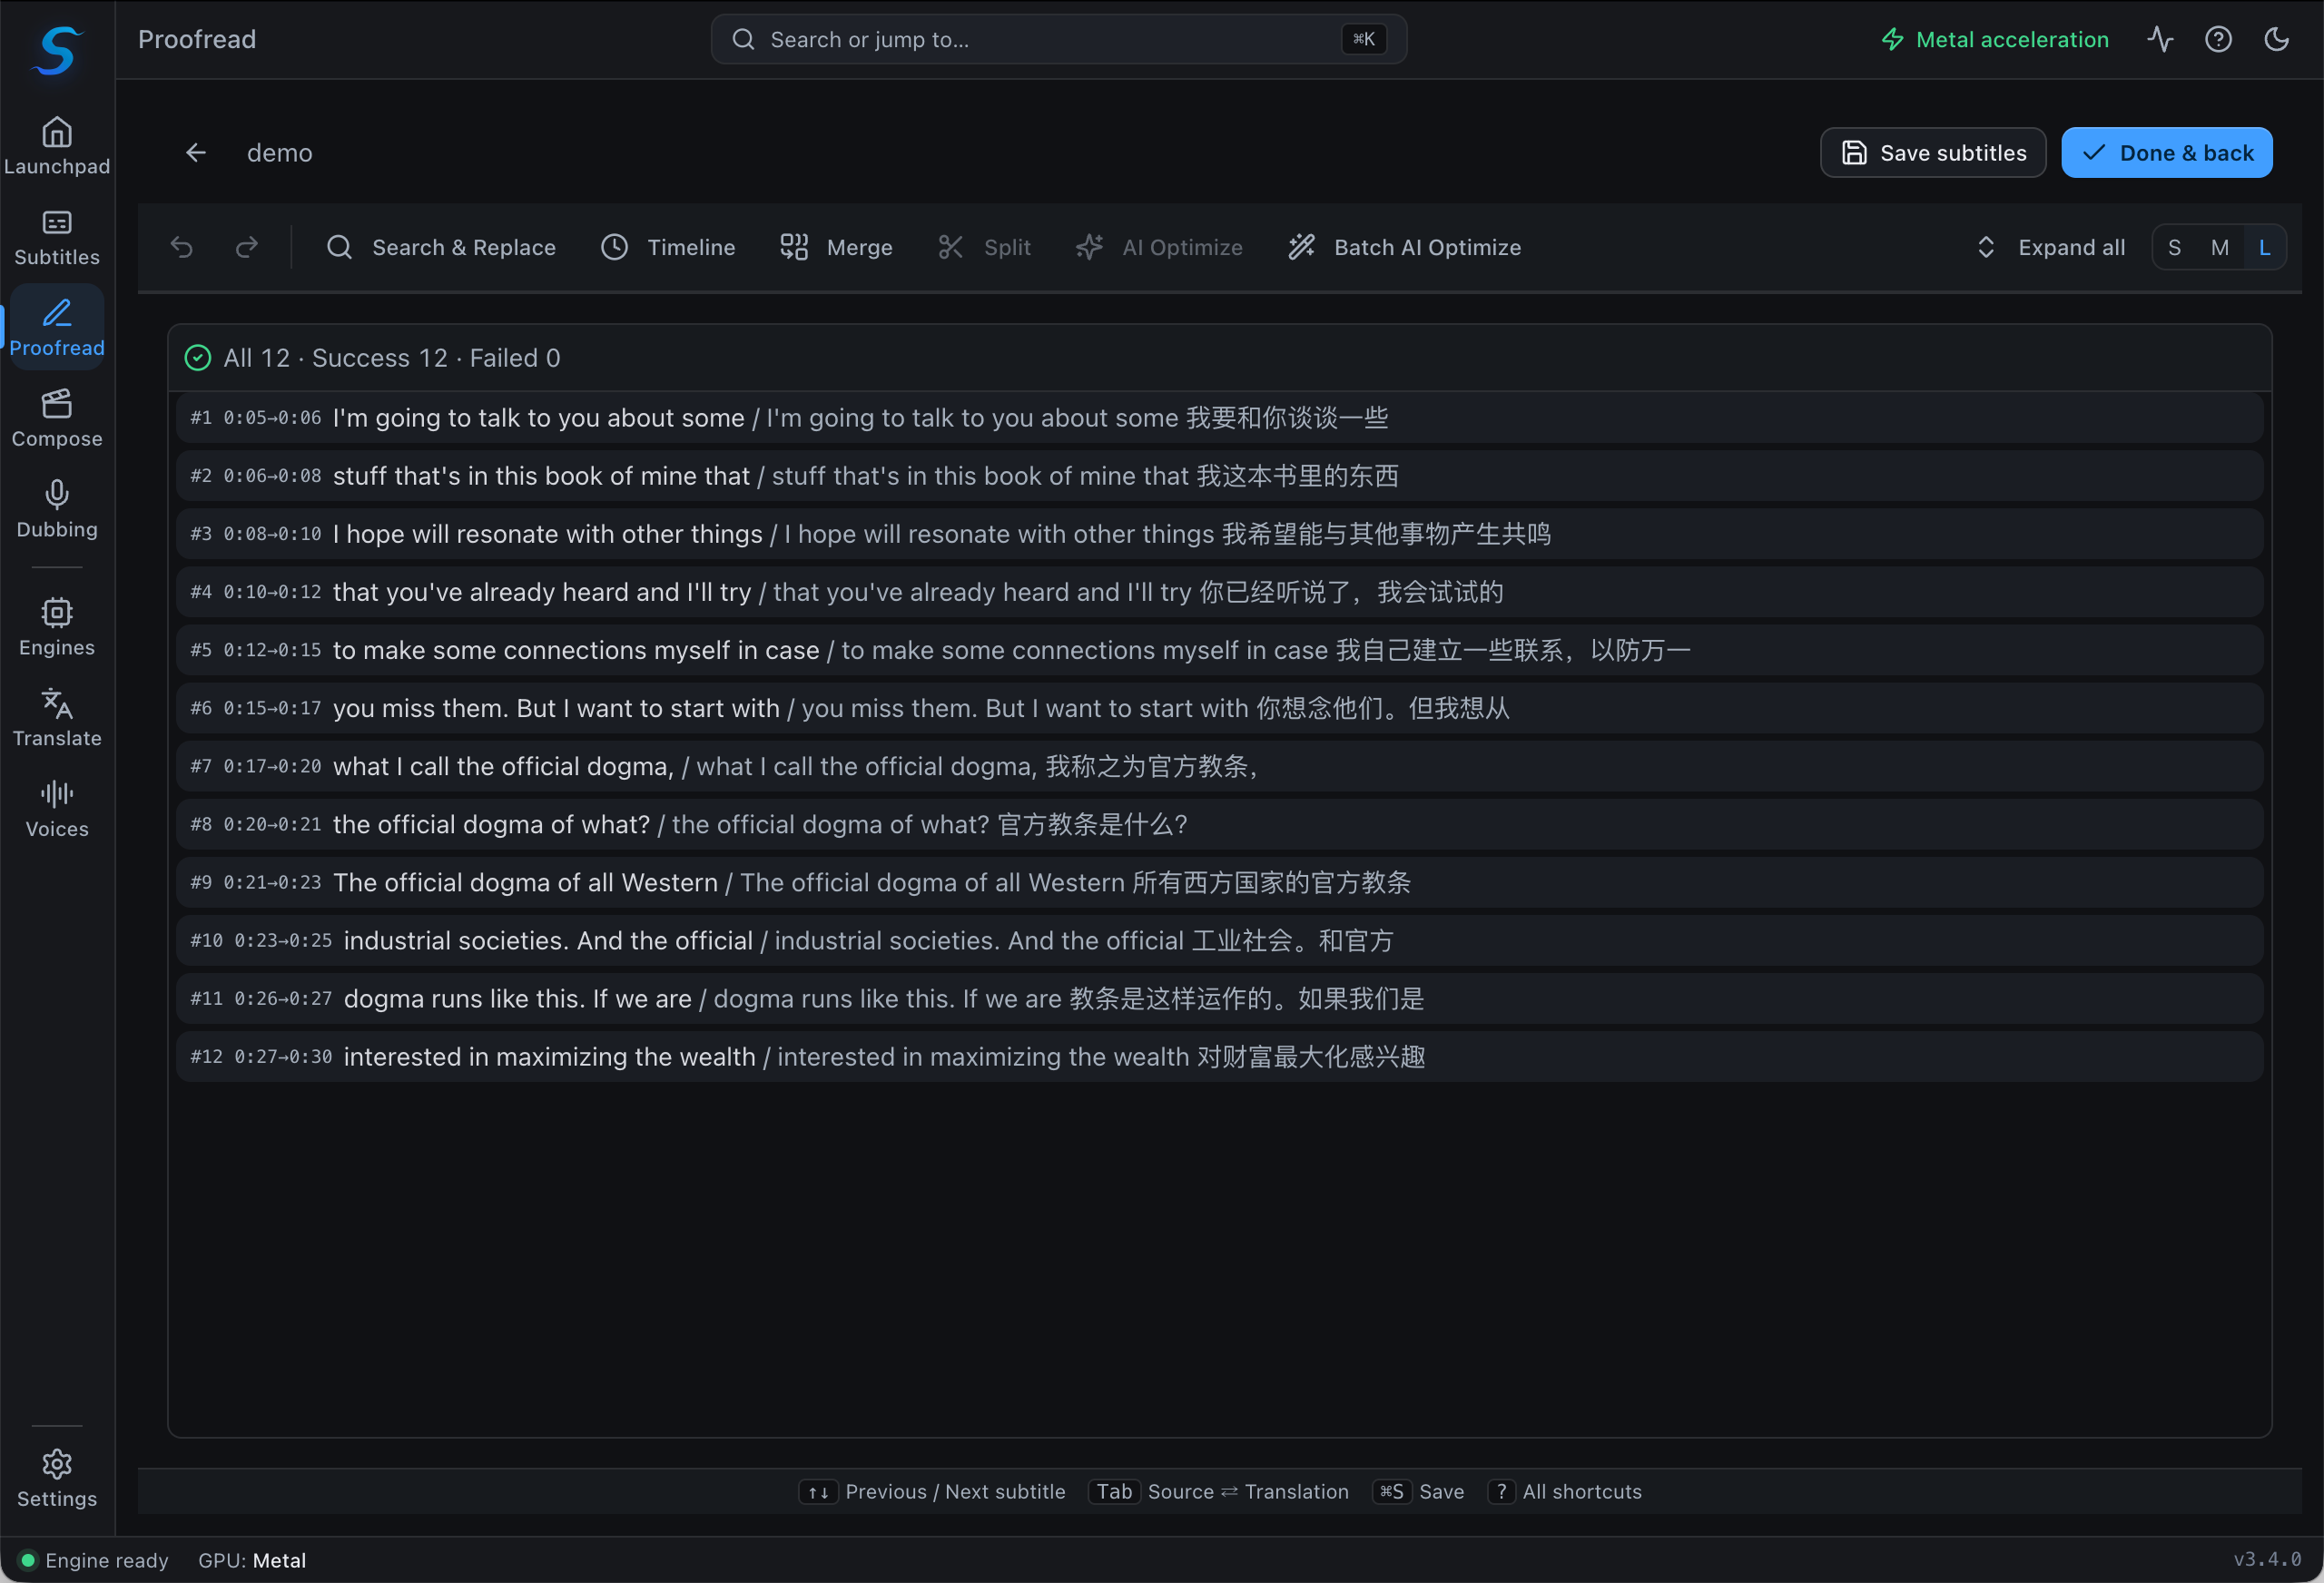
Image from the project's GitHub repository.
Getting tired halfway through? Press ⌘J on Mac (Ctrl+J on Windows) to open the built-in AI assistant. Then tell it things like "make this line sound more conversational" or "fix the homophone errors in this paragraph." It shows the changes in the editor first, and it only writes them to the file when you say "save." The AI assistant needs a large model service connected in the settings first.
Step 4: Dub the Video or Use Your Own Voice (Optional)
If you want a foreign-language version, or narration for a video that has no sound, open the dubbing workbench. Choose a voice, and it synthesizes each subtitle line and aligns it to the timeline. If a line runs too fast or doesn't fit the timing, it goes onto a to-do list. From there you can edit the script, redo a single line, or accept a speed change.
You can also use your own voice. Record a clear reference clip, add the matching text, and build a cloned voice. Then the whole video can be narrated in your voice. Before it builds the voice, SmartSub checks the reference recording for volume and background noise, and it asks you to re-record if there are problems.
Step 5: Burn in the Subtitles and Export the Final Video
The last step is composing. Hard subtitles are permanently burned into the picture, so they show up on any platform. Soft subtitles are a separate track that viewers can turn on or off, and the picture quality stays untouched. You can adjust the subtitle style and position, and the preview on the right updates live.
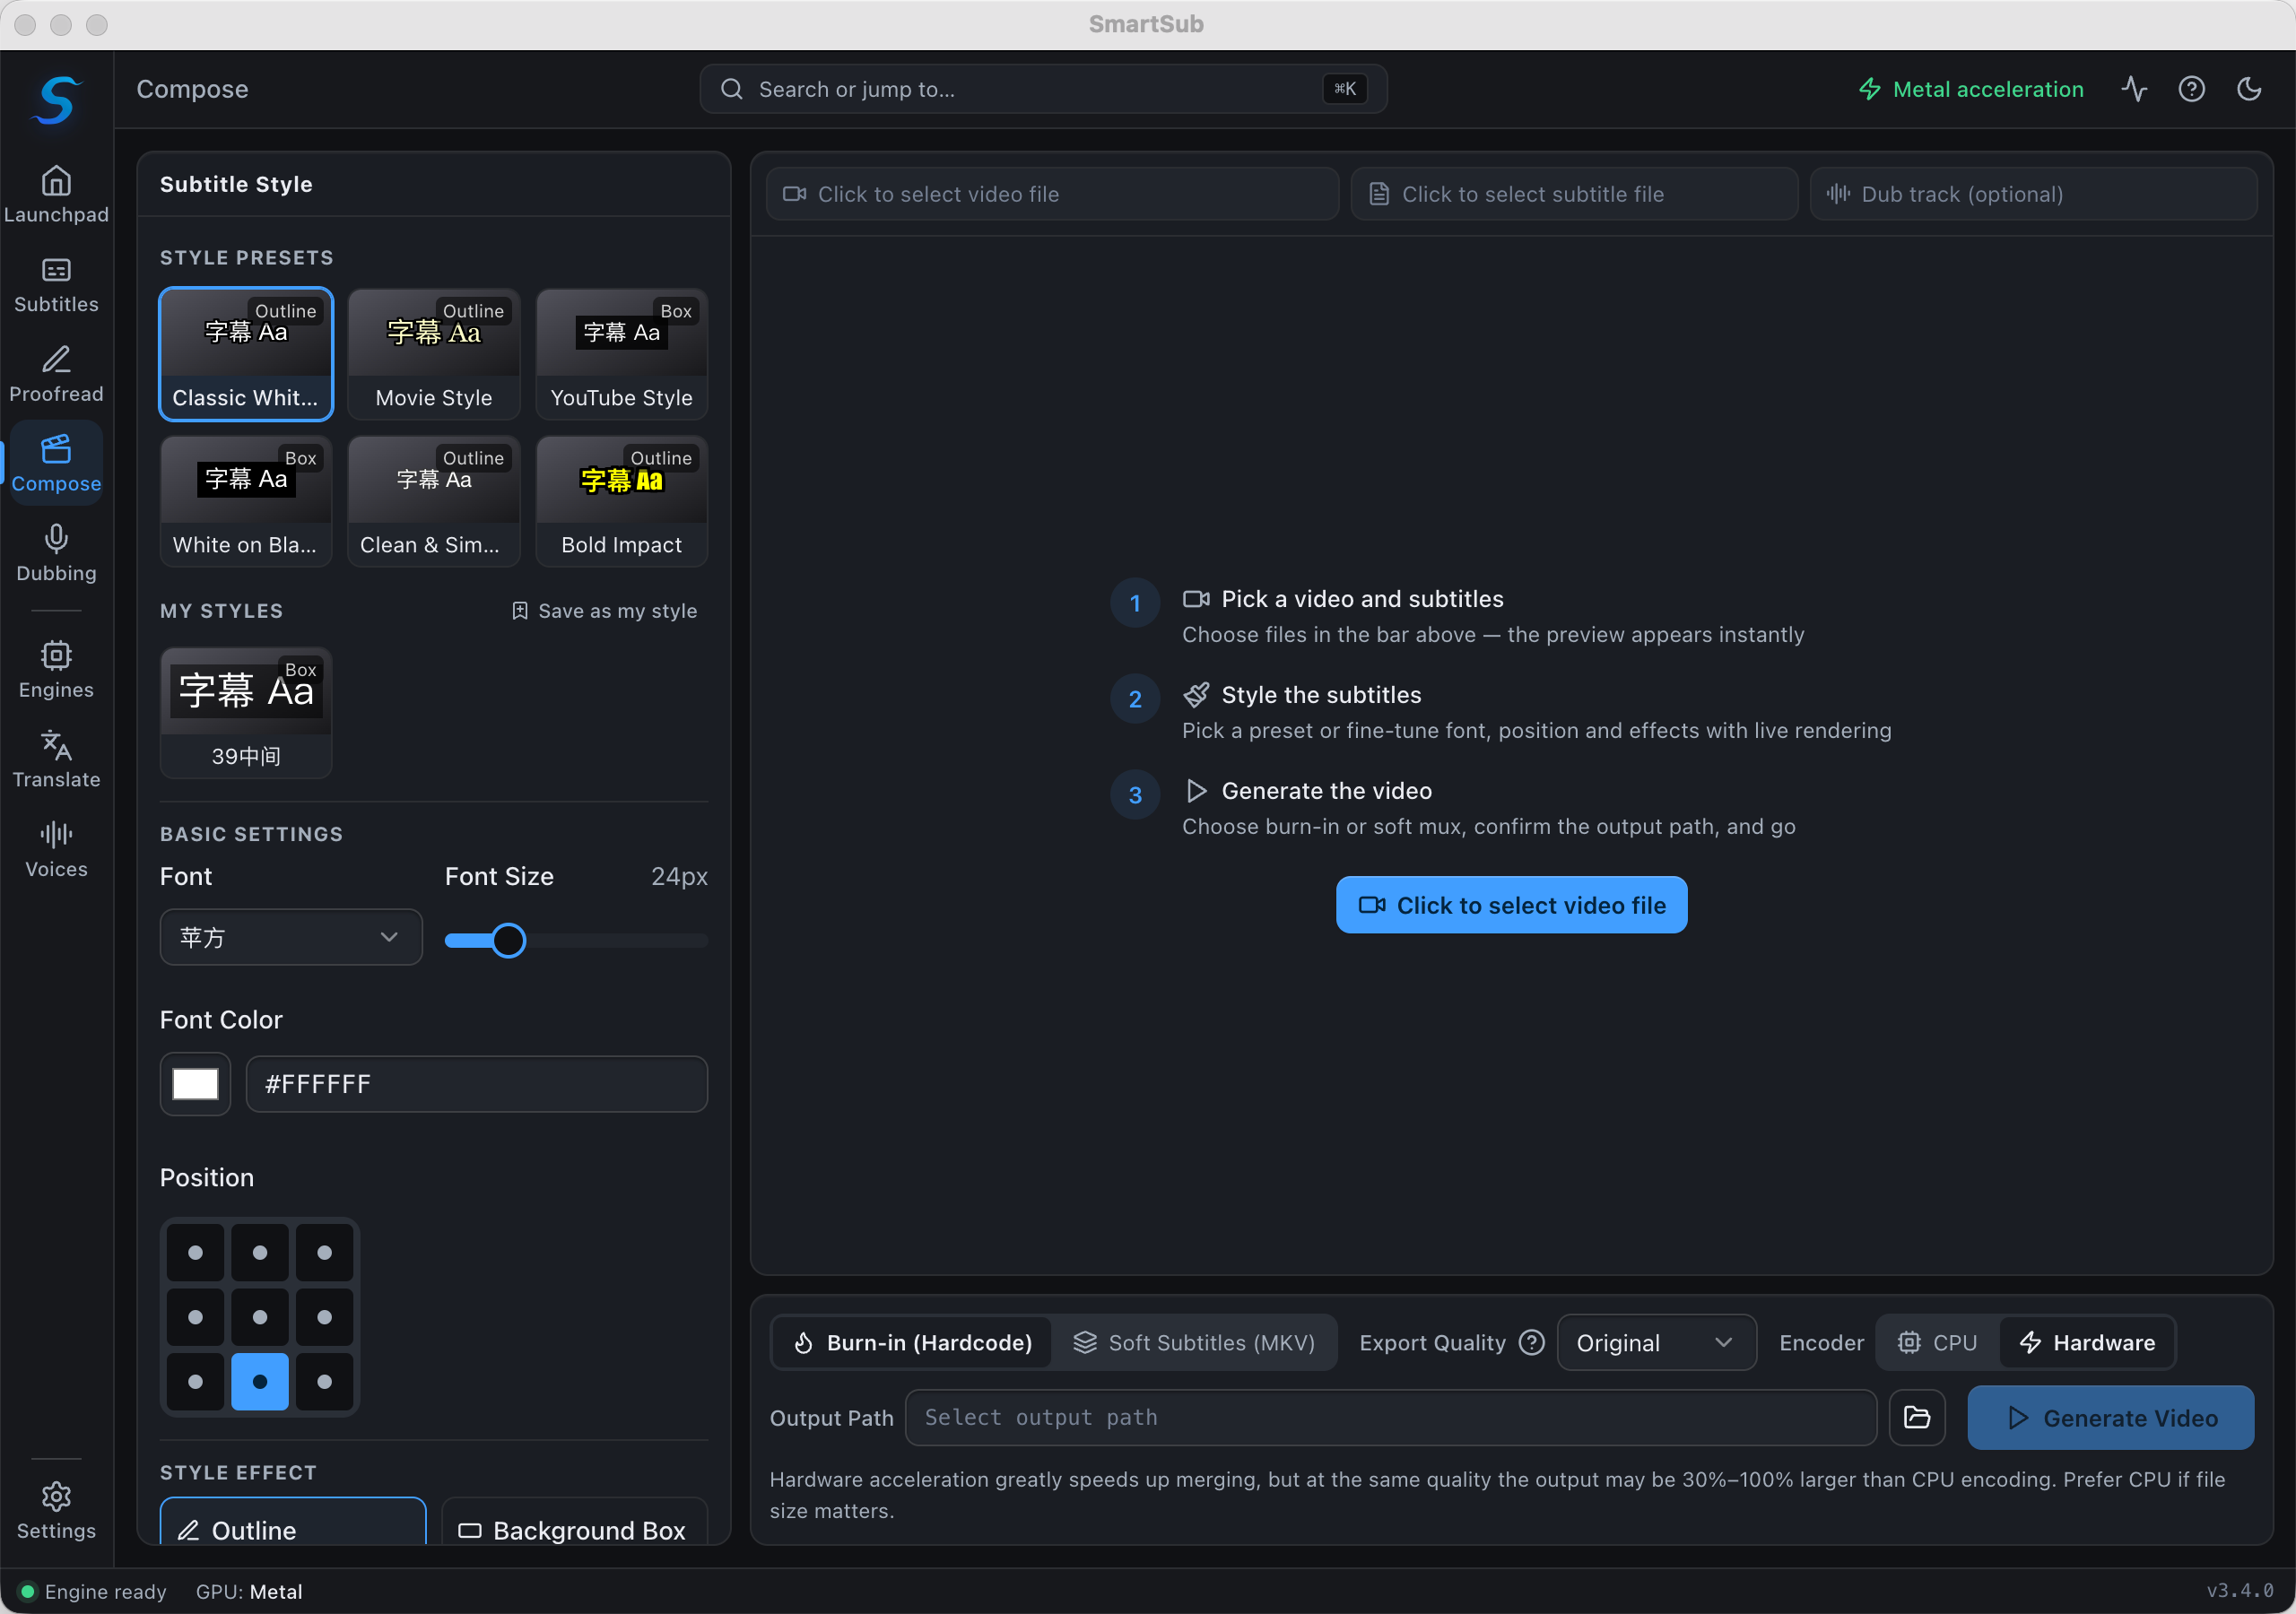
Image from the project's GitHub repository.
Have Your AI Agent Process a Whole Folder at Once
SmartSub includes an MCP server and a command-line interface. According to the project docs, there are 111 tools in total. MCP works like a standard plug: once you connect it, your AI agent can call SmartSub's transcription, translation, dubbing, and composing directly, so you don't have to click through each step in the interface. In the app, go to Settings → Connect AI Tools (MCP) for one-click setup with common AI agents.
Once it's connected, you can give your AI agent a request like this:
Sign in to unlock this key section
New accounts get 10 free credits, plus 1 more each day you sign in (none on days you don't). Spend 1 credit to unlock and it stays open for you.
Item 4 matters most. Your AI agent can get 80 to 90 percent of the work done, but names and technical terms are the easiest things to get wrong. Have it flag the sentences it isn't sure about, so you only need to check those spots.
Things to Know
- Only process videos you have the right to use. The software can download online videos, but if you add subtitles or a new voiceover to someone else's video and publish it, that is still reposting, and it may infringe on their rights.
- Get consent before cloning a voice. Only clone your own voice or a voice you have permission to use. When you publish content made with a cloned voice, label it as AI-generated, as each platform requires.
- Cloud services upload your content. If you choose cloud speech recognition, translation, or voiceover, your audio and text are sent to the provider you configured. Use local models for sensitive content.
- The app crashes with GPU acceleration. On the "Engines & Models" page, change the acceleration mode to "CPU only," or switch to a different transcription engine.
If you want your AI agent to dub a video into another language using your original voice, see Let Your AI Agent Dub Your Video in Your Own Voice. If you just want a local voiceover app, see Free AI Voiceover in Your Own Voice, Right on Your Computer.
Comments (0)
No comments yet. Start the conversation.